
You plug in your electric guitar, strum a chord, and… it sounds thin. Clean, sure, but nowhere near the gritty, roaring tone you hear on your favorite rock records. That crunch you’re chasing? It comes from a distortion pedal. The good news is that dialing in a massive, satisfying tone isn’t as complicated as it looks.
In this guide how to use a distortion pedal, you’ll learn exactly how to set up, connect, and tweak your pedal for the sound you want. We’ll cover the gear you need, walk through each step, and share a few insider tricks along the way. Whether you’re brand new to effects or just want to sharpen your setup, you’ll come away ready to fill the room with grit and growl. Let’s plug in.
What Is a Distortion Pedal?
A distortion pedal is a small stompbox that sits between your guitar and amplifier. It clips and shapes your guitar signal, turning a clean tone into a thick, saturated, aggressive sound. Think of the gritty rhythm in punk, metal, and hard rock — that’s this effect at work. You control it with your foot, so you can switch between clean and heavy tones on the fly.
What You’ll Need
Before you start, gather these essentials:
- An electric guitar (with fresh strings for the best tone)
- A distortion effect pedal
- A guitar amplifier (combo or head-and-cabinet)
- Two instrument cables (quarter-inch)
- A 9V battery or a compatible power supply
- A pick, if you use one
- A quiet space to hear your adjustments clearly
That’s really all you need to get rolling. Optional extras like a tuner or a second overdrive pedal can help later, but they’re not required for day one.
Step-by-Step Guide to How to Use a Distortion Pedal
Step 1: Power the Pedal Correctly
Start by giving your pedal a reliable power source. Most stompboxes run on a 9V battery or a dedicated power supply. A power adapter is the smarter long-term choice — batteries die mid-song and always seem to quit at the worst moment. If you use an adapter, check that its voltage and polarity match the pedal’s requirements. Plugging in the wrong power can damage the circuit, so read the label on the bottom of the unit first.
Step 2: Connect Everything in the Right Order
Signal flow matters more than beginners expect. Run one cable from your guitar’s output into the pedal’s input jack, then run a second cable from the pedal’s output jack into your amp. The signal always travels guitar → pedal → amp. Double-check you haven’t reversed the input and output, since a swap will kill your sound. Keep your cables tidy so you don’t trip during a jam.
Step 3: Set Your Amp to a Clean Base Tone
Before you touch the pedal, get your amplifier sounding clean. Set the amp’s gain low and keep the tone controls (bass, mids, treble) around the middle. A clean base gives the pedal room to do its job without muddying everything up. If your amp already has heavy overdrive dialed in, the two effects will fight and turn to mush. Start neutral, then build from there.
Step 4: Start With Low Settings on the Pedal
Most distortion pedals have three main knobs: level (volume), tone, and gain (drive or distortion). Turn them all to about the halfway point to begin. Starting low keeps you from being blasted by harsh noise the moment you engage the effect. It’s far easier to add grit gradually than to yank it back down. Play a few chords and listen before you make bigger changes.
Step 5: Engage the Pedal and Listen
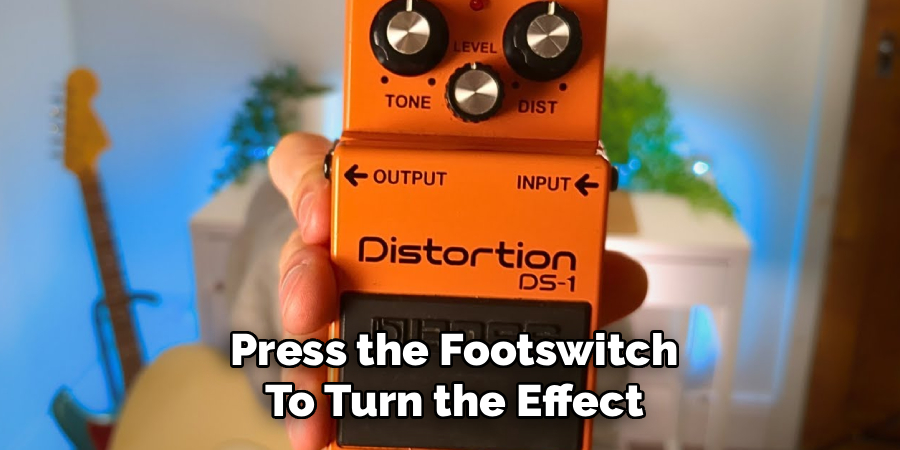
Press the footswitch to turn the effect on — you should hear an instant jump in grit and volume. Strum a chord and pay attention to how the character changes. If it sounds too loud compared to your clean tone, that’s normal and you’ll fix it in the next steps. Toggle the switch on and off a few times so you learn the difference. This on/off comparison is your best tool for tuning by ear.
Step 6: Dial In the Gain
The gain knob controls how much crunch and saturation you get. Turn it up slowly and notice how the sound thickens and sustains longer. Lower gain gives you a light, bluesy edge, while higher gain pushes toward full metal chaos. A common mistake is cranking gain all the way — too much turns clear chords into a fuzzy blur. Find the sweet spot where notes still ring out clearly but carry that satisfying bite.
Step 7: Shape the Tone Knob
The tone control adjusts brightness. Turn it clockwise for more treble and cut, or counterclockwise for a warmer, darker feel. Match this to your guitar and music style — bright settings slice through a band mix, while darker settings suit heavier, thicker riffs. Play the same riff at different tone settings to hear the shift. Trust your ears over any “perfect” number.
Step 8: Balance the Volume Level
Now set the level knob so your effected tone matches your clean volume. Switch the pedal on and off and adjust until both sound roughly equal. Bumping the level slightly higher than your clean signal is a neat trick for solos, since it pushes you above the rest of the band. Avoid a huge volume jump, though — it startles listeners and can overwhelm your amp. Aim for a smooth, natural transition.
Step 9: Fine-Tune and Play
With everything connected and dialed in, spend real time playing. Cycle through chords, single notes, and riffs to test your settings in context. Small tweaks to gain or tone can make a big difference, so adjust as you go. Write down settings you love so you can recall them next session. This is the fun part — trust your ears and enjoy the sound you built.
Tips for Best Results
- Place it in the right spot on your chain. If you use several pedals, put distortion after a wah or compressor but before delay and reverb. This order keeps time-based effects clean and your grit tight.
- Roll back your guitar’s volume knob. Backing off the volume on the guitar itself cleans up a heavy tone without touching the pedal. It’s the fastest way to move from rhythm crunch to a lighter sound mid-song.
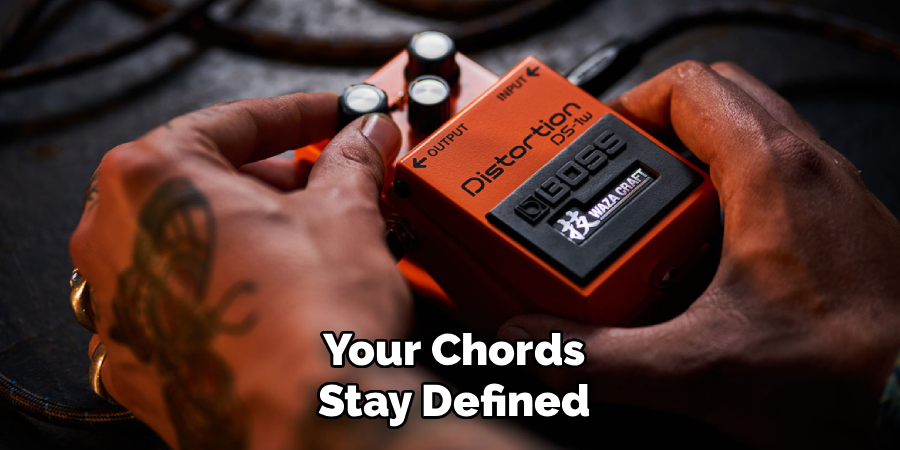
- Watch the low end at high gain. Too much bass plus heavy gain equals mud. Trim a little bass on your amp when you push the drive hard, and your chords stay defined.
- Use fresh strings and a clean signal. Old, dead strings sound dull no matter how good your settings are. Distortion amplifies every detail, so start with quality tone at the source.
- Try stacking with an overdrive. Running a mild overdrive into your distortion adds warmth and sustain. This “stacking” trick is a favorite among pros chasing a richer, more layered sound.
Frequently Asked Questions
What Is the Difference Between Distortion and Overdrive?
Overdrive gives you a softer, more natural breakup, like an amp pushed just a bit too hard. Distortion is heavier and more aggressive, with more saturation and sustain. Overdrive suits blues and classic rock, while distortion fits punk and metal. Many players own both and use each for different songs.
Where Should the Pedal Go in My Signal Chain?
Place it early in your chain, after dynamic effects like wah and compression but before delay and reverb. This keeps your grit tight and your ambient effects clean. If you reverse that order, delay and reverb get distorted too, which usually sounds messy. Experiment, since there’s no single rule that fits every player.
Can I Use It With Any Amplifier?
Yes, you can use one with almost any electric guitar amp, whether it’s a small practice combo or a big stack. For the clearest results, set your amp to a clean channel first so the pedal shapes the tone. Cheaper amps still work fine, though a quality amp brings out more detail. Just match your power source to the pedal’s needs to avoid damage.
Is It Safe to Leave the Battery Inside?
It’s fine short-term, but unplug the input cable when you’re done playing. Most pedals only draw power while a cable sits in the input jack, so leaving it connected drains the battery. To avoid this hassle entirely, switch to a power adapter. Pull the battery out if you plan to store the pedal for a long stretch.
Why Does My Tone Sound Muddy?
Muddiness usually comes from too much gain paired with too much bass. Try lowering the drive and trimming some low end on your amp. A dark tone setting can also blur your notes, so nudge it brighter. Fresh strings and a clean amp channel go a long way toward fixing a murky sound.
Do I Need Expensive Gear to Get a Good Sound?
Not at all. Plenty of affordable stompboxes deliver great tones, and technique matters more than price. Focus on learning your knobs, your signal chain, and your picking dynamics first. You can always upgrade later once you know exactly what tone you’re chasing.
Conclusion
Getting a killer tone out of a distortion pedal comes down to a clean base, careful knob adjustments, and plenty of playing time. Start low, build your gain and tone slowly, and match your volume so switching feels smooth. With a little practice, you’ll dial in everything from bluesy crunch to full-on roar in seconds. If you haven’t picked one up yet, check out our picks above to find the right fit for your rig. Ready to keep leveling up your sound? Explore our other gear guides on the site and keep experimenting.
