
Picture this: you’re trying to hang a heavy shelf on a brick wall, and your regular drill just spins helplessly against the surface. The bit smokes, the wall barely dents, and your patience wears thin. Sound familiar? That’s exactly the moment a hammer drill earns its keep.
Learning how to use a hammer drill opens up projects that a standard drill simply can’t handle, like mounting brackets into concrete or drilling into stone. In this guide, you’ll learn what supplies to grab, how to set up and drill safely step by step, plus a few pro tips that make the job smoother. Whether you’re a total beginner or a weekend DIYer, this walkthrough has you covered. Let’s turn that stubborn wall into an easy win.
What You’ll Need
Before you fire up the tool, gather your gear. Having everything ready keeps the job smooth and safe.
- A hammer drill (corded or cordless)
- Masonry drill bits sized for your project
- Safety glasses to shield your eyes from debris
- Ear protection, since these tools get loud
- A dust mask for concrete and brick dust
- Work gloves for a better grip
- A pencil or marker for marking spots
- A tape measure for accurate placement
- Masking tape (great for marking depth)
- A vacuum or brush for cleanup
- Wall plugs or anchors if you’re mounting something
- A stud finder or cable detector for safety
Keep your bits organized in a case so you don’t fumble mid-project. If you’re working on concrete, choose carbide-tipped masonry bits, which stand up to the pounding action far better than standard steel bits.
Step-by-Step Guide on How to Use a Hammer Drill
Follow these steps in order, and you’ll drill clean, accurate holes without the guesswork. Take your time, especially the first few times you handle the tool.
Step 1: Understand How the Tool Works
Before drilling, get familiar with what makes this tool different. A hammer drill spins the bit while also punching it forward in rapid bursts. That hammering action shatters tough materials like brick and concrete as the bit rotates. It’s this combo that lets you power through surfaces a regular drill can’t touch.
Most models have a switch to toggle the hammer function on or off. That means you can use it as a standard drill for wood or metal too. Knowing this saves you from buying two separate tools. Get comfortable with the controls before you start.
Step 2: Pick the Right Drill Bit
Your bit choice makes or breaks the job. For concrete, brick, or stone, always reach for a masonry bit with a carbide tip. These bits handle the constant pounding without dulling quickly. Using the wrong bit, like a wood bit, will ruin it fast and leave you frustrated.
Match the bit diameter to the anchor or screw you plan to use. If you’re installing wall plugs, the bit should match the plug size exactly. Check the bit for cracks or heavy wear before loading it. A fresh, sharp bit drills faster and cleaner every time.
Step 3: Gear Up With Safety Equipment
Never skip your protective gear, even for a quick job. Put on safety glasses to guard against flying chips and dust. Slip on ear protection, since these tools produce a serious racket that can damage hearing over time. A dust mask is a must when drilling into masonry, because that fine powder isn’t kind to your lungs.
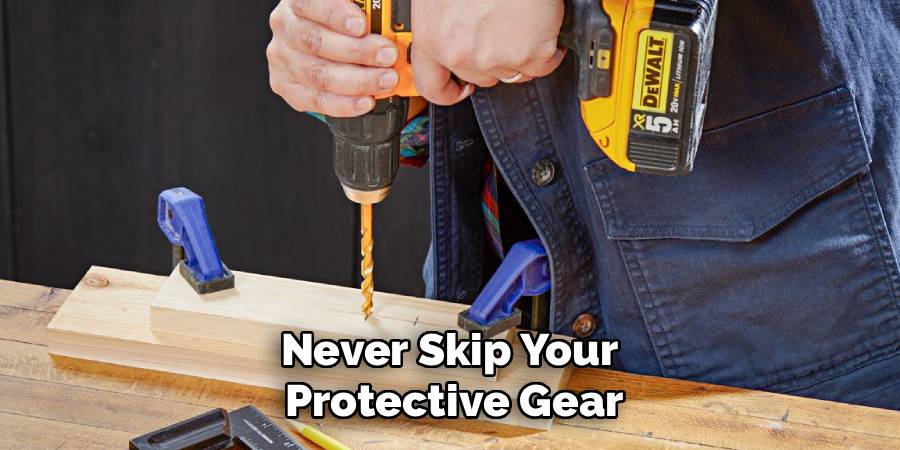
Wear snug-fitting gloves for grip, but avoid loose sleeves that could catch. Tie back long hair too. It only takes a second to gear up, and it keeps small accidents from becoming big ones. Safe habits now protect you for years of projects.
Step 4: Mark and Measure Your Drilling Spot
Accuracy starts with a good mark. Use your tape measure to find the exact spot, then mark it with a pencil or marker. Double-check your measurements before you commit, since a misplaced hole in concrete is tough to fix. Measure twice, drill once, as the old saying goes.
Run a stud finder or cable detector over the area first. You want to avoid hidden pipes and electrical wires behind the wall. Drilling into a live cable is dangerous and expensive. A quick scan gives you peace of mind before the bit ever touches the surface.
Step 5: Set the Correct Depth
Drilling too deep wastes effort and can weaken your anchor’s hold. Some drills have a built-in depth stop, so set it to match your screw or plug length. If yours doesn’t, wrap a strip of masking tape around the bit at your target depth. When the tape reaches the surface, you know it’s time to stop.
This trick keeps every hole consistent, which matters when you’re mounting something level. It also stops you from punching clean through a thin wall. Take a moment to measure the anchor and mark the bit. Small prep like this saves headaches later.
Step 6: Position the Drill and Start Slow
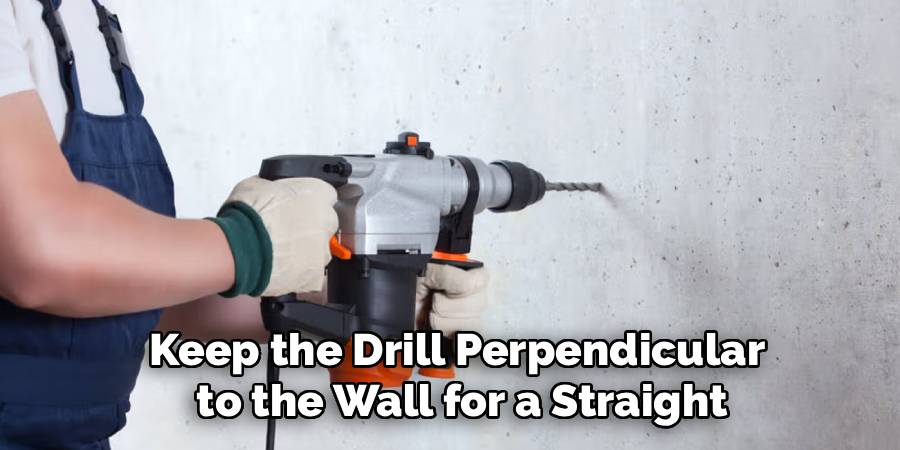
Line the bit up squarely on your mark, holding the drill straight and level. Grip the tool firmly with both hands, using the side handle if your model has one. Start drilling at a slow speed to create a small pilot divot. This keeps the bit from wandering across the surface.
Once the bit bites in, you can increase speed steadily. Keep the drill perpendicular to the wall for a straight, clean hole. Let the tool’s hammering action do the hard work instead of forcing it. Rushing at the start usually leads to a crooked or off-center hole.
Step 7: Apply Steady Pressure While Drilling
With the hole started, keep firm and even pressure as you push forward. You don’t need to lean your whole body into it, though. The hammering mechanism handles the impact, so let it work while you guide the direction. Too much force can overheat the bit or stall the motor.
Pull the bit out every few seconds to clear dust from the hole. This keeps debris from clogging the bit and slowing your progress. If you hit a tough spot, ease off slightly and let the tool grind through. Steady and patient beats forceful and rushed every time.
Step 8: Clear the Hole and Insert Anchors
Once you reach your marked depth, pull the bit straight out while it’s still spinning. Blow or vacuum the dust from the hole so your anchor sits snugly. A clean hole grips wall plugs and screws far better than a dusty one. This small step makes your mount rock-solid.
Tap your wall plug or anchor in gently with a hammer until it sits flush. Then drive your screw in, and you’re ready to hang your shelf, bracket, or fixture. Check that everything sits level before fully tightening. A clean finish here shows off all your careful work.
Step 9: Clean Up and Store Your Tool
Wrap up by clearing the work area of dust and debris. Wipe down the drill with a dry cloth, paying attention to the chuck and vents. Remove the bit, clean it, and return it to its case so it stays sharp. Coiling the cord neatly or charging the battery keeps the tool ready for next time.
Store everything in a dry spot away from moisture. Good habits like these extend the life of your gear. A clean tool performs better and lasts longer. Future you will appreciate the effort.
Tips for Best Results
Want to level up beyond the basics? These insider tips make a real difference.
- Let the tool do the work. The biggest beginner mistake is shoving the drill with all your weight. The hammering action already delivers the force, so guide it gently and let momentum carry you through. This protects both your bits and the motor.
- Cool your bit on long jobs. Drilling deep into concrete builds serious heat. Pause every so often and dip the bit tip in water for a second, or just let it rest. A cooler bit stays sharp far longer.
- Use a smaller pilot hole first. For large holes, drill a smaller guide hole before switching to the full-size bit. This keeps the big bit centered and reduces strain. You’ll get cleaner results with less wobble.
- Keep spare bits on hand. Masonry bits wear down, and a dull one turns an easy job into a struggle. Having a fresh bit ready saves a trip to the store mid-project. Sharp tools always work faster.
- Mark your depth even when using a depth stop. Backups never hurt. The tape trick gives you a visual cue that’s easy to spot while drilling. Consistency across every hole makes mounting level and clean.
Frequently Asked Questions
What’s the Difference Between a Hammer Drill and a Regular Drill?
A regular drill only spins the bit, which works fine for wood, plastic, and metal. A hammer drill adds a rapid punching motion that lets it bust through concrete, brick, and stone. Most hammer drills let you switch the hammer function off, so you get two tools in one. For masonry work, the hammer version is the clear winner.
Can I Use a Hammer Drill for Regular Drilling Tasks?
Yes, and that’s one of its best features. Simply switch off the hammer function, and it behaves like a standard drill. This lets you handle wood, drywall, and metal with the same tool. Just remember to swap in the correct bit for the material you’re working with.
Is It Safe to Use a Hammer Drill on Tile?
You can drill tile, but proceed with caution to avoid cracking it. Turn off the hammer function and use a diamond-tipped or tile-specific bit for the ceramic surface. Once you break through the tile into the wall behind it, you can switch the hammer mode back on. Go slow at the start, since tile is brittle and unforgiving.
How Do I Stop the Drill Bit From Slipping on the Wall?
Slipping usually happens because you start too fast. Begin at a low speed to carve a small divot that anchors the bit in place. You can also stick a piece of masking tape over your mark to give the bit more grip. Once the tip bites in, you can safely ramp up the speed.
Why Is My Hammer Drill Not Going Through Concrete?
Nine times out of ten, the culprit is the wrong bit. Make sure you’re using a carbide-tipped masonry bit and that the hammer function is switched on. Clear dust from the hole regularly, since packed debris slows progress dramatically. If the bit looks worn or dull, swap it for a fresh one.
Do I Need to Wear a Mask When Drilling Concrete?
Absolutely. Drilling into concrete and brick kicks up fine silica dust that’s harmful to breathe. A dust mask or respirator protects your lungs during and after the job. Pair it with safety glasses and ear protection for full coverage, and you’ll work comfortably and safely.
Conclusion
You’ve now got everything you need to tackle tough surfaces with confidence. The key takeaway is simple: pick the right bit, gear up for safety, and let the tool’s hammering action do the heavy lifting instead of forcing it. Learning how to use a hammer drill turns frustrating projects into quick, satisfying wins.
If you still need to add one to your kit, check out our recommended picks above to find the right fit. Now grab your gear and put those skills to work. When you’re done, explore our other tool guides for your next DIY project.
