
You pull your favorite shirt from the closet, and there it is — a maze of creases running right across the front. You’ve got twenty minutes before you head out the door, and no time for a trip to the dry cleaner. This is exactly where knowing how to use a steam iron saves the day. With a little steam and the right technique, those stubborn wrinkles disappear in minutes.
In this guide, you’ll learn everything from prepping your iron to handling delicate fabrics without scorching them. We’ll walk through each step together, share a few insider tips, and answer the questions people ask most. By the end, you’ll press shirts, pants, and linens like a pro. Let’s get your wardrobe looking crisp and fresh.
What You’ll Need
A smooth ironing session starts with the right setup. Gather these items before you begin so you’re not scrambling halfway through.
- A steam iron with an adjustable temperature dial
- A sturdy ironing board with a padded cover
- Clean, distilled water for the water tank
- The garment care labels on your clothes (check them first)
- A spray bottle of water for extra-dry spots
- A clean, dry cloth for the soleplate
- A pressing cloth for delicate fabrics
- Hangers to keep pressed items wrinkle-free
Having these on hand makes the whole process faster. It also protects your clothes from accidental damage.
Step-by-Step Guide on How to Use a Steam Iron
Ready to smooth things out? Follow these steps in order, and you’ll get clean, crisp results every time.
Step 1: Check the Fabric Care Label
Before you touch the iron, flip your garment inside out and find the care tag. These little labels tell you the safe heat settings for each item. Cotton and linen handle high heat, while synthetic fabrics like polyester need a much cooler touch. Silk and wool sit somewhere in between and often need a pressing cloth.
Ignoring the label is the most common mistake people make. Too much heat can melt synthetic fibers or leave a shiny mark. When in doubt, start low and work your way up.
Step 2: Fill the Water Tank Correctly
Open the fill cap and pour clean water into the water tank up to the marked line. Distilled water is your best friend here, since it prevents mineral buildup inside the iron. Hard tap water leaves deposits that clog the steam vents over time. That buildup can spit brown gunk onto your clothes.
Don’t overfill past the max line, as that can cause leaking. Screw or snap the cap shut firmly before you plug in. A properly filled tank gives you steady, reliable steam.
Step 3: Set Up Your Ironing Board
Position your ironing board at a comfortable height, ideally around waist level. A padded cover gives you a smooth surface and helps steam pass through the fabric. Make sure the board locks securely so it won’t wobble mid-press. Set it up near an outlet so the cord doesn’t stretch awkwardly.
Good lighting matters more than you’d think. It helps you spot every wrinkle and avoid missing spots. A stable, well-lit setup makes ironing far less frustrating.
Step 4: Choose the Right Heat and Steam Settings
Turn the temperature dial to match your fabric. Most irons have handy labels like “cotton,” “wool,” and “synthetic” printed right on the dial. Give the iron a few minutes to reach the set temperature before you start. Many models have an indicator light that switches off when they’re ready.
For heavier fabrics, crank up both the heat and steam. For delicate fabrics, keep the heat low and the steam gentle. Matching your settings to the material is the key to safe wrinkle removal.
Step 5: Learn How to Use a Steam Iron on Different Fabrics
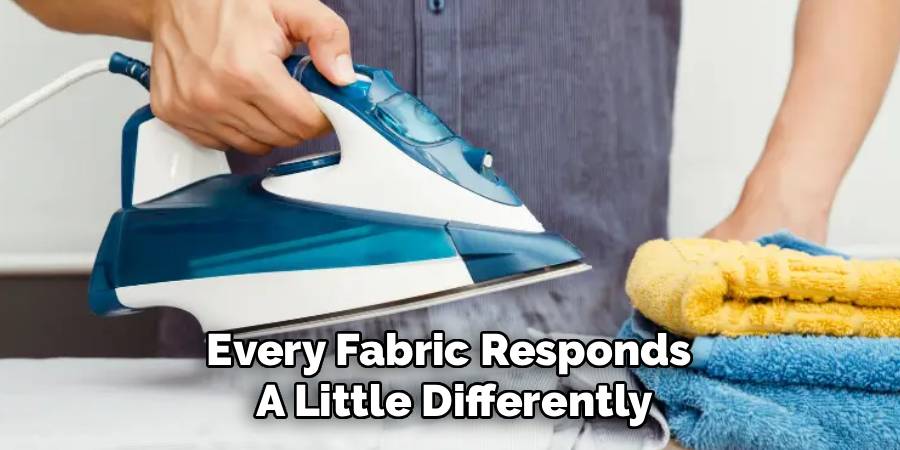
Every fabric responds a little differently, so adjust as you go. Press cotton and linen firmly with plenty of steam for crisp results. For silk and wool, place a thin pressing cloth between the soleplate and the fabric to prevent shine. Synthetic fabrics need quick, light passes at low heat.
Always test a hidden area first, like an inner seam or hem. This quick check saves you from ruining a visible spot. Working smart here protects your favorite pieces.
Step 6: Iron in Smooth, Even Strokes
Glide the iron across the fabric in long, steady motions. Follow the grain of the material rather than pushing side to side randomly. Start with collars, cuffs, and sleeves, then move to the larger flat areas. This order keeps already-pressed sections from re-wrinkling.
Don’t leave the iron sitting in one spot, even for a second. That’s how scorch marks happen. Keep the soleplate moving, and let the steam do most of the work.
Step 7: Use the Steam Burst for Stubborn Wrinkles
Some creases just won’t budge with normal pressing. That’s when the steam burst button comes in handy. Hold the iron slightly above the fabric and press the button to release a strong shot of steam. This blast relaxes tough wrinkles in seconds.
You can also hang the garment and steam it vertically for delicate items. Keep your free hand clear of the steam, since it’s hot enough to burn. A well-timed burst handles the creases regular passes leave behind.
Step 8: Hang or Fold Immediately
The moment you finish an item, hang it on a hanger or fold it neatly. Warm, freshly pressed fabric wrinkles fast if you leave it in a pile. Hanging shirts keeps collars and shoulders crisp. Folding pants along the crease locks in that sharp line.
Give each piece a few minutes to cool and set. This small habit keeps your hard work from unraveling. Your clothes stay smooth all the way to your closet.
Step 9: Turn Off and Store Safely
When you’re done, switch the iron off and unplug it right away. Let it cool completely before you empty the leftover water from the tank. Emptying the water prevents leaks and mineral buildup during storage. Wipe the soleplate with a dry cloth once it’s cool.
Store the iron upright or in its designated spot, cord wrapped loosely. Never wind the cord tightly while it’s still warm. A little care here keeps your iron working well for years.
Tips for Best Results
Want to level up your ironing game? These insider tricks make a real difference.
- Iron slightly damp clothes. Fabrics that are a touch damp press smoother and faster. If yours are bone-dry, mist them lightly with a spray bottle first.
- Clean the soleplate regularly. A gunked-up plate drags and can stain your clothes. Wipe it with a paste of baking soda and water when it looks dull.
- Sort by temperature before you start. Group garments by fabric type and iron the low-heat items first. This way you avoid waiting for the iron to cool between pieces.
- Use distilled water every time. It keeps the steam vents clear and stops mineral spitting. Your iron will last longer and run cleaner.
- Store an old towel nearby. Slip it under thin fabrics for extra padding, or use it to test your heat settings quickly.
Frequently Asked Questions Section
What Kind of Water Should I Put in a Steam Iron?
Distilled or demineralized water works best for most irons. It prevents mineral deposits from clogging the steam vents and extends the life of your appliance. Tap water can work in a pinch, but hard water leaves buildup over time. Check your iron’s manual, since a few models are actually designed for tap water.
Can I Use a Steam Iron on Delicate Fabrics Like Silk?
Yes, but you’ll want to take extra care. Set the iron to a low heat setting and always place a thin pressing cloth between the soleplate and the silk. This barrier prevents scorching and shiny marks. Better yet, steam silk vertically while it hangs to avoid direct contact.
How Do I Stop My Iron From Leaking Water?
Leaks usually happen when the iron isn’t hot enough to convert water into steam. Give it a few extra minutes to reach the proper temperature before pressing. Also, avoid overfilling the water tank past the max line. If it keeps leaking, the seals or vents may need cleaning.
Why Is My Iron Leaving Brown Marks on Clothes?
Brown stains typically come from mineral buildup or rust inside the water tank. Switching to distilled water usually solves the problem going forward. Run a cleaning cycle if your iron has one, or flush the tank with a vinegar-water mix. Always test on a scrap cloth after cleaning.

Is It Safe to Leave a Steam Iron On?
No, you should never leave a heated iron unattended. Most modern irons have an auto-shutoff feature, but you shouldn’t rely on it fully. An unattended iron is a fire and burn risk, especially around kids or pets. Turn it off and unplug it whenever you step away.
How Often Should I Clean My Steam Iron?
Aim to clean the soleplate every few weeks with regular use. Descale the water tank once a month if you notice weaker steam or spitting. Regular cleaning keeps the steam vents clear and your clothes stain-free. A well-maintained iron simply performs better and lasts longer.
Conclusion
Once you get the hang of it, ironing becomes quick and even a little satisfying. The secret is simple: check your labels, match your heat settings, and let steam handle the tough wrinkles. When you use a steam iron the right way, your clothes look sharper and last longer.
If you haven’t picked one up yet, check out our recommended picks above to find a model that fits your needs. Now that you know how to use a steam iron with confidence, why not explore our other garment care guides on the site? Happy pressing!
