

Your fingers ache, your nails are sore, and you’ve only tied fifteen balloons out of the hundred you need for tomorrow’s party. Sound familiar? Anyone who’s built a balloon arch or filled a room with color knows the struggle. That’s exactly why learning how to tie balloons with a tool is such a game-changer. This little gadget takes the pinch and pain out of the job and helps you work faster.
In this guide, you’ll learn what a balloon tying tool is, what supplies to gather, and how to tie a tight, secure balloon knot every single time. We’ll walk through each step, share a few insider tricks, and answer the questions people ask most. By the end, you’ll knock out a whole bag of balloons without a single sore fingertip.

What Is a Balloon Tying Tool?
A balloon tying tool is a small handheld gadget, usually made of plastic, designed to help you knot inflated balloons quickly and painlessly. It has a hook or notch where you loop the balloon neck, then guide it into a tidy knot. Most models are lightweight, pocket-sized, and cheap enough to buy in bulk. Party planners, decorators, and anyone tackling big batches of party decorations swear by them because they save your fingers and speed up the whole process.
What You’ll Need
Gather your supplies before you start so you’re not scrambling mid-project. Here’s your simple checklist:
- A balloon tying tool — the star of the show, in either a ring or handheld style
- Latex balloons — buy a few extra for practice and pops
- A balloon pump or air compressor — hand or electric, whichever you prefer
- A flat work surface — a table gives you room to spread out
- Ribbon or balloon tape — if you’re building displays or bouquets
- A small basket or bag — to hold finished balloons and keep them from drifting off
Keep everything within arm’s reach. A little organization makes a big difference when you’re working through a large batch.
Step-by-Step Guide on How to Tie Balloons with a Tool
Ready to give those fingers a break? Follow these steps in order. Take it slow the first few times, and you’ll build speed quickly.
Step 1: Inflate Your Balloon
Start by filling your latex balloon with air or helium using your pump. Don’t overfill it. A balloon stretched to its limit is more likely to pop and harder to knot. Leave a little slack near the neck so you have enough material to work with.
Aim for a consistent size across all your balloons, especially if they’re going into an arch or garland. Pinch the neck closed with your fingers right after inflating so no air escapes. Hold that pinch until you’re ready for the next step.
Step 2: Get a Firm Grip on the Neck
Keep pinching the neck of the inflated balloon so it stays sealed. Stretch the neck out a little to give yourself a workable length. This extra bit of rubber is what wraps around the tool, so don’t cut it short.
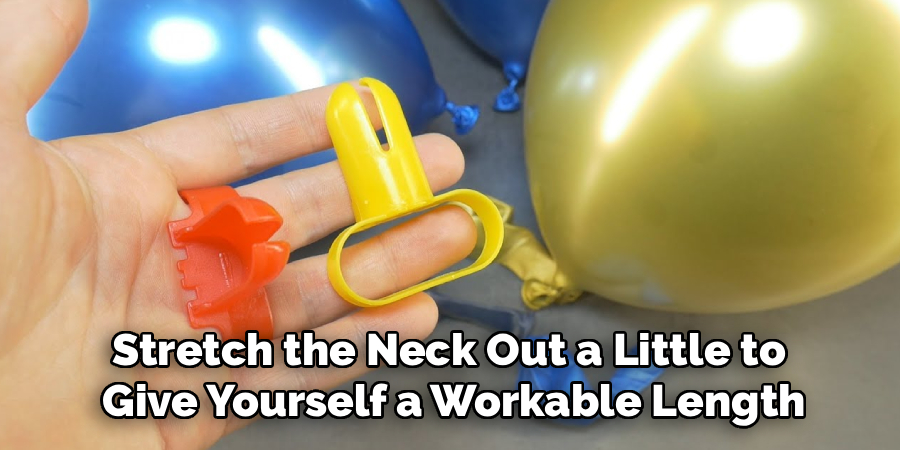
Use your thumb and forefinger to hold it tight. If air keeps sneaking out, you’re not pinching close enough to the opening. A firm grip here sets you up for a clean knot. Practice this hold a couple of times before moving on.
Step 3: Wrap the Neck Around the Tool
Loop the stretched neck around the two prongs or the hook of your balloon tying tool. Most tools have a small gap or notch designed for exactly this. Wrap it once, keeping the tension snug so it doesn’t slip loose.
The goal is to create a loop you can pull the end through. Different tools work slightly differently, so glance at the shape of yours. If it has two prongs, cross the neck between them. This wrap is the foundation of your balloon knot.
Step 4: Cross and Loop the End
Now bring the tail end of the neck across and hook it onto the tool’s notch. You’re essentially forming an overhand knot, just with the tool doing the pinching for you. Keep the loop firm so the whole thing stays in place.
This is the step that feels awkward at first, but it clicks fast. Watch how the rubber crosses over itself to form the loop. Once you see it, your hands will remember. Give it two or three tries before you expect it to feel smooth.
Step 5: Pull the End Through
Slide the hooked tail through the loop you just created. Pull it steadily and firmly. The tool holds the tension while your hand does the pulling, which is where the finger-saving magic happens. Keep pulling until the knot starts to tighten.
Don’t yank too hard or too fast, or you might tear the neck. A smooth, confident pull works best. You’ll feel the knot forming as the rubber cinches down. This motion is the heart of the whole balloon tying hack.
Step 6: Slide the Knot Off the Tool
Once the knot is snug, gently slide it off the prongs or hook. The finished knot should hold tight on its own. Give it a quick tug to confirm it’s secure before you move on. A loose knot means you need a little more tension next time.
If the balloon deflates slowly, the knot didn’t fully close. No worries, just re-inflate and try again. This step gets faster with every balloon. Soon you’ll be sliding knots off without even looking.
Step 7: Check and Set Aside
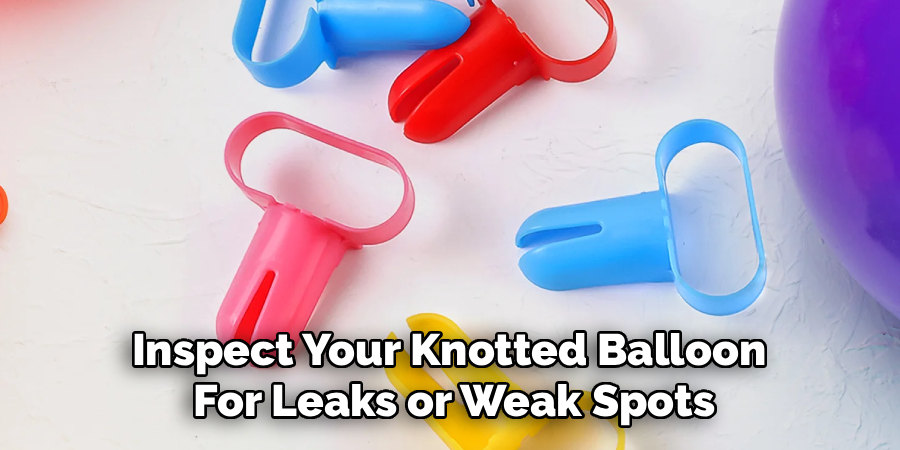
Inspect your knotted balloon for leaks or weak spots. Press it gently to make sure it holds firm. Then drop it into your basket or bag so it doesn’t float away or roll off the table. Keeping your finished balloons contained saves you a scramble later.
If you’re color-coding for a design, sort them as you go. This little habit keeps your project tidy and speeds up assembly. A quick check now prevents surprise pops during setup.
Step 8: Repeat and Build Your Rhythm
Grab your next balloon and run through the steps again. By the third or fourth one, you’ll notice your hands moving on autopilot. Speed comes from repetition, not force. Keep your movements relaxed and steady.
Set a comfortable pace instead of rushing. Rushing leads to slips and pops, which slow you down more than a steady rhythm ever would. Before long, you’ll clear a whole bag of latex balloons in a fraction of the usual time. That’s the payoff for sticking with it.
Tips for Best Results
Want to work like a seasoned party pro? These insider tricks make a real difference.
- Warm up cold balloons. Latex straight from a cold room turns stiff and brittle. Rub the balloon between your hands or leave the bag in a warm spot for a bit. Warm rubber stretches easier and pops less.
- Match your tool to your balloon size. A tool built for standard balloons may struggle with tiny 5-inch ones. If you’re working with mixed sizes, keep a couple of tool styles handy so nothing slows you down.
- Don’t over-inflate. Leaving a little breathing room in each balloon makes knotting easier and extends how long your display stays looking full. Overstuffed balloons also fade and shrink faster.
- Keep a spare tool nearby. These little gadgets are cheap, and they can crack under heavy use. Having a backup means one broken tool won’t halt your whole project.
- Set up an assembly line. Inflate a batch first, then knot them all in one go. Switching between tasks slows you down, while batching keeps your rhythm smooth and steady.
Frequently Asked Questions
How Does a Balloon Tying Tool Actually Work?
The tool holds the balloon neck under tension while you loop and pull the end through to form a knot. Instead of your fingers doing the tight pinching, the prongs or hook take the strain. This means you tie faster and skip the sore fingertips. Most people get the hang of it after just a few practice balloons.
Can I Use One Tool for Different Balloon Sizes?
Yes, many tools handle a range of standard sizes, though very small or very large balloons can be trickier. If you often work with mixed sizes, it helps to keep a couple of tool styles on hand. Test your tool on each size before a big project so there are no surprises. Matching the right tool to the balloon keeps everything running smoothly.
Is Tying Balloons with a Tool Faster Than by Hand?
For big batches, absolutely. Once you build a rhythm, a tool can cut your tying time dramatically and save your hands from cramping. The real advantage shows up when you’re filling an arch or garland with dozens of balloons. For just a few balloons, hand-tying is fine, but tools shine on large jobs.
Why Does My Balloon Keep Popping While I Tie It?
Popping usually comes down to over-inflation or cold, brittle latex. Give each balloon a little slack instead of stretching it to the max, and warm up your balloons before you start. Sharp nails or rough tool edges can also cause pops, so handle the neck gently. Slowing your pull just a touch often solves the problem.
Do I Need Special Balloons to Use the Tool?
No, standard latex balloons work perfectly with most tying tools. Just make sure the neck is long enough to wrap around the prongs. Foil balloons usually self-seal and don’t need tying, so tools are meant for latex. Any regular party balloon from the store will do the job.
Conclusion
Tying balloons no longer has to leave your fingers sore and your patience thin. Once you get comfortable with how to tie balloons with a tool, you’ll fly through even the biggest batches with ease. Remember the basics: inflate with a little slack, wrap the neck snugly, and pull with a smooth, steady motion. That’s really all it takes.
If you haven’t grabbed a tying tool yet, check out our recommended picks above to build your kit. Ready to level up your next celebration? Explore our other DIY and party decoration guides for more hands-on tips. Happy tying!
