
You’re under the car, wrench in hand, trying to pop a stubborn ball joint loose from the steering knuckle. You’ve hammered, pried, and cursed a little. Nothing budges. That greasy, rusted joint won’t let go — and this is exactly where a pickle fork earns its keep. This handy separator tool is built to break apart tapered joints that seem welded together by years of grime.
In this guide how to use a pickle fork, you’ll learn what this tool does, how to use it safely, and the mistakes that trip up most beginners. We’ll walk through the gear you need, a clear step-by-step process, and a few insider tricks along the way. Whether you’re tackling suspension work for the first time or just want cleaner results, you’ll finish this ready to separate joints like a pro. Let’s dig in.
What Is a Pickle Fork?
It’s a two-pronged separator tool shaped a bit like a giant dinner fork — hence the name. Mechanics use it to split tapered joints in a vehicle’s steering and suspension, like ball joints, tie rod ends, and control arm connections. You slide the forked end between two parts, then drive a wedge into the joint to force them apart. It’s a brute-force tool, so it works fast but can damage rubber boots if you’re not careful.
What You’ll Need
Before you slide under the vehicle, gather these essentials:
- A pickle fork sized for your job (they come in various widths)
- A heavy ball-peen or dead-blow hammer
- Safety glasses and work gloves
- A jack and a set of sturdy jack stands
- Wheel chocks to keep the car from rolling
- Penetrating oil (for rusted, seized joints)
- A wire brush for cleaning grime
- A replacement part, since the boot often tears during removal
That’s the core kit. A pneumatic version and an impact hammer are nice upgrades, but you don’t need them to get started.
Step-by-Step Guide on How to Use a Pickle Fork
Step 1: Secure the Vehicle Safely
Safety comes first, always. Park on flat, solid ground and set your parking brake. Chock the wheels that stay on the ground so nothing rolls while you work. Raise the car with a jack, then lower it onto jack stands rated for the weight. Never trust a jack alone — it can fail without warning. Give the car a firm shake to confirm it’s rock solid before you slide underneath.
Step 2: Locate and Inspect the Joint
Find the joint you plan to separate, whether it’s a ball joint, tie rod end, or another suspension link. Wipe away caked-on grease and dirt with a wire brush so you can see clearly. Check how the two parts fit together and note the tapered stud that holds them locked. Look for the retaining nut — you’ll need to remove it first. A quick inspection now saves you from prying at the wrong spot later.
Step 3: Loosen and Remove the Retaining Nut
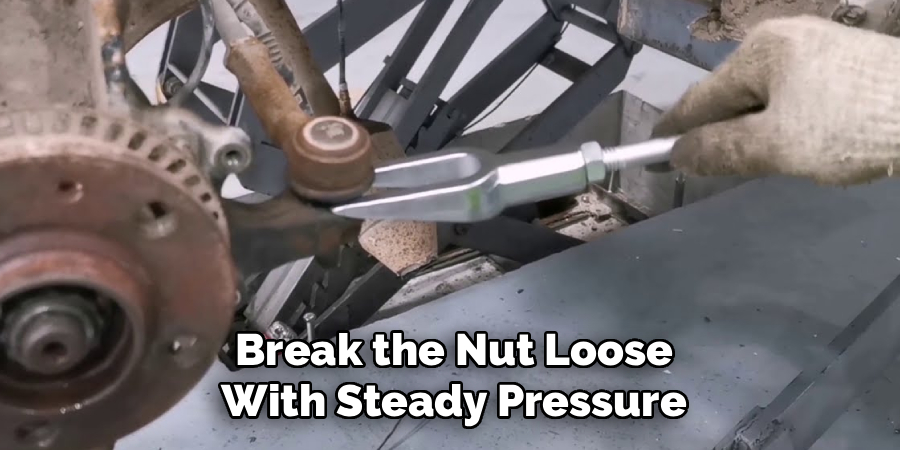
Before any wedging, back off the nut that secures the joint. Spray penetrating oil on rusted threads and give it a few minutes to soak in. Use the right-size socket or wrench, and break the nut loose with steady pressure. Here’s a smart move: leave the nut on a few threads rather than removing it fully. That way, when the joint pops free suddenly, the part won’t crash down or fly off. Remove the nut completely only once the joint has separated.
Step 4: Position the Fork Correctly
Slide the forked end between the two components you want to split. The prongs should straddle the tapered stud, with the wedge shape facing the seam where the parts meet. Push it in as far as it will comfortably go for solid contact. Getting this angle right matters — a crooked fork slips out and wastes your swings. Take a second to line it up square before you pick up the hammer.
Step 5: Drive the Wedge Home
Now the satisfying part. Grab your ball-peen or dead-blow hammer and strike the thick end of the fork with firm, controlled hits. The wedge forces the prongs deeper, spreading the joint apart. Keep your strikes square so the tool doesn’t kick sideways. Let the wedge do the work — you’re driving it in, not trying to shatter the joint. Most seized connections give way with a loud pop after several solid blows.
Step 6: Watch for the Pop
As you hammer, tension builds in the tapered joint until it suddenly releases. That sharp crack means the stud has broken free from its socket. Keep your hands and face clear of the joint, because parts can jump when they let go. If the retaining nut is still threaded on a bit, it’ll catch the part safely. Once you hear that pop, stop swinging and check whether the pieces have fully separated.
Step 7: Separate and Remove the Parts
With the joint broken loose, finish removing the nut and pull the components apart by hand. If they’re still snug, a gentle tap or a little wiggle usually frees them. Inspect the rubber boot — this brute-force method often tears it, which is why you kept a replacement handy. Set the old part aside and clean the mating surfaces before installing anything new. Take a moment to check the surrounding suspension components for wear while you’re in there.
Step 8: Clean Up and Reassemble
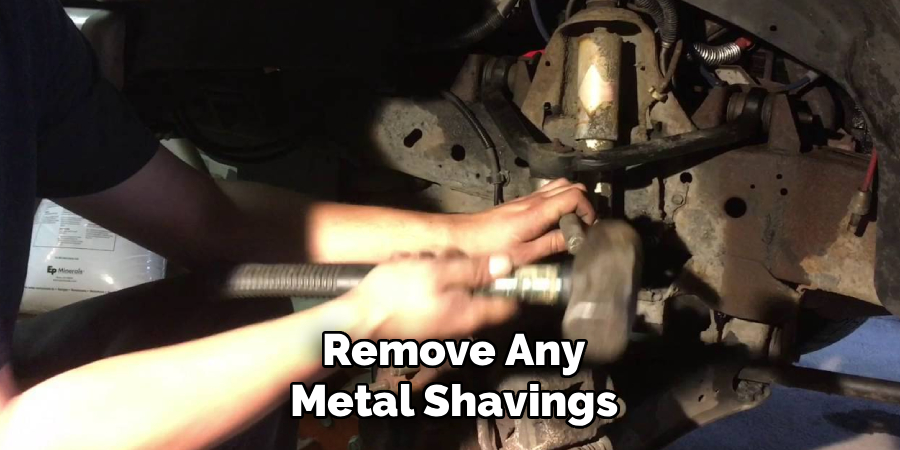
Wipe down the area and remove any metal shavings or grit. Fit your new ball joint or tie rod end into place, then torque the retaining nut to the manufacturer’s spec — don’t just guess. Proper torque keeps the joint safe on the road, so grab a torque wrench for this step. Double-check that everything sits flush and seated. Lower the car off the stands slowly and give the wheel a firm shake to confirm a solid, rattle-free connection.
Tips for Best Results
- Soak seized joints overnight. For badly rusted suspension parts, spray penetrating oil and let it work for hours or even overnight. The wedge slides in far easier, and you’ll swing that hammer half as many times.
- Protect the boot when you can. If you plan to reuse the part, wrap the rubber boot in a rag or slip a hose section over the fork prongs. This separator tool tears boots easily, so a little padding saves a good component.
- Match the fork width to the job. Too wide and it won’t fit the gap; too narrow and it won’t grab. Keep a couple of sizes on hand for different tie rod and ball joint separator tasks.
- Use a dead-blow hammer for control. Its cushioned head delivers force without bouncing back at you. You get more energy into the wedge and less shock in your wrist.
- Consider a pneumatic version for volume work. If you separate joints often, an air hammer with a fork attachment blasts through them fast and spares your arm.
Frequently Asked Questions
What Is a Pickle Fork Used For?
It’s used to separate tapered joints in a vehicle’s steering and suspension system. Common jobs include splitting ball joints, tie rod ends, and control arm connections that have seized over time. You wedge the forked end into the joint and hammer it apart. It’s a fast, forceful tool that shines on rusted, stubborn parts.
Will It Damage the Ball Joint or Boot?
It often tears the rubber boot, since the wedge forces its way right past it. That’s usually fine when you’re replacing the part anyway. If you want to save the component, pad the prongs with a rag or use a gentler press-style separator instead. Always inspect the boot afterward and swap it if it’s torn.
Do I Need to Remove the Nut First?
Loosen the retaining nut before you start hammering, but don’t take it all the way off. Leaving it threaded on a few turns catches the part when the joint pops free suddenly. This keeps the component from dropping onto you or flying off unexpectedly. Remove the nut fully only after the joint has separated.
Can I Use One Without an Air Hammer?
Absolutely. A standard ball-peen or dead-blow hammer works perfectly for most home jobs. Air hammers just speed things up if you do a lot of suspension work. Soak rusty joints in penetrating oil first, and manual hammering will get the job done without any special power tools.
Is It Safe to Use Under a Jacked-Up Car?
It’s safe as long as you support the car properly. Never rely on the jack alone — always lower the vehicle onto rated jack stands and chock the wheels. Give the car a good shake to confirm stability before you crawl under. Wear safety glasses too, since metal chips and grease can fly loose during hammering.
Why Won’t the Joint Separate No Matter How Hard I Hit?
Heavy rust or grime is usually the culprit. Clean the joint with a wire brush, then soak it in penetrating oil and wait — sometimes overnight makes all the difference. Check that your fork is sized right and seated squarely in the seam. If it still won’t budge, a larger separator tool or a hydraulic press may be your next move.
Conclusion
Separating a stubborn ball joint or tie rod end doesn’t have to feel like a wrestling match. With a pickle fork, a solid hammer, and a little patience, you’ll break loose even the crustiest suspension parts. Remember to secure the vehicle, loosen that nut first, and let the wedge do the heavy lifting.
Before long, you’ll handle steering and suspension jobs with real confidence. If you haven’t grabbed one yet, check out our picks above to find the right fit. Want more hands-on know-how? Explore our other DIY guides on the site and keep building your skills.
