
Picture this: you’ve mounted a new sink, and you need a perfectly round opening for the drain. Or maybe you’re wiring a room and need clean holes for recessed lights. Reaching for a knife or chisel just won’t cut it. That’s where learning how to use a hole cutter saves the day. This handy tool bores smooth, precise circles in wood, drywall, metal, and more.
In this guide, you’ll learn exactly what this tool is and how it works. We’ll cover the gear you need, walk through the setup step by step, and share pro tips for a clean cut every time. You’ll also get answers to the questions beginners ask most. By the end, you’ll drill flawless holes with confidence and skip the guesswork.
What Is a Hole Cutter?
A hole cutter is a tool that bores round openings into a surface, and it usually attaches to a standard power drill. The most common version is a hole saw, a cylindrical blade with saw-like teeth that cuts a circle as it spins. Most models include a central pilot bit that keeps the tool steady and stops it from wandering. You’ll find them sized for everything from tiny cable holes to large fixture cutouts.
What You’ll Need
Round up these items before you start. Having everything on hand keeps the job smooth and safe.
- A power drill (corded or a strong cordless)
- A hole saw or the correct cutting bit for your material
- An arbor to connect the saw to your drill
- A sharp pilot bit that matches the arbor
- Safety glasses and work gloves
- A dust mask for drywall or wood dust
- A pencil and measuring tape
- A clamp or vise to secure your workpiece
- Painter’s tape (for marking and reducing splinters)
- A scrap board to protect your work surface
Step-by-Step Guide on How to Use a Hole Cutter
Step 1: Choose the Right Bit for Your Material
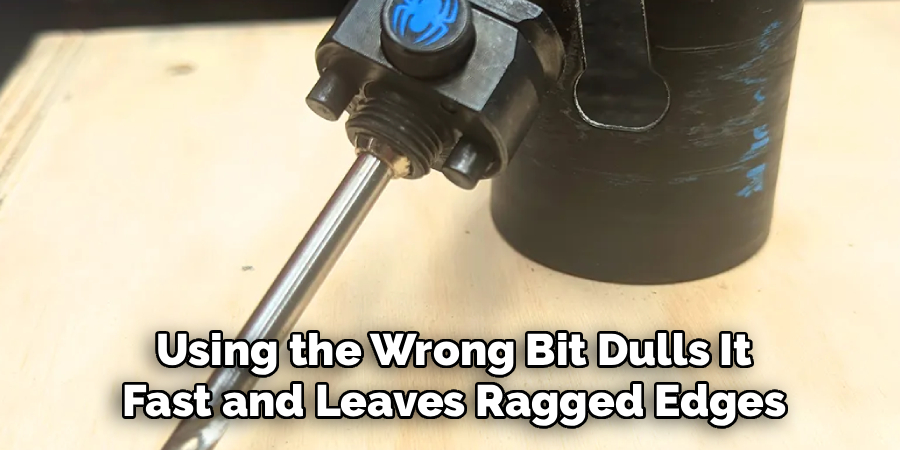
Start by matching the tool to what you’re cutting. Wood, drywall, tile, and metal each call for a different tooth design or coating. A bi-metal hole saw handles wood and thin metal well, while a carbide-tipped version tackles tougher tile. Using the wrong bit dulls it fast and leaves ragged edges. Check the packaging, which usually lists the materials each blade suits. Picking correctly here sets you up for a clean cut and longer tool life.
Step 2: Measure and Mark Your Center Point
Grab your measuring tape and pencil, then mark the exact spot where the hole belongs. Precision matters most at this stage, since a small error throws off the whole job. Make a clear, dark dot so the pilot bit has an obvious target. If you’re placing several holes, mark them all before you drill. Double-check your measurements against your fixture or pipe. A minute of careful marking beats redrilling a crooked hole later.
Step 3: Assemble the Arbor and Pilot Bit
Thread the hole saw onto the arbor until it seats firmly. Then slide the pilot bit through the center and lock it in place. The pilot bit should stick out past the saw teeth by about a quarter inch. Give everything a firm tug to confirm it’s tight, since a loose assembly wobbles and cuts poorly. Tighten any set screws with the included wrench. A solid setup keeps the blade centered and prevents dangerous slips.
Step 4: Secure Your Workpiece
Clamp your material to a workbench or lock it in a vise before drilling. Loose boards can spin or kick back the moment the teeth bite in. Place a scrap board underneath so the bit exits cleanly and doesn’t chew up your bench. For thin sheets like drywall or metal, backing support reduces bending and tearing. Take a second to confirm nothing shifts when you press on it. A steady workpiece is the foundation of every accurate hole.
Step 5: Set Your Drill to the Right Speed
Speed makes a big difference in cut quality and safety. Use a lower RPM for metal and tile, since fast spinning overheats the teeth and burns the edges. Wood and drywall handle higher speeds better because they clear chips easily. Most drills have a variable trigger, so you can ease into the cut. Avoid flooring the trigger right away, which is a common rookie mistake. Matching your RPM to the material protects both your blade and your workpiece.
Step 6: Start the Cut With the Pilot Bit
Line up the pilot bit with your marked center dot and hold the drill perpendicular to the surface. Squeeze the trigger gently so the pilot bit bites in first and anchors the tool. Once it’s seated, the saw teeth will start scoring a circle. Keep the drill straight, since tilting leads to an oval or angled opening. Let the tool do the work instead of forcing it. This slow, steady start guarantees the cut stays centered.
Step 7: Apply Steady, Even Pressure
With the pilot bit anchored, push forward with light, consistent pressure as the teeth cut deeper. Don’t lean your full weight into it, since too much force overheats the blade and stalls the drill. Let the teeth chew through at their own pace. For deep material, back the saw out every few seconds to clear sawdust and metal shavings. This pause also cools the blade and prevents binding. Even pressure delivers a smooth, round hole with minimal cleanup.
Step 8: Watch Your Cutting Depth
Keep an eye on how far the blade sinks as you go. Many hole saws have a limited cutting depth, so thick materials may need cutting from both sides. If the saw bottoms out, flip the piece over and finish from the opposite face using your pilot hole as a guide. Marking the desired depth with tape on the saw helps you track progress. Rushing past the right depth can crack the surface or jam the tool. Controlled depth keeps your edges crisp.
Step 9: Remove the Plug and Finish the Edges
Once you break through, the cut releases a round slug of material inside the saw. Unplug or set down the drill, then pop the plug out through the arbor’s slot with a screwdriver. Wear gloves here, since fresh metal edges can be sharp. Run a file or sandpaper around the rim to smooth any burrs or splinters. Wipe away dust and inspect the hole against your fixture. A quick cleanup gives you a professional, finished look.
Step 10: Clean and Store Your Tools
Brush the sawdust and shavings off the teeth before they harden into gunk. A dull, dirty blade cuts slower and strains your drill. Store the hole saw and arbor in a dry case so they don’t rust or dull against other tools. Check the pilot bit for wear and replace it when the tip goes blunt. Wind up your cord or charge your battery for next time. Good storage habits keep your gear ready and extend its working life.

Tips for Best Results
These insider pointers help you cut cleaner holes and protect your tools.
- Stick painter’s tape over the mark first. Tape reduces splintering on wood and stops the drill bit from wandering on slick surfaces like tile. Peel it off after, and you’ll see a noticeably cleaner edge.
- Cut halfway from each side on thick stock. Drilling through from one face often blows out the back. Starting your pilot hole, then finishing from the reverse side, leaves both faces smooth and chip-free.
- Keep the teeth cool on metal. Add a drop of cutting oil and pause often to let the blade rest. Overheating is the fastest way to ruin a bi-metal blade and dull those teeth for good.
- Clear the plug before it packs tight. If the slug jams inside the saw, it stops cutting and overheats. Back out frequently and knock the plug loose so the teeth keep biting freely.
- Match arbor size to saw size. A large hole saw on a small arbor can flex and wobble. Pairing them correctly keeps the cut round and your drill under control.
Frequently Asked Questions
What Is the Difference Between a Hole Saw and a Hole Cutter?
People often use the two terms for the same thing, since a hole saw is the most common style. Technically, “hole cutter” is a broader label that includes hole saws, adjustable circle cutters, and step bits. A hole saw uses a fixed-diameter cylindrical blade, while an adjustable cutter lets you dial in different sizes. For most home projects, a standard hole saw covers your needs.
How Do I Stop the Bit From Wandering?
The pilot bit is your best friend here, since it anchors the tool at your center mark before the teeth engage. Start the drill slowly so the pilot bites in first and holds the position. A strip of painter’s tape over your mark also adds grip on smooth surfaces. Keeping the drill perpendicular and easing into the cut prevents the blade from skating across your workpiece.
Can I Use a Hole Cutter on Metal?
Yes, but you need the right blade and settings. Choose a bi-metal or carbide-tipped hole saw rated for metal, and set your drill to a low RPM. Fast speeds overheat the teeth and burn the cutting edge, so slow and steady wins. Add a little cutting oil to keep the blade cool, and clamp the metal firmly to avoid dangerous kickback.
Why Is My Hole Saw Getting Stuck?
Most jams happen when the plug of material packs tightly inside the saw. Back the tool out every few seconds to clear chips and knock the slug loose through the arbor slot. Too much pressure or too high a speed can also bind the teeth and stall the drill. Ease up, clear the debris, and let the blade cut at its own pace.
How Deep Can a Hole Cutter Go?
That depends on the cutting depth of your specific saw, which is set by the height of the cylinder. Standard hole saws cut about an inch to an inch and a half deep. For thicker wood or panels, drill halfway from one side, then flip the piece and finish from the other using your pilot hole as a guide. Deep-cut models exist for beams and thick stock.
Is It Safe to Use a Hole Cutter Freehand?
You can, but clamping your workpiece is far safer and gives cleaner results. Freehand cutting invites kickback if the material spins or the blade grabs suddenly. Always wear safety glasses and gloves, and keep both hands steady on the drill. If you must go freehand, use a slow start and light pressure to stay in control.
Conclusion
Cutting clean, round holes is well within your reach once you know the basics. Match the blade to your material, anchor the pilot bit, and let steady pressure do the work. With a little practice, you’ll turn tricky cutouts into quick, satisfying wins.
Remember to keep your speed sensible and your workpiece clamped tight. If you haven’t picked one up yet, check out our recommended picks above. Ready to tackle your next project? Browse our other tool and DIY guides on the site for more hands-on help.
