


Picture this: you’ve pressed your best shirt, knotted your tie just right, and you’re ready to walk into a big meeting. Then you glance in the mirror and see your collar tips curling up like they’ve got a mind of their own. A collar stay solves that problem in seconds. This small accessory keeps your shirt collar crisp, flat, and sharp all day long.
Maybe you’ve spotted these little strips tucked inside a new dress shirt and had no idea what they were for. Or maybe you’ve lost yours and your collar has looked floppy ever since. Either way, you’re about to fix that for good. In this guide, you’ll learn exactly How to Use a Collar Stay, how to slide them in properly, and how to keep your collar looking polished from morning to night.
What Is a Collar Stay?
A collar stay is a small, rigid strip made from plastic, metal, or even mother-of-pearl that slides into the underside of your shirt collar. Its job is simple: it stiffens the collar points so they stay flat and pointed instead of curling, bending, or drooping. Most dress shirts have hidden slots sewn along the underside of the collar, designed to hold these strips snugly. Once inserted, they’re completely invisible from the outside while doing all the hard work of keeping you looking sharp.
What You’ll Need
Gather these before you start so you’re not fumbling around while you’re trying to get dressed.
- A dress shirt with collar stay slots (most do — check the underside)
- A pair of collar stays that match your collar length
- A ruler or the old stay to measure the correct size
- Optional: a set of magnetic stays for extra hold
- Optional: metal stays for a firmer, longer-lasting result
- A small container or pouch to store spare stays
- Good lighting so you can see the slot openings clearly
Step-by-Step Guide on How to Use a Collar Stay
Follow these steps in order, and you’ll have a crisp collar in under a minute. The most common mistake is grabbing the wrong size, so pay close attention to step two.
Step 1: Find the Collar Slots
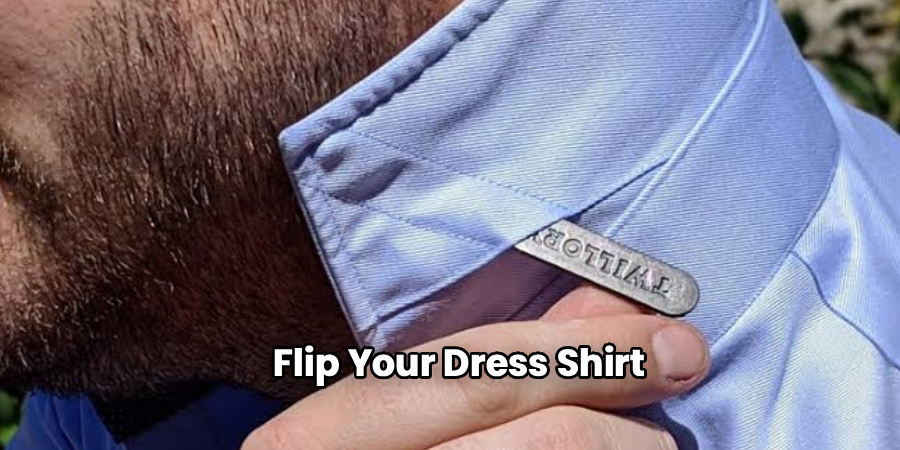
Flip your dress shirt so the underside of the collar faces you. Look near the tips for two small horizontal openings sewn into the fabric. These slots are usually close to the collar points and angled slightly inward. Run your finger along the seam if you can’t spot them right away. Not every shirt has them, so if you don’t find slots, you’ll want a magnetic option instead. Once you locate the openings, you’re ready to move on.
Step 2: Measure the Right Length
Size matters more than anything else here. A stay that’s too long will bunch the fabric, and one that’s too short will slide around and do nothing. Measure the distance from the slot opening to the collar tip, or simply match a new stay to the one your shirt came with. Most shirts use stays between 2.5 and 3 inches, but longer collars need bigger ones. Keep a few sizes on hand since collar lengths vary between shirts. Getting this right makes every other step easier.
Step 3: Choose Your Stay Material
Different materials give you different results, so pick based on your needs. Plastic stays are lightweight, cheap, and perfect for everyday wear. Metal stays offer a firmer hold and last far longer, making them great for stubborn collars. Magnetic stays use a tiny magnet to lock the collar flat, which works well on shirts without slots. Mother-of-pearl and brass options add a touch of luxury if you like premium details. Match the material to the occasion and the shirt.
Step 4: Insert the Stay Correctly
Hold the stay with its pointed end facing the collar tip. Slide it gently into the slot, pushing it all the way toward the point. Keep the flat, wider end at the opening so it’s easy to grab later. Don’t force it — if it snags, wiggle it slightly rather than shoving hard. A smooth insertion means the collar point stays flat without any lumps. Do the same on the other side so both tips match.
Step 5: Check Both Sides for Balance
After inserting both stays, flip the collar back to its normal position. Look in the mirror and compare the two collar points. They should sit at the same angle with equal stiffness on each side. If one side looks droopier, your stays might be different sizes or one isn’t pushed all the way in. Adjust until both points look symmetrical. Balance is what separates a sharp collar from a sloppy one.
Step 6: Try Magnetic Stays for Slotless Shirts
If your shirt has no slots, magnetic stays are your best friend. These come in two parts: a stay that sits inside or under the collar and a small magnet that holds it in place from outside. Position the stay along the collar point, then place the magnet on the opposite side of the fabric. The magnetic pull locks everything flat without any sewn-in pocket. This trick works on casual shirts, knit collars, and older shirts that never had slots to begin with.
Step 7: Fasten and Adjust Your Collar
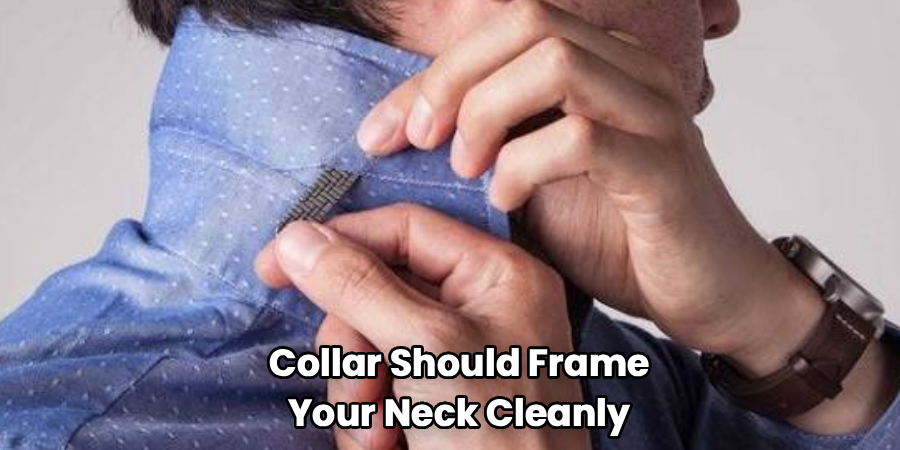
Now button up your dress shirt and add your tie if you’re wearing one. With the stays in place, your collar should frame your neck cleanly and lie flat against your chest. Give the collar points a gentle press with your fingers to settle them. Notice how the tips stay pointed instead of curling upward. If something still looks off, unbutton and reseat the stays. A well-set collar makes the whole outfit look intentional.
Step 8: Remove Before Washing
Always take the stays out before you toss the shirt in the wash. Heat and tumbling can warp plastic, rust cheaper metal, and even damage your collar slots. Pull each stay out by its flat end and set them somewhere safe. This one habit doubles the life of both your stays and your shirt. Skipping it is the fastest way to end up with a melted stay stuck in your collar.
Step 9: Store Your Stays Safely
Keep your stays in a small pouch, tin, or dedicated compartment so they don’t vanish. These little strips have a talent for disappearing into laundry baskets and dresser drawers. Storing them together also lets you grab the right size fast when you’re rushing to get ready. A magnetic tin works especially well for metal and magnetic stays. Treat them like cufflinks — small but worth keeping organized.
Tips for Best Results
These pointers go beyond the basics and help you look sharp like someone who’s been doing this for years.
- Keep multiple sizes ready. Collar lengths differ from shirt to shirt, so a single size won’t fit everything. Buy a variety pack and match the stay to each collar for a perfect fit every time.
- Upgrade to metal for stubborn collars. If plastic stays keep letting your collar droop, switch to metal stays. They hold firmer, resist bending, and last for years instead of months.
- Warm plastic stays before inserting. Cold plastic can feel stiff and awkward. Hold them in your hand for a moment so they flex slightly and slide in more smoothly.
- Use magnetic stays for travel. They pack flat, work on almost any shirt, and save you from packing separate sizes. One set handles most collars on the road.
- Replace bent stays right away. A warped stay pushes your collar out of shape instead of holding it flat. Toss anything that’s lost its straight edge.
Frequently Asked Questions
What Is the Point of a Collar Stay?
The whole purpose is to keep your shirt collar flat, crisp, and pointed throughout the day. Without one, collar tips tend to curl, bend, and look messy, especially in warm weather. These small strips slide into hidden slots and do their work invisibly. The result is a polished, put-together look that lasts from morning to evening.
How Do I Know What Size to Buy?
Measure the distance from the slot opening to the collar point, or match a new stay to the one your shirt came with. Most dress shirts use stays between 2.5 and 3 inches, though longer collars need bigger ones. Buying a variety pack is the easiest fix since collar lengths vary widely. When in doubt, size slightly smaller rather than too long.
Can I Use Magnetic Stays on Any Shirt?
Yes, magnetic stays are the go-to option for shirts without sewn-in slots. They use a small magnet to hold the stay flat against the collar from both sides of the fabric. This makes them perfect for casual shirts, knit collars, and older shirts. Just keep magnets away from watches and electronics when you store them.
Is It Safe to Leave Stays in During Washing?
No, you should always remove them before washing. Heat from the water and dryer can warp plastic, rust cheap metal, and stress your collar slots. Pull each stay out by its flat end and store it safely before laundry day. This simple step protects both your stays and the shirt itself.
What Are Collar Stays Made From?
They come in several materials, each with its own strengths. Plastic is light and affordable for everyday use, while metal offers a firmer, longer-lasting hold. Magnetic versions include a small magnet for slotless shirts, and premium options use brass or mother-of-pearl. Choose based on how much hold you need and the occasion.
Why Do My Collar Tips Still Curl With Stays In?
Usually this means the stays are too short, bent, or not pushed fully into the slots. A stay that doesn’t reach the collar point can’t keep it flat. Check that both stays match your collar length and sit all the way in. If plastic keeps failing you, switch to firmer metal stays for a stronger result.
Conclusion
Keeping your collar sharp really comes down to a few simple habits: find the slots, pick the right size, slide the stays in evenly, and pull them out before washing. Do that, and your dress shirt will look crisp every single time you wear it. Whether you prefer plastic, metal, or magnetic options, the right pair makes all the difference. If you haven’t found your ideal set yet, check out our recommended products above to get started. Ready for more? Browse our other style and grooming guides for easy wins you can use today.
