
You pull a fresh batch of muffins from the oven, flip the tray, and watch half of them crumble apart or refuse to budge at all. Frustrating, right? That sticky, torn-bottom disaster is one of the most common baking headaches out there. The good news is that a silicone muffin pan can fix it for good. This bendy, non-stick tool releases your treats with a gentle push and skips the greasing drama entirely.
In this guide, you’ll learn How to Use Silicone Muffin Pan. We’ll walk through the supplies you need, a clear step-by-step process, and a few insider tricks that most home bakers overlook. Whether you’re baking cupcakes, egg bites, or savory muffins, you’ll finish knowing exactly how to bake, clean, and store your pan the right way. Let’s dig in.
What You’ll Need
Grab these items before you start. Having everything within reach keeps your baking calm and mess-free.
- A silicone muffin pan (6-cup or 12-cup)
- A sturdy baking sheet for support
- Your muffin or cupcake batter
- A cooking spray or a light brush of oil (optional)
- An ice cream scoop or measuring cup for even portions
- Oven mitts or heat-resistant gloves
- A cooling rack
- A soft sponge and dish soap for cleanup
Step-by-Step Guide on How to Use Silicone Muffin Pan
Work through these steps in order. After a bake or two, the whole routine will feel like second nature.
Step 1: Wash the Pan Before First Use
Give your new pan a warm, soapy wash before its first bake. Factory residue and dust can cling to fresh silicone, so this quick step matters. Rinse it well and dry it fully with a clean towel. A dry surface helps your batter set evenly and prevents any odd flavors. Skip this only if you enjoy tasting rubbery notes in your first batch.
Step 2: Place It on a Baking Sheet
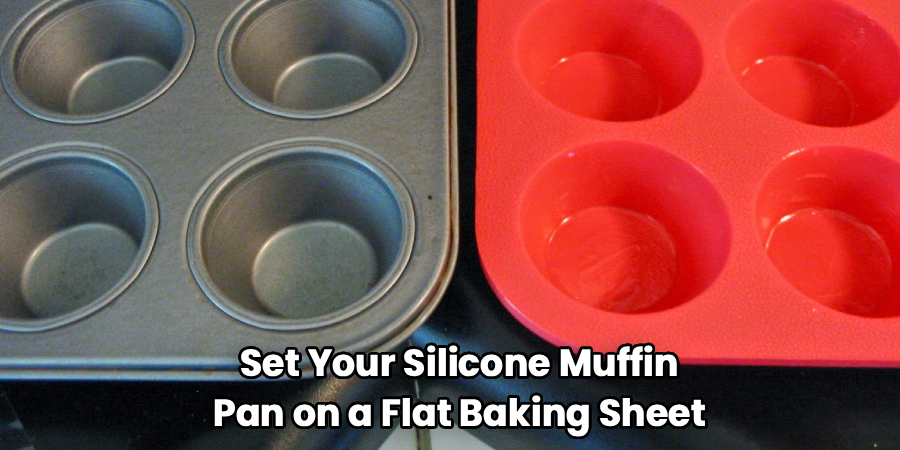
Set your silicone muffin pan on a flat baking sheet before you fill it. Silicone is floppy, and a full tray can bend and spill when you lift it. The rigid sheet gives you a stable base to carry into the oven. It also spreads heat more evenly across the bottoms. Trust me, this one habit saves you from batter sliding all over your oven floor.
Step 3: Grease Only If You Want To
Most quality silicone releases cleanly without any grease at all. Still, a light mist of cooking spray gives extra insurance for sticky recipes like cheesy egg bites. Use a thin coat, since too much oil can leave a greasy film on your muffins. Avoid butter here, as it can burn and stick more than you’d expect. For plain cupcakes, you can usually skip greasing completely.
Step 4: Fill Each Cup Evenly
Scoop your batter into each cup about two-thirds full. An ice cream scoop keeps portions consistent so every muffin bakes at the same rate. Overfilling leads to spillover and flat, spread-out tops. Underfilling gives you sad, shrunken results. Aim for that two-thirds mark and you’ll get bakery-worthy domes every time.
Step 5: Bake at the Right Temperature
Slide the whole setup into a preheated oven and follow your recipe’s temperature. Silicone heats a little differently than metal, so check for doneness a couple minutes early. A toothpick poked into the center should come out clean or with a few dry crumbs. Rotate the tray halfway through if your oven has hot spots. Keep an eye on the edges, since they can brown faster than the tops.
Step 6: Let the Muffins Cool in the Pan
Once baked, move the tray to a cooling rack and wait about ten minutes. Hot muffins are fragile and can tear if you rush them out. A short rest lets the crumb firm up and shrink slightly from the sides. This makes release almost effortless. Patience here is the secret to clean, whole muffins instead of a crumbly mess.
Step 7: Push From the Bottom to Release
Here’s where silicone shines. Gently push up on the bottom of each cup with your thumb, and the muffin pops right out. There’s no need to twist, bang, or dig with a knife. Work one cup at a time for the cleanest result. This flexible release is the whole reason people love baking with silicone in the first place.

Step 8: Clean the Pan Properly
Let the pan cool fully before washing to protect the material. Warm, soapy water and a soft sponge handle most jobs with ease. Skip abrasive scrubbers, which can scratch the surface over time. If any greasy residue lingers, soak it for a few minutes first. Most silicone bakeware is dishwasher-safe too, so check your product’s care notes.
Step 9: Store It Without Damage
Dry the pan completely before you put it away to prevent mildew. You can fold, roll, or stack silicone since it springs right back into shape. Store it flat if you have the drawer space, though. Keep it away from sharp knives or graters that could nick the surface. Treated well, a good pan lasts for years of happy baking.
Tips for Best Results
These extra pointers come from real time in the kitchen. They’ll help you get bakery-level results at home.
- Preheat fully every time. Silicone doesn’t conduct heat as fast as metal, so a properly heated oven helps your muffins rise evenly. Don’t rush the preheat light.
- Use a lighter batch when learning. If your recipe browns tops too fast, try lowering the temperature by 25°F. This gives the centers time to cook through without over-baking the crust.
- Fill empty cups with water. Baking a half batch? Add a splash of water to the empty cups. It keeps heat balanced and protects the empty spots from scorching.
- Skip the paper liners. Silicone releases so well that liners are usually unnecessary. Going liner-free saves money and gives your muffins a clean, smooth edge.
- Keep a dedicated pan for savory bakes. Silicone can absorb strong smells like garlic or onion over time. A separate pan for savory recipes keeps your sweet treats tasting fresh.
Frequently Asked Questions
Do I Need to Grease a Silicone Muffin Pan?
For most sweet recipes, no greasing is needed at all. The non-stick surface releases muffins with a simple push from the bottom. For sticky or cheesy recipes, a light mist of cooking spray adds peace of mind. Just avoid heavy coats of oil or butter, which can leave a greasy film.
Is Silicone Bakeware Safe to Use in the Oven?
Yes, food-grade silicone is designed for oven use and handles high heat well. Most pans are rated safe up to around 425°F, but always check your product’s label. Avoid placing it directly on a burner, stovetop flame, or under a broiler. Used as directed, it’s a safe and reliable choice for everyday baking.
Why Are My Muffins Not Browning on the Bottom?
Silicone insulates more than metal, so bottoms can stay pale. Placing the pan on a preheated baking sheet helps transfer more heat to the base. You can also bake a touch longer or on a lower oven rack. A little extra time usually gives you that golden bottom you want.
Can I Cut Food Directly in the Pan?
It’s best not to. Knives and other sharp tools can slice or scratch the silicone surface. Damaged spots collect food and lose their non-stick quality over time. Instead, remove your muffins first, then cut or slice them on a board.
How Do I Get Rid of Lingering Smells?
Soak the pan in warm water with a splash of vinegar or a spoonful of baking soda. Let it sit for about thirty minutes, then wash as usual. A run through the dishwasher can help too. For stubborn odors, a quick bake in an empty oven at low heat often clears them out.
Conclusion
Baking should feel fun, not like a battle with a stubborn tray. With the right steps, a silicone muffin pan gives you clean release, easy cleanup, and muffins that hold their shape every single time. Just remember the basics: support the pan on a sheet, fill each cup two-thirds full, cool before releasing, and push from the bottom.
If you haven’t picked one up yet, check out our recommended picks above to find the perfect fit for your kitchen. Ready to bake more? Browse our other how-to guides on the site for more simple, hands-on tips. Happy baking.
