
You walk up to that big metal frame with the barbell locked into two vertical rails, and you pause. Do you sit? Stand? How do you even unrack the bar? If you’ve ever felt a little lost staring at a smith machine, you’re in good company. Plenty of gym-goers skip it simply because nobody showed them the ropes.
Good news: it’s one of the friendliest pieces of equipment once you know the basics. In this guide, you’ll learn exactly how to use smith machine, a clear step-by-step walkthrough, and some insider tips to train smarter. We’ll also cover the questions people ask most. By the end, you’ll approach that frame with real confidence.
What You’ll Need
Before you load up and get going, gather a few essentials. Having these ready keeps your session smooth and safe.
- A pair of flat, stable shoes for solid footing during squats and presses
- A weightlifting belt if you’re going heavy on lower-body lifts
- Lifting gloves or chalk to keep your grip secure on the bar
- A water bottle and small towel to stay comfortable between sets
- Weight plates in a range of sizes for easy load adjustments
- A phone or notebook to log your sets, reps, and settings
- Comfortable, fitted clothing that won’t snag on the rails or hooks
- A spotter or your own awareness of the safety catches, just in case
Most gyms supply the machine and plates, so you’ll mainly bring your gear and your focus. Double-check the safety stops before your first rep.
Step-by-Step Guide on How to Use Smith Machine
Step 1: Inspect the Machine and Set the Safety Stops
Give the frame a quick once-over before you touch a plate. Check that the bar slides smoothly along the rails and that the hooks rotate freely. Then set the safety stops, those adjustable catches that stop the bar from dropping too low. Position them just below your lowest range of motion so they’ll catch the weight if you fail a rep. This one habit protects you when you’re training alone. Skipping it is the most common mistake beginners make.
Step 2: Adjust the Bar to the Right Starting Height
The bar should sit where you can reach it comfortably at the start of your lift. For squats, that’s roughly shoulder height so you can step under it easily. For a bench press, set it low enough to reach while lying down without straining. Take a moment to test the position with an empty bar first. Getting this right saves your shoulders and keeps each set consistent. A little setup now prevents awkward fumbling later.
Step 3: Load Your Plates Evenly
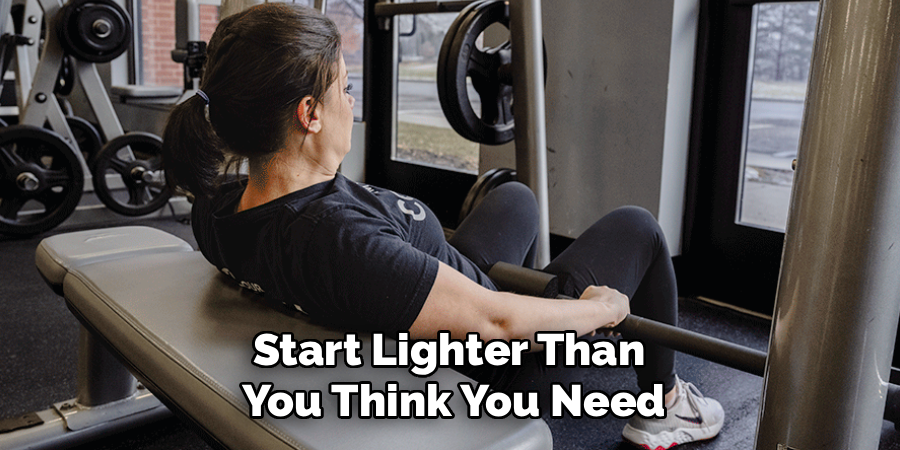
Slide your weight plates onto both ends of the bar, matching the load side to side. Even loading keeps the bar balanced and your movement clean. Start lighter than you think you need, since the guided path feels different from a free-weight barbell. Secure each side with a collar so nothing shifts mid-set. Uneven or unsecured plates can throw off your form and rattle your focus. When in doubt, add weight gradually across sets.
Step 4: Position Your Body Under or On the Bar
Now line yourself up with the bar’s fixed path. For squats, center the bar across your upper traps and set your feet slightly forward of the rails. For presses, plant your feet and settle your back against the bench. Your body should feel stacked and stable before you unrack. Take a breath and brace your core. This alignment is where good reps begin, so don’t rush it.
Step 5: Unrack the Bar With a Simple Twist
Here’s the part that trips up newcomers. Grip the bar, then rotate your wrists to twist the hooks off their pegs. On most machines, a small forward or backward turn releases the bar cleanly. Practice this motion once with light weight so it feels natural. When you learn how to use smith machine hooks smoothly, unracking becomes second nature. If the bar won’t budge, you’re likely twisting the wrong direction, so try the other way.
Step 6: Perform Your Rep With Controlled Motion
Lower the bar slowly along its track, matching your breathing to the movement. Because the rails guide the path, you can focus fully on your target muscles instead of balancing the weight. Keep your reps smooth and avoid bouncing at the bottom. Drive back up with steady power, exhaling as you push. Aim for full control rather than speed. That guided path is your best friend for dialing in form and feeling each muscle work.
Step 7: Rack the Bar Safely Between Sets
When you finish a set, twist the bar back into the nearest hooks to lock it. Make sure both sides catch before you let go, since a half-hooked bar can slip. Pause here to check your form notes or catch your breath. If you’re mid-workout and want to reposition, use the safety stops as a resting shelf. Racking with intention keeps every set clean and safe. Never let go until you feel the bar settle.
Step 8: Adjust and Progress Between Exercises
The beauty of this frame is how quickly you can switch moves. Slide the bar up for shoulder presses, down for bent rows, or reset for lunges. Change your plates and bar height to match each exercise. Log your settings so you can repeat them next time. Small, steady increases in weight build real strength over the weeks. Treat each session as a chance to nudge your numbers forward.
Step 9: Wipe Down and Reset the Machine
Finish by stripping your plates and returning them to the rack. Wipe the bar and bench so the next person finds it clean. Reset the bar to a neutral height and leave the safety stops in a sensible spot. This courtesy keeps the gym running smoothly for everyone. It also gives you a moment to reflect on your session before you head out. Good gym etiquette is part of good training.
Tips for Best Results
- Use the fixed path to master form. Since the bar moves in a straight line, it’s perfect for grooving proper technique on squats and presses before you graduate to free weights.
- Position your feet thoughtfully. For guided squats, placing your feet slightly forward reduces knee strain and shifts more work to your glutes and hamstrings. Experiment to find your sweet spot.
- Don’t ego-lift. The guided track can make heavy loads feel easier than they are. Keep your reps honest and your range full so you actually build strength, not just move weight.
- Try single-side and tempo work. Slow negatives, pauses, and split-stance variations turn this simple frame into a versatile strength tool. These tweaks add serious challenge without extra weight.
- Always reset the safety catches per exercise. A stop that’s perfect for a bench press sits far too low for a shoulder press. Adjust them every time you change movements.
Frequently Asked Questions
Is It Safe to Use a Smith Machine Without a Spotter?
Yes, and that’s one of its biggest perks. The safety stops act like a built-in spotter, catching the bar if you can’t finish a rep. Just set those catches at the right height before every exercise so they’re ready when you need them. That said, staying aware of your limits and racking with a controlled twist keeps you even safer.
What Muscles Can I Train on This Machine?
Quite a lot, actually. You can hit your legs with squats and lunges, your chest with bench presses, your shoulders with overhead presses, and your back with rows. The guided bar lets you isolate specific muscles because you’re not spending energy balancing the load. Just adjust the bar height and your body position to target each area.
How Is It Different From a Free-Weight Barbell?
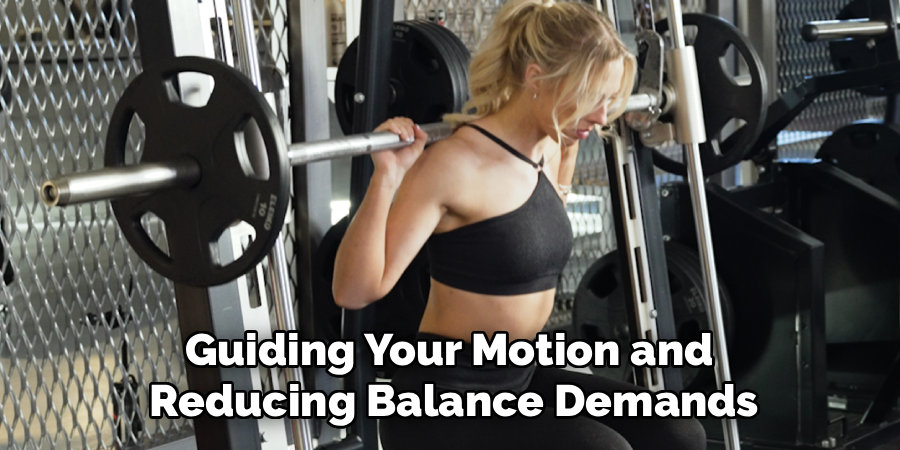
The main difference is the fixed path. A regular barbell moves freely in any direction, so you recruit more stabilizer muscles to control it. The smith machine locks the bar into vertical rails, guiding your motion and reducing balance demands. That makes it great for beginners, targeted muscle work, and training solo, though many lifters use both for variety.
Can Beginners Learn Squats on This Equipment?
Absolutely, and many trainers recommend it as a starting point. The guided track helps you feel the correct up-and-down pattern without worrying about tipping forward or back. Start with an empty bar to learn the motion, then add weight slowly as your confidence grows. Once your form feels solid, you can transition toward free-weight squats.
Why Does the Bar Feel Lighter Than Expected?
The rails carry some of the balancing work, so a given weight can feel easier than the same load on a free barbell. This is normal and nothing to worry about. Just don’t let it tempt you into loading up beyond what your form can handle. Focus on full range of motion and controlled reps rather than chasing big numbers.
How Do I Unrack the Bar Correctly?
Grip the bar firmly, then rotate your wrists to lift the hooks off their pegs. A small twist forward or backward releases it, depending on your machine. If it won’t move, you’re probably twisting the wrong way, so simply try the opposite direction. Practicing this with a light load a couple of times makes it feel automatic.
Conclusion
Learning how to use smith machine equipment turns an intimidating frame into one of the most reliable tools in the gym. Remember the essentials: set your safety stops, load evenly, unrack with a smooth twist, and keep every rep controlled.
With that guided path on your side, you can build strength and dial in your form with real confidence. If you’re still shopping for home gym gear, check out our recommended picks above. Ready for more? Explore our other guides for friendly, practical training tips you can use today.
