
That brand-new Weber sits proudly on your patio, and yet the thought of firing it up makes your palms a little sweaty. Maybe you inherited one from a neighbor, or you finally treated yourself after years of sad, indoor cooking. Either way, you want juicy burgers and perfectly seared steaks without the guesswork. Learning how to use Weber grill setups the right way turns that nervous energy into pure backyard confidence.
In this guide, you’ll learn everything from lighting to cleanup. We’ll cover the gear you need, walk through each step, and share pro tips that separate charred disasters from crowd-pleasing meals. Whether you own a classic charcoal kettle or a shiny gas model, you’ll feel ready to grill like a seasoned pitmaster by the end. Let’s get that fire going.
What You’ll Need
Grab these items before you start. A little prep keeps the whole cookout smooth and stress-free.
- Your Weber grill (charcoal kettle or gas model)
- Charcoal briquettes or a full propane tank, depending on your setup
- A chimney starter for fast, even charcoal lighting
- Lighter cubes or newspaper to get the coals going
- A long-handled lighter or matches
- A grill brush with sturdy bristles for cleaning grates
- Long tongs and a spatula to flip and move food safely
- An instant-read meat thermometer for perfect doneness
- Heat-resistant gloves to protect your hands
- Cooking oil to season the grates
- A small bucket for spent ashes (charcoal models)
Step-by-Step Guide on How to Use Weber Grill
Step 1: Choose Your Fuel and Setup
Start by deciding which fuel your grill runs on. Charcoal gives you that smoky flavor, while gas offers speed and control. If you own a kettle, load quality briquettes into a chimney starter for the easiest lighting. Gas owners just need to check that the propane tank has enough fuel before cooking. Knowing your setup shapes every step that follows, so take a moment to get familiar with your model’s parts.
Step 2: Light the Grill Safely
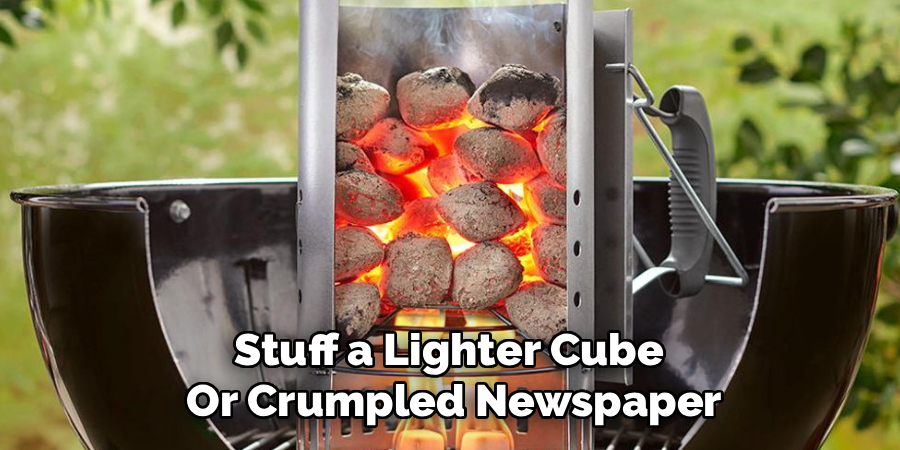
For charcoal, stuff a lighter cube or crumpled newspaper under a filled chimney starter and light it. Wait until the top coals glow orange and turn slightly gray with ash, usually 15 to 20 minutes. For gas, open the lid first, turn on the propane, then click the ignition. Never close the lid while lighting a gas grill, since trapped fumes can cause a dangerous flare-up. Always keep your face clear of the cooking area when the flame catches.
Step 3: Arrange Your Coals or Set Your Burners
Once your charcoal is ready, pour the coals in and arrange them for the meal you’re making. Spread them evenly for burgers, or pile them on one side to create direct and indirect zones. That two-zone method lets you sear over high heat and finish delicate foods gently. Gas users set burners to high on one side and low on the other for the same effect. This simple layout gives you way more control over every cook.
Step 4: Preheat and Clean the Grates
Close the lid and let the grill heat up for 10 to 15 minutes. A hot grate sears food beautifully and stops it from sticking. While it’s warming, scrub the grates with your grill brush to remove old residue. Cold grates and leftover gunk are the top reasons food tears when you flip it. Once clean and screaming hot, you’re set for the fun part.
Step 5: Oil the Grates
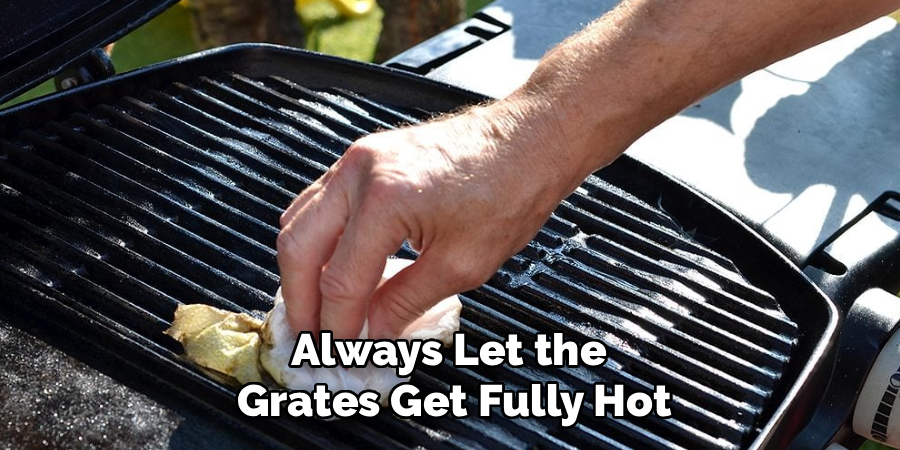
Fold a paper towel into a small pad and dip it in cooking oil. Grab it with your tongs and wipe it across the hot grates in a few quick passes. This creates a slick, nonstick surface that gives you those gorgeous grill marks. Use just a light coat, since too much oil can flare up and burn. A properly oiled grate makes flipping smooth and cleanup easier later.
Step 6: Place and Cook Your Food
Lay your food down over the right heat zone and resist the urge to fiddle. Let it sear undisturbed so it develops a crust and releases naturally. Flip only once when the food lifts easily and shows deep grill marks. Keep the lid closed between checks to trap heat and cook everything evenly. Constant peeking drops the temperature and stretches your cook time way longer than needed.
Step 7: Check the Temperature
Guessing doneness by eye is how good steaks turn into hockey pucks. Slide an instant-read thermometer into the thickest part of the meat for an accurate reading. Aim for 165°F for chicken, 145°F for pork, and your preferred range for beef. Pull the food a few degrees early, since it keeps cooking while it rests. This one habit will save more meals than any other trick you learn.
Step 8: Rest and Serve
Move your finished food to a clean plate and let it rest for five to ten minutes. Resting lets the juices redistribute so every bite stays moist instead of running out on the cutting board. Tent larger cuts loosely with foil to hold the warmth. Meanwhile, you can toast buns or warm sides over the cooling grill. Now knowing how to use Weber grill techniques, you’ll serve food that tastes like it came from a steakhouse.
Step 9: Shut Down and Clean the Grill
For gas, turn off the burners first, then close the propane tank valve. For charcoal, close the lid and vents to smother the coals safely. Once everything cools, scrub the grates again while there’s still a bit of warmth to loosen debris. Empty the ash catcher on charcoal models so it doesn’t clog the vents. A quick cleanup after each cookout keeps your grill performing like new for years.
Tips for Best Results
- Master the two-zone fire. Keeping one side hot and one side cool gives you a safe spot to move food when flare-ups happen. It’s the single best skill for cooking thick cuts without burning the outside.
- Control heat with the vents. On a charcoal kettle, the bottom and top vents act like a throttle. Open them wider for more heat and close them slightly to cool things down. Fresh air feeds the fire, so use it wisely.
- Keep the lid closed. Every time you lift the lid, you lose heat and add minutes to your cook. Trust your timing and thermometer instead of peeking constantly.
- Season your grates before storing. A light wipe of oil after cleaning prevents rust and keeps the surface ready for next time. This tiny step extends the life of your grill dramatically.
- Prep everything before you light up. Grilling moves fast once food hits the grate. Have your tools, sauces, and platters ready so you’re never scrambling mid-cook.
Frequently Asked Questions
How Long Does It Take to Preheat a Weber Grill?
A gas Weber usually preheats in about 10 to 15 minutes with the lid closed. Charcoal takes a little longer, since you need 15 to 20 minutes for the coals to ash over in the chimney starter. Always let the grates get fully hot before adding food to prevent sticking. Rushing this step is the most common reason beginners struggle with torn burgers.
Can I Use a Gas Weber Grill in the Rain?
Yes, you can grill in light rain as long as you stay safe and keep the lid closed. Position the grill in an open area away from walls, overhangs, and anything flammable. Never grill indoors or in an enclosed space, since carbon monoxide buildup is deadly. If lightning starts, head inside and finish cooking another time.
Why Does My Food Keep Sticking to the Grates?
Sticking usually comes from grates that are too cold, dirty, or unoiled. Always preheat until the surface is screaming hot, scrub off old residue, then wipe on a light coat of oil. Give food time to sear so it releases naturally instead of forcing an early flip. Once you build that habit, sticking becomes a rare problem.
Is It Safe to Leave the Propane Tank Connected?
You can leave the tank connected between cookouts, but always close the tank valve when you finish. Shutting the valve stops any slow leaks and keeps pressure off the hose and fittings. Store the tank upright and outdoors, never inside your home or garage. Checking the connections for leaks with soapy water now and then adds an extra layer of safety.
How Do I Add Smoky Flavor to My Grilling?
Toss a handful of soaked wood chips or a few chunks onto hot charcoal for rich, smoky flavor. For a gas grill, place the chips in a foil packet with holes poked in the top and set it over a burner. Keep the lid closed so the smoke surrounds your food. Start with a small amount, since too much smoke can turn bitter fast.
What’s the Best Way to Control Temperature on a Charcoal Weber?
The vents are your throttle for managing heat on a charcoal kettle. Open the top and bottom vents wide to raise the temperature, and close them partway to cool the fire down. The amount of charcoal you use also matters, so add more coals for longer, hotter cooks. With a little practice, you’ll dial in the perfect heat every time.
Conclusion
Great grilling comes down to a few simple habits: preheat fully, build a two-zone fire, and trust your thermometer instead of guessing. Once you nail those basics, learning how to use Weber grill setups feels like second nature, and you’ll turn out juicy, flavorful meals every weekend.
With a bit of practice, that once-intimidating grill becomes the heart of your backyard gatherings. If you haven’t picked up the right model or tools yet, check out our recommended picks above. Hungry for more? Browse our other grilling and outdoor cooking guides for tips you can use today.
