
You just finished sewing a cute little baby bib, and now it needs a closure. A zipper feels like overkill. Buttons take forever to sew and slip open too easily. That’s exactly where metal snaps shine. Learning how to attach metal snaps with pliers gives you a fast, secure closure that clicks shut and holds tight through the wash. No hammer, no anvil, no banging on the kitchen table while everyone stares.
In this guide, you’ll learn what supplies to gather, how to set each piece step by step, and the insider tricks that keep your snaps from popping loose. We’ll also tackle the questions beginners ask most. By the end, you’ll add professional-looking fasteners to any project with confidence.
What You’ll Need
Gather everything before you start. A little prep keeps the whole process smooth and saves you from hunting for a stray piece mid-project. Here’s your checklist:
- Snap pliers — also called a snap setter or snap plier tool
- Metal snaps — prong snaps or ring snaps in your chosen size
- The correct dies — small attachments that match your snap size
- Fabric or leather — your project material
- Fabric marker or chalk — for marking snap placement
- A ruler or measuring tape — for even spacing
- Awl or hole punch — needed for thicker materials
- Scrap fabric — for a practice run
- Interfacing or a fabric patch (optional) — to reinforce thin fabric
- Good lighting — so you can line everything up cleanly
Keep a small dish nearby for the snap pieces. Those tiny caps and sockets love to roll off the table and hide.
Step-by-Step Guide on How to Attach Metal Snaps with Pliers
Step 1: Understand the Four Snap Pieces
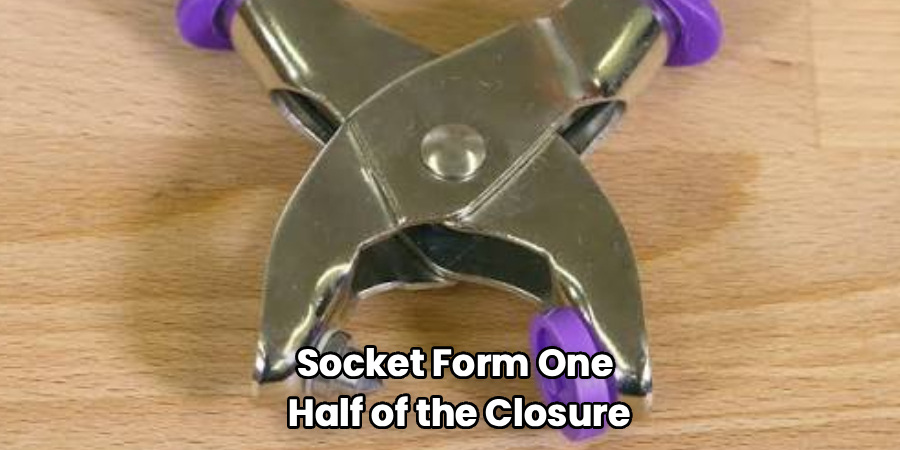
Before you press anything, get to know your snap. A standard prong snap has four parts: the cap, the socket, the stud, and the post. The cap and socket form one half of the closure, while the stud and post form the other. When the two halves meet, they click together and hold.
Lay them out and see how they pair up. The cap always shows on the outside of your project. Mixing up which piece goes where is the most common beginner slip. A quick sort now saves frustration later.
Step 2: Load the Right Dies into Your Pliers
Your snap pliers come with interchangeable dies that cradle each snap piece during setting. Match the die to the exact size and type of your metal fasteners. Using the wrong die can crush the snap or leave it loosely set. Most snap setter kits label the dies or include a size chart.
Snap the dies firmly into place before you begin. Give them a gentle wiggle to make sure they’re seated. A loose die shifts under pressure and can dent your snap. Take ten seconds here—it pays off.
Step 3: Mark Your Snap Placement
Decide exactly where each snap will sit. Use a fabric marker or chalk to mark the center point on both layers of material. Measure twice so the two halves line up perfectly when closed. Even a small offset means your closure won’t sit flat.
For projects like bags or jackets, use a ruler to space multiple snaps evenly. Line them up along the edge and mark each one before setting any. Guessing your spacing usually leads to a crooked row you’ll wish you could redo.
Step 4: Prepare the Fabric and Make a Hole If Needed
Thin fabrics let prongs pierce straight through, but thicker or tightly woven materials need help. Use an awl or hole punch to create a small opening at your mark. For ring snaps or leather, a punched hole gives the post a clean path. Keep the hole snug—too big and the snap wobbles.
Reinforce delicate fabric with a scrap of interfacing behind the mark. This stops the snap from tearing loose over time. Skipping reinforcement is why so many snaps rip out of lightweight cotton after a few uses.
Step 5: Set the First Half (Cap and Socket)
Push the cap’s prongs through the fabric from the outside, so the smooth cap shows on the front. Slide the socket over the prongs on the back side. Place the assembled pieces into the matching dies of your pliers, with the cap resting in the lower die.
Line everything up straight before you squeeze. A tilted setup crimps the prongs unevenly and creates a weak snap. Double-check that the socket faces the right way—it should open toward the stud half it’ll eventually meet.
Step 6: Squeeze the Pliers Firmly and Evenly
Now comes the satisfying part. Close the pliers with steady, firm pressure until the handles meet or stop. Hold for a second, then release. The prongs should curl neatly into the socket, locking the two pieces together.
Don’t tap or pulse the pliers repeatedly—one confident squeeze works better than several timid ones. If the snap still feels loose, you may need more pressure or a better die match. When you attach metal snaps with pliers, that solid, single press is what gives you a fastener that lasts.
Step 7: Set the Second Half (Stud and Post)
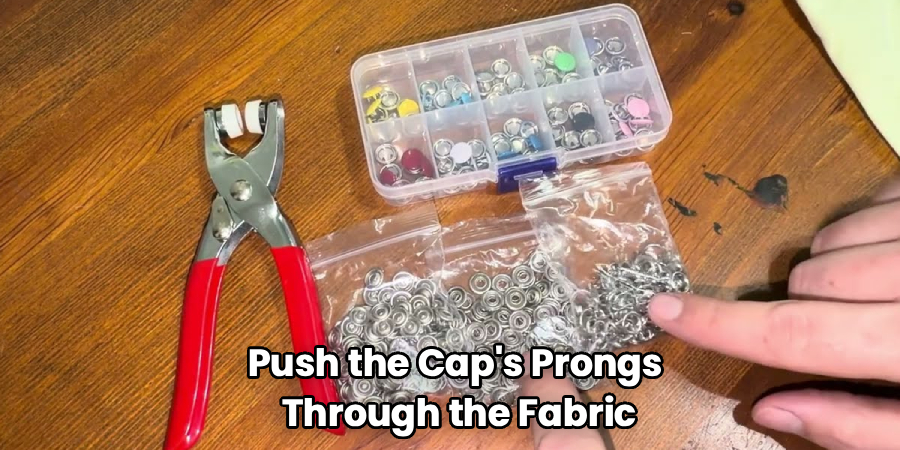
Repeat the process for the other half of your closure. Push the post through the second piece of fabric from the back, then cap it with the stud on the front—or follow your snap style’s layout. Place both pieces into the correct dies, keeping the setup level.
Squeeze firmly, just like before. The key is consistency: matching pressure on both halves means the snap opens and closes smoothly. A stud set too loose will pop apart, while one set unevenly may refuse to click at all.
Step 8: Test the Snap Connection
Once both halves are set, bring them together and press. You should feel a clean, satisfying click as they lock. Pull gently to confirm the closure holds without popping open. Then open it a few times to check the action feels smooth.
If the snap won’t close, the halves may be misaligned or one piece set crooked. If it pops open too easily, the prongs likely didn’t curl tight enough. Testing now, before you finish the project, lets you fix issues while it’s still easy.
Step 9: Inspect and Reinforce Your Work
Give each snap a careful look. Check that the cap sits flush against the fabric with no gaps, and that the back pieces lie flat. Run your finger over the edges to feel for sharp or lifted prongs. A snap that’s set clean looks tidy and wears comfortably.
For high-stress items like jackets or diaper covers, tug firmly to stress-test the hold. Add a reinforcing patch behind any snap that feels shaky. This final check separates a snap that lasts years from one that fails after a month.
Tips for Best Results
- Always practice on a scrap first. Set a test snap on the same fabric you’ll use for your project. This tells you exactly how much pressure your material needs and whether you’ve matched the right dies before you touch the real piece.
- Reinforce thin or stretchy fabric. A small square of interfacing behind each snap stops the prongs from tearing out. This one trick is the difference between sewing snaps that hold for years and ones that rip loose after a few wears.
- Match your snap size to your project. Lightweight size 16 snaps suit baby clothes and thin cotton, while heavier sizes handle bags and outerwear. Using an oversized snap on delicate fabric puts too much stress on the material.
- Keep your dies clean and dry. A speck of grit or a bit of rust on a die can dent your snap or set it crooked. Wipe them down after use and store your snap plier tool somewhere dry.
- Line up multiple snaps before setting any. Mark and dry-fit an entire row first. This catches spacing errors while you can still fix them, so your finished closure sits straight and even.
Frequently Asked Questions
What Kind of Pliers Do I Need to Set Metal Snaps?
You’ll want a dedicated snap plier tool, often sold as a snap setter, with interchangeable dies. Regular household pliers won’t cradle the snap pieces correctly and can crush or bend them. The right dies match your snap size and type, cradling each part while you press. Many kits bundle the pliers, dies, and a starter set of snaps together.
Can I Attach Metal Snaps with Pliers on Leather?
Yes, and pliers work beautifully on leather with a little prep. Punch a clean hole first, since prongs can’t pierce thick hide on their own. Choose a sturdy snap size rated for heavier materials so the closure holds under stress. Test on a leather scrap to dial in your hole size and pressure before setting the real piece.
Why Do My Snaps Keep Popping Open?
Loose snaps usually come down to two causes. Either the prongs didn’t curl tight enough during setting, or the two halves aren’t aligned. Check that you squeezed with firm, even pressure and used the correct dies. If the fabric is thin, add reinforcement so the snap has something solid to grip.
What’s the Difference Between Prong Snaps and Ring Snaps?
Prong snaps have little teeth that pierce through fabric and curl into the socket, making them great for thin materials without punching holes. Ring snaps use a smooth post that needs a pre-punched hole, and they hold especially well on thicker fabrics and leather. Both are reliable metal fasteners. Your choice depends on your material and the look you want.
Can I Reuse a Snap If I Set It Wrong?
Once prongs curl into place, a snap is tough to remove without damaging it, so reuse is rarely worth it. It’s better to carefully cut the bad snap off and set a fresh one. This is exactly why practicing on scrap fabric first matters so much. Buy a few extra snaps so a mistake doesn’t stall your whole project.
Is It Safe to Attach Metal Snaps to Baby Clothes?
Absolutely, as long as you set them securely and test the hold. Use a smaller snap size suited to lightweight fabric, and reinforce the material behind each one. After setting, tug firmly to confirm no piece can work loose, since small parts pose a hazard for little ones. A properly set snap stays put through countless washes and wears.
Conclusion
Setting snaps is one of those skills that feels tricky for about five minutes, then becomes second nature. Match your dies, mark your placement, and give the pliers one firm, confident squeeze. With a little practice on scrap fabric, you’ll attach metal snaps with pliers like a pro and add clean, durable closures to any project. If you haven’t picked up a quality snap plier kit yet, check out our recommended picks above. Ready for your next build? Explore our other tool guides on the site and keep growing your skills.
