
You reach up to trim that stubborn branch, squeeze the trigger, and the saw just chews instead of slicing. The cuts turn ragged, the motor bogs down, and sawdust turns into fine powder. That’s your tool begging for attention. When you learn to sharpen a pole saw blade, you bring that clean, effortless bite back in minutes.
In this guide, I’ll walk you through the whole process from start to finish. You’ll learn how to sharpen a pole saw blade, how to file each tooth at the right angle, and how to check your depth gauges. We’ll also cover insider tips and answer the questions folks ask most. By the end, you’ll cut through limbs like the saw was brand new. Let’s get that edge back.
What You’ll Need
Before you start, round up your supplies. Having everything ready saves you from stopping mid-job to hunt for a file.
- A round chainsaw file that matches your chain pitch (usually 5/32″, 3/16″, or 7/32″)
- A flat file for the depth gauges
- A filing guide or file holder to hold the correct angle
- A depth gauge tool
- A vise or clamp to hold the bar steady
- Work gloves to protect your hands
- Safety glasses
- A stiff brush or rag for cleaning
- A marker for tracking your starting tooth
- Bar and chain oil for finishing up
Keep everything on a flat workbench. Good lighting helps too, since you need to see each cutting tooth clearly.
Step-by-Step Guide on How to Sharpen a Pole Saw Blade
Ready to bring that edge back? Follow these steps in order. Take your time on each one, because rushing leads to uneven teeth and poor cuts.
Step 1: Secure the Pole Saw Safely
Start by shutting off the power completely. Unplug an electric model, pull the battery on a cordless unit, or disconnect the spark plug on a gas saw. This single step prevents an accidental start while your fingers sit near the chain. Next, clamp the bar in a vise or steady the saw against a solid surface. A firm hold keeps the pole saw chain from shifting while you file. Never skip this setup, since a wobbling blade makes clean sharpening nearly impossible.
Step 2: Clean the Chain and Inspect the Teeth
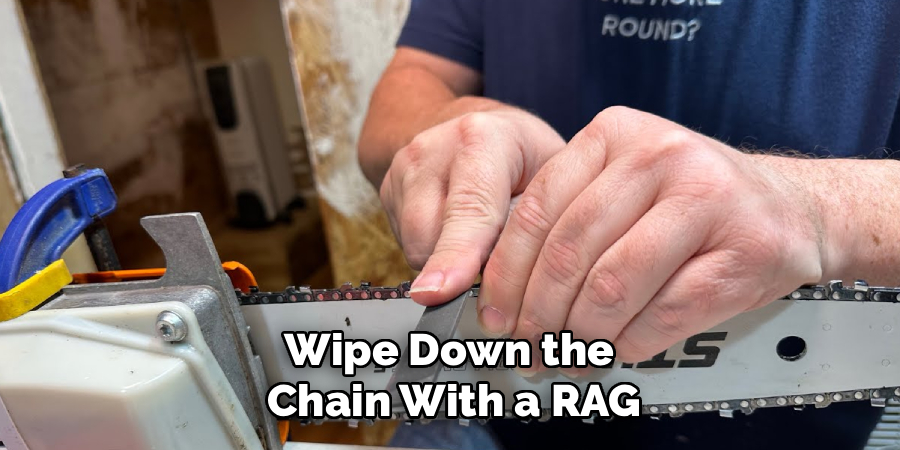
Wipe down the chain with a rag to clear away sap, dirt, and old oil buildup. A clean surface lets you see each tooth and spot problems fast. Look closely for cracks, chips, or teeth worn down more than the rest. If you find a badly damaged link, mark it so you know to file it evenly. Check the chain tension too, since a loose chain flops around and throws off your angles. This quick inspection tells you exactly what each tooth needs.
Step 3: Choose the Right File Size
Matching your file to the chain makes all the difference. Check your saw’s manual or the packaging for the correct round file diameter. Common sizes run 5/32″, 3/16″, and 7/32″, and using the wrong one ruins your tooth shape. A file that’s too small digs too deep, while one too large barely touches the cutting edge. When in doubt, measure the chain pitch and match it to the recommended file. The right file makes file sharpening smooth and consistent.
Step 4: Mark Your Starting Tooth
Grab your marker and dab the first tooth you plan to sharpen. This little dot keeps you from losing track and double-filing the same edge. Circling the entire chain without a marker leads to uneven teeth and a saw that pulls to one side. Start with the shortest or most worn tooth, then match every other tooth to it. Consistency here is the secret to a chain that cuts straight and true. Trust me, this habit saves plenty of confusion later.
Step 5: File the Cutting Teeth at the Correct Angle
Set your file into the notch of the first tooth, resting it against the cutting edge. Most chains use a filing angle of about 25 to 30 degrees, and a file holder marks this line for you. Push the file forward in smooth, even strokes, lifting it on the return. Count your strokes, then give every tooth the same number for a balanced edge. Keep the file level and follow the tooth angle stamped on the guide. Consistent pressure gives each saw tooth the same sharp bite.
Step 6: Sharpen the Teeth on the Other Side
Once you circle back to your marked tooth, flip the saw or move to the opposite side. The teeth alternate direction, so half face one way and half the other. File these at the same angle and with the same stroke count you used before. Standing on the other side helps you keep a comfortable, steady position. Matching both sides keeps the chain cutting evenly instead of veering off. Uneven sides are the top reason a saw wanders through a branch.
Step 7: Check and Lower the Depth Gauges
The depth gauge is the little bump in front of each cutting tooth. It controls how deep the tooth bites into the wood. After several sharpenings, teeth get shorter but the gauges stay tall, which limits cutting efficiency. Lay your depth gauge tool across the chain and file down any gauge sticking above it. Use your flat file for this, keeping the top slightly rounded to match the original shape. Don’t overdo it, since gauges filed too low cause rough, grabby cuts.
Step 8: Test the Sharpness and Reassemble
Run your gloved finger lightly along the teeth to feel for a crisp, sharp edge. The teeth should catch slightly instead of sliding smooth. Reconnect the power source, whether that’s the battery, plug, or spark plug. Add a few drops of bar and chain oil to keep everything running smoothly. Make a quick test cut on a spare branch to confirm the chain pulls itself into the wood. Clean, curly shavings mean you nailed it, while powder means you need another pass.

Tips for Best Results
Want to file like a seasoned pro? These insider tricks go beyond the basics and save you real headaches.
- Sharpen little and often. A few strokes after every couple of uses beats waiting until the chain is bone dull. Regular touch-ups keep sharpening quick and your cuts sharp all season.
- Count every stroke. Giving each tooth the exact same number of file passes keeps the chain balanced. An unbalanced chain wears faster and pulls to one side while you cut.
- Watch your chips. Fine sawdust means dull teeth, while long, curly shavings mean a healthy edge. Let the shavings tell you when it’s time for a chainsaw file touch-up.
- Don’t forget the depth gauges. Folks sharpen teeth for years and never touch the gauges, then wonder why cutting slows down. Check them every third sharpening for the best cutting efficiency.
- Replace a stretched chain. If teeth get short and stubby or links feel loose, a new chain beats endless filing. A worn-out chain simply won’t hold an edge no matter how well you file.
Frequently Asked Questions
How Often Should I Sharpen My Pole Saw Chain?
It depends on how much you cut and what kind of wood you tackle. As a rule, give the chain a few strokes after every two or three uses. If you notice fine sawdust, ragged cuts, or extra effort, it’s time to file. Regular light sharpening keeps the job fast and your saw teeth in top shape.
Can I Sharpen the Blade Without Removing It From the Saw?
Yes, and most people file the chain right on the bar. Just make sure the power source is disconnected and the bar sits clamped in a vise. Filing in place keeps the chain steady and saves you the trouble of reassembly. Only remove the chain if it needs a deep cleaning or a full replacement.
What Angle Should I File the Teeth At?
Most pole saw chains sharpen best at a filing angle between 25 and 30 degrees. Your exact number depends on the chain, so check the manual or the mark stamped on the tooth. A file holder or guide keeps this tooth angle consistent across every cutter. Sticking to the right angle gives you clean cuts and a chain that lasts longer.
Is It Safe to Sharpen a Pole Saw Blade Myself?
It’s perfectly safe when you take the right precautions. Always disconnect the power, wear gloves and safety glasses, and clamp the bar firmly. Keep your fingers clear of the cutting edge and file with steady, controlled strokes. With a little care, home sharpening is a simple, satisfying job you’ll master fast.
Why Does My Saw Still Cut Poorly After Sharpening?
The most common culprit is tall depth gauges that stop the teeth from biting. If you only file the teeth and never lower the gauges, cutting slows over time. Uneven strokes between the two sides can also make the saw wander. Recheck your gauges and stroke count, and your cutting efficiency should bounce right back.
Do I Need a Special File for a Pole Saw Chain?
You need a round chainsaw file sized to match your chain pitch. Common diameters include 5/32″, 3/16″, and 7/32″, so check before you buy. A flat file handles the depth gauges, and a guide keeps your angles steady. Using the correct file size protects the tooth shape and makes file sharpening easy.
Conclusion
Bringing that bite back is easier than it looks. Once you know how to sharpen a pole saw blade, you’ll spend less time struggling and more time cutting clean. Just remember to match your file, keep your angles steady, and check those depth gauges. A few minutes of care keeps every branch falling with ease.
If you haven’t grabbed a quality file kit yet, check out our picks in the recommended products section above. Ready to keep your gear in top shape? Browse our other DIY guides for more hands-on tips and simple project walkthroughs.
