
You’ve got two pieces of metal that need to join together, but there’s no way to reach the back side with a wrench. Welding feels like overkill, and screws just won’t hold. This is exactly how to use a riveting tool saves the day. With a few simple squeezes, you can create a permanent, sturdy connection that lasts for years.
Whether you’re fixing a rain gutter, building a project, or repairing a metal bracket, this handy device makes fast work of tough jobs. In this guide, you’ll learn what these tools do, what supplies you’ll need, and a clear step-by-step process for using one. By the end, you’ll fasten metal like a seasoned pro.
What Is a Riveting Tool?
A riveting tool, often called a rivet gun or pop riveter, is a hand-operated device that installs blind rivets to join two materials. It grips the stem of a rivet, then pulls it tight until the rivet expands and snaps off, locking your pieces together. The best part? You only need access to one side of your workpiece, which makes it ideal for tight spots. It’s a favorite for metalwork, automotive repairs, and countless DIY projects around the home.
What You’ll Need
Before you get started, gather these basics so everything is within reach:
- A hand riveter (or a heavy-duty lever style for bigger jobs)
- Blind rivets sized to match your material thickness
- A power drill with matching drill bits
- A measuring tape or ruler
- A permanent marker or pencil
- Safety glasses
- Work gloves
- Clamps to hold your pieces steady
- A metal file or deburring tool
- The two materials you plan to join
Having your gear laid out keeps the whole process smooth and stress-free.
Step-by-Step Guide on How to Use a Riveting Tool
Step 1: Choose the Right Rivet and Nose Piece
Start by picking a rivet that suits your project. Rivets come in different diameters and grip ranges, so match them to the thickness of the materials you’re joining. Check the packaging for the grip range, which tells you how thick a stack the rivet can handle. Then attach the matching nose piece to your riveter, since each rivet size uses a specific tip. Most riveters include several interchangeable nose pieces stored in the handle. Using the wrong size is a common mistake that leads to weak joints or jammed tools.
Step 2: Mark and Measure Your Holes
Line up your two pieces exactly how you want them to sit once joined. Use clamps to hold everything firmly in place so nothing shifts. Grab your marker and dot each spot where a rivet will go. Space your marks evenly for a clean, professional look and balanced strength. If you’re joining a long seam, plan your spacing before drilling. Rushing this step often results in crooked holes that throw off your whole project.
Step 3: Drill Your Pilot Holes
Fit your drill with a bit that matches the diameter of your rivet body. Drilling too small means the rivet won’t fit, while too large leaves a loose, wobbly connection. Keep your drill straight and steady as you bore through both layers at once. Apply gentle, even pressure and let the bit do the work. Drilling both pieces together ensures the holes line up perfectly. Slow down near the end so you don’t blow out a jagged exit hole.
Step 4: Clean Up the Holes
Once you’ve drilled, you’ll likely notice rough edges or metal burrs around each hole. Run a metal file or deburring tool over these spots to smooth them out. Clean holes let the rivet seat properly and prevent sharp edges from cutting your hands. This quick step also helps your finished joint sit flush and tight. Wipe away any metal shavings before moving on. Skipping this can leave debris trapped in the joint, weakening your connection over time.
Step 5: Load the Rivet Into the Tool
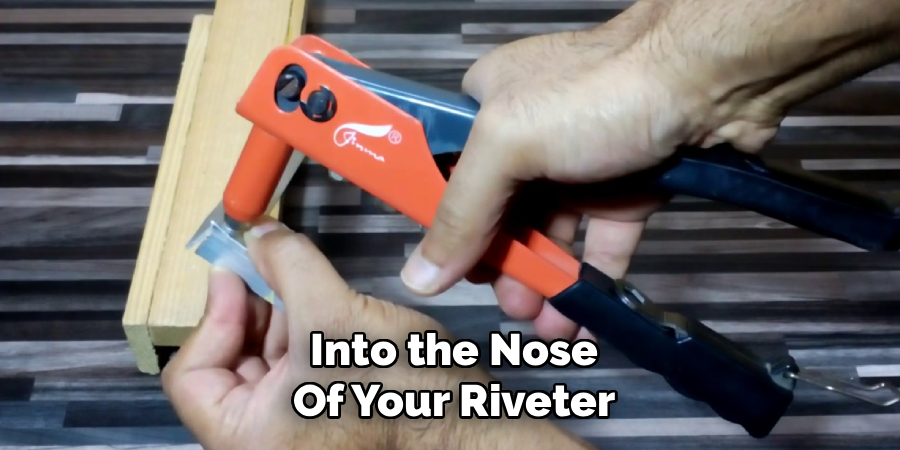
Slide the long stem, called the mandrel, into the nose of your riveter. The rivet body should rest snugly against the tip while the stem points back toward the handle. Give it a light tug to confirm it’s seated and won’t fall out. A properly loaded rivet stays put even when you tip the tool downward. If it feels loose, double-check that your nose piece matches the rivet size. This small habit saves you from dropping rivets mid-job.
Step 6: Insert the Rivet Into the Hole
Push the rivet body all the way into the drilled hole until it stops. The head of the rivet should sit flat against the surface of your top piece. Hold the tool perpendicular to your work so the rivet goes in straight. If it tilts, your joint may end up loose or uneven. Press firmly to keep the pieces snug against each other. A tight fit here makes for a stronger, cleaner result.
Step 7: Squeeze the Handles to Set the Rivet
Now comes the satisfying part. Squeeze the handles of the tool firmly and steadily. As you pump, the mandrel pulls back and forces the rivet to expand on the far side. Keep squeezing until you hear and feel a distinct snap, which means the stem has broken off. You may need two or three pumps for thicker rivets. Don’t yank in a hurry, since smooth, full strokes give you the best hold.
Step 8: Remove and Discard the Broken Mandrel
After the snap, a small piece of the mandrel stays lodged in the tool’s nose. Tip the riveter downward and the broken stem should slide right out. Toss these little pieces in a container rather than letting them scatter around your workspace. They’re sharp and easy to step on later. Some tools have a collection cup at the back to catch them automatically. Keeping your area tidy makes the next rivet quicker to install.
Step 9: Inspect Your Finished Joint
Take a moment to check your work before calling it done. Run your finger over the rivet head to make sure it sits flush and secure. Give the joined pieces a gentle wiggle to confirm there’s no play or looseness. A solid rivet won’t budge or rattle. If something feels loose, you may need to drill it out and try again with a fresh rivet. A quick inspection now prevents headaches down the road.
Tips for Best Results
- Match your rivet material to your project. Aluminum rivets work well for light jobs, but use steel or stainless steel for outdoor or high-stress applications. Mixing metals can cause corrosion over time, so pair like with like when you can.
- Back thin or soft materials with a washer. When joining flimsy sheet metal or plastic, slip a rivet washer onto the back side. It spreads the load and stops the rivet from pulling through under pressure.
- Keep the tool square to your workpiece. Even a slight angle weakens the joint. Take an extra second to line things up straight before you squeeze.
- Buy rivets in bulk assortments. A mixed pack of sizes means you’ll always have the right rivet on hand. Running out mid-project is a frustration you can easily avoid.
- Oil the moving parts occasionally. A drop of light machine oil on the jaws and pivot keeps your tool working smoothly and extends its life.
Frequently Asked Questions
What Size Rivet Should I Use?
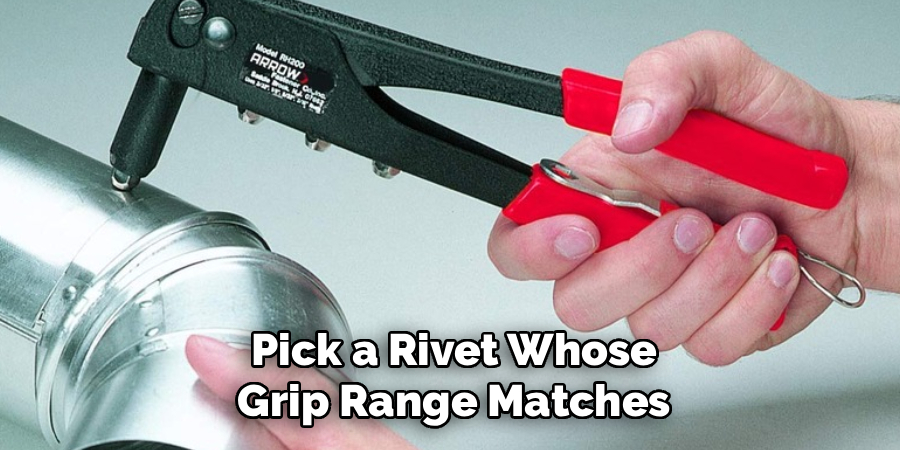
Pick a rivet whose grip range matches the combined thickness of your materials. The grip range appears on the box and tells you the minimum and maximum stack it can hold. For the hole, drill it to match the rivet body diameter exactly. Getting both right ensures a tight, lasting joint.
Can I Remove a Rivet Once It’s Set?
Yes, though it takes a little effort. Drill straight into the center of the rivet head using a bit slightly smaller than the rivet body. The head will pop off, and you can push the remaining body out of the hole. Work slowly so you don’t enlarge the hole and ruin your material.
Is It Safe to Rivet Without Gloves?
You can, but gloves are a smart idea. Fresh drill holes leave sharp burrs, and broken mandrels are pointy little hazards. A good pair of work gloves protects your hands from cuts and pinches. Always wear safety glasses too, since bits of metal can fly during drilling.
Why Won’t My Rivet Set Properly?
The most common cause is a mismatch between the rivet size and the drilled hole. A hole that’s too big leaves the rivet loose, while one that’s too small won’t fit at all. Also check that your nose piece matches your rivet. If the mandrel won’t snap, your tool may need a firmer, fuller squeeze.
What Materials Can I Join With Rivets?
Rivets bond metal, plastic, leather, fabric, and more. They shine when you can only reach one side of your workpiece. Just be sure to match the rivet material and length to what you’re fastening. For heavy structural jobs, though, welding or bolts may serve you better.
How Do I Stop Rivets From Loosening Over Time?
Start with a snug hole and the correct grip range for a tight initial set. Add a washer behind soft or thin materials to spread the stress. Choose corrosion-resistant rivets for outdoor use so weather won’t weaken them. A properly installed rivet rarely loosens on its own.
Conclusion
Using a riveting tool is one of those skills that feels tricky at first but quickly becomes second nature. You now know how to pick the right rivet, drill clean holes, and set a solid joint every time. Don’t stress if your first few attempts aren’t perfect — practice makes all the difference. Grab some scrap metal and give it a try this weekend. If you haven’t picked up your gear yet, check out our recommended picks above to get started. Ready for more? Explore our other DIY guides on the site and keep building your confidence. Happy riveting!
