
That grinding hum coming from your wheel hub, or a stubborn bearing that refuses to budge no matter how hard you tap—it’s enough to test anyone’s patience. Yanking, prying, and hammering usually just damages the shaft or the bearing race around it. A bearing puller tool changes the whole game. It grips the bearing and draws it out cleanly, without wrecking the parts you want to keep.
In this guide, you’ll learn How to Use a Bearing Puller Tool, what supplies to gather, and a clear step-by-step process for pulling bearings safely. We’ll also share insider tips and answer the questions people ask most. By the end, you’ll handle bearing removal with confidence and save yourself a costly trip to the shop.
What Is a Bearing Puller Tool?
A bearing puller tool is a mechanical device that grips a bearing and applies steady, controlled force to slide it off a shaft or out of a hub. Most designs use two or three arms (called jaws) that hook behind the bearing, plus a center screw that pushes against the shaft as you tighten it. Mechanics, DIYers, and machinists rely on it for jobs like wheel bearing swaps and press-fit part removal. Unlike a hammer, it pulls evenly so you don’t crack the bearing race or bend the shaft.
What You’ll Need
Before you dive in, gather your gear. Having everything within arm’s reach keeps the job smooth and cuts down on frustration mid-project.
- A bearing puller (two-jaw or three-jaw, sized for your bearing)
- A gear puller as a backup for tight or awkward spots
- Penetrating oil to loosen rust and corrosion
- A wrench or ratchet to turn the center screw
- Safety glasses and work gloves
- A clean rag and degreaser
- A vise or sturdy workbench to hold small parts
- Replacement bearings ready for reinstallation
- A soft-face hammer for gentle persuasion (optional)
Most of these items are affordable and easy to find. A quality puller and a can of penetrating oil make the biggest difference in the outcome.
Step-by-Step Guide on How to Use a Bearing Puller Tool
Ready to master the process? Follow these steps in order, and take your time on the first couple of pulls. Once you feel how the pressure builds, the rest gets much easier.
Step 1: Set Up a Clean, Stable Work Area
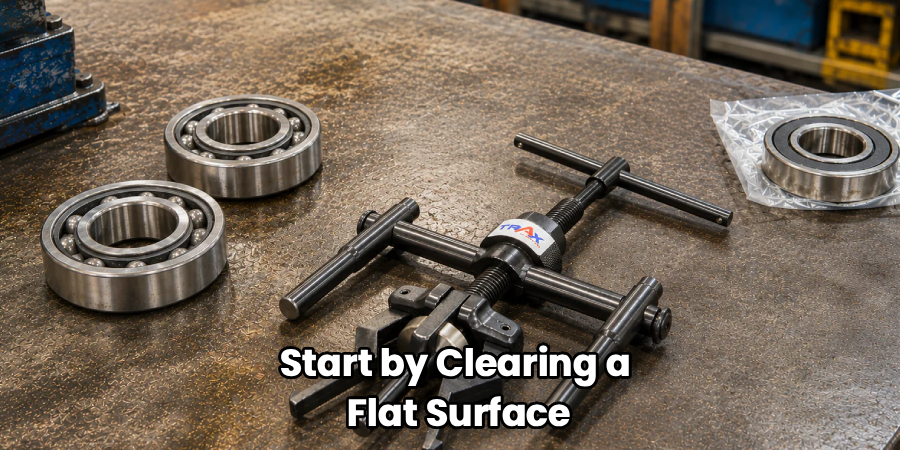
Start by clearing a flat surface and giving yourself plenty of elbow room. A cluttered bench makes it easy to lose small parts like clips and spacers. If you’re working on a small component, clamp it in a vise so it won’t shift while you apply force. Good lighting helps you see exactly where the jaws need to grip.
A common mistake is rushing this step. Take a minute to organize now, and you’ll avoid hunting for a dropped bolt later with greasy hands.
Step 2: Inspect the Bearing and Surrounding Parts
Before touching your puller, look over the bearing and the area around it. Check for retaining clips, snap rings, or set screws that lock the bearing in place. Trying to pull a bearing that’s still pinned will damage the shaft or the tool itself. Remove any fasteners first and set them somewhere safe.
Note how the bearing sits so you can install the new one the same way. Snapping a quick photo on your phone is a smart move for tricky assemblies.
Step 3: Apply Penetrating Oil
Spray penetrating oil where the bearing meets the shaft or hub. Rust and corrosion are the main reasons a bearing fights back, and a little lubricant works wonders. Give it five to ten minutes to soak into the gap. For badly seized parts, apply a second coat and wait a bit longer.
Don’t skip this even if the bearing looks clean. Hidden corrosion inside a press-fit joint can turn an easy pull into a struggle.
Step 4: Position the Puller Jaws
Slide the jaws of your puller behind the bearing so they hook the back edge or the inner race. Make sure each jaw sits square and grips the same amount, or the pull will go crooked. For a two-jaw puller, keep the arms directly across from each other. A three-jaw setup spreads force more evenly and works well on round hubs.
Uneven jaw placement is the number one cause of slipped pulls. Double-check that all arms are seated firmly before you add any tension.
Step 5: Center the Screw on the Shaft
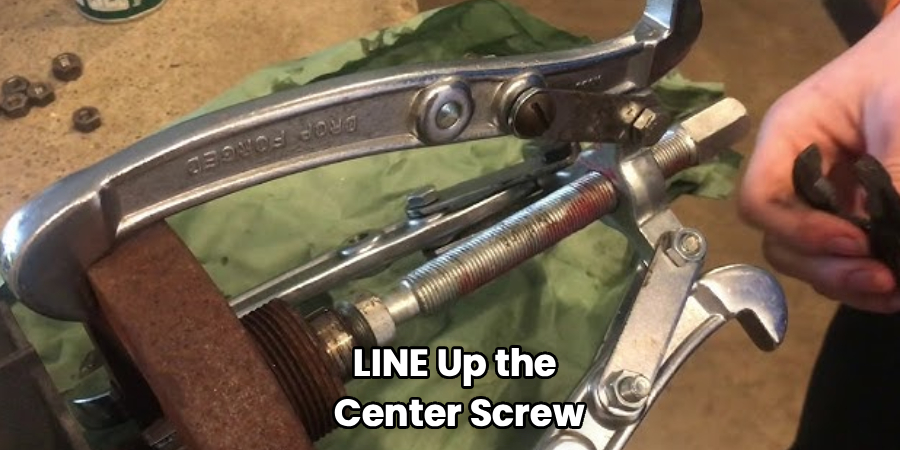
Line up the center screw of your bearing puller tool so its tip rests on the end of the shaft. The point should sit dead center, not off to one side. If the shaft has a small dimple, seat the screw right in it for a stable push. Placing a bit of grease on the tip reduces friction and protects the shaft face.
An off-center screw pushes at an angle and can bend the shaft. Take a second to eyeball the alignment from a couple of angles.
Step 6: Tighten the Center Screw Slowly
Now turn the center screw with your wrench or ratchet, adding pressure gradually. You’ll feel resistance build as the jaws pull and the screw pushes against the shaft. Go slow and steady—this even force is what makes mechanical bearing extraction so clean. Pause every few turns to confirm the jaws are still gripping squarely.
Resist the urge to crank hard and fast. Sudden force can snap a jaw or crack the bearing race, sending sharp pieces flying.
Step 7: Watch for Movement and Adjust
As tension climbs, keep an eye on the bearing for the first signs of movement. If it starts to slide, keep turning smoothly until it comes free. If nothing budges after firm pressure, stop and reassess. Add more penetrating oil, tap the puller body lightly with a soft-face hammer, and let it sit again.
Never force a stuck bearing past the point of heavy strain. Backing off and re-soaking almost always beats muscling through and breaking something.
Step 8: Remove the Bearing and Clean the Shaft
Once the bearing slides off, ease the tension on the screw and lift the puller away. Wipe down the shaft and hub with degreaser and a clean rag to remove old grease and grime. Inspect the shaft surface for scoring, burrs, or wear that could affect the new bearing. Smooth out any rough spots with fine emery cloth if needed.
A clean, smooth shaft is essential for a proper press fit. Installing a fresh bearing onto a dirty surface leads to early failure.
Step 9: Prep for Reinstallation
With the old bearing out, get ready to fit the replacement. Compare the new bearing to the old one to confirm the size and type match exactly. Apply a light film of oil to the shaft to help the new bearing seat evenly. Use a bearing press or a proper driver to install it—never hammer directly on the bearing itself.
Pressing on the wrong race can dent the rolling elements inside. Always push on the race that contacts the mounting surface.
Tips for Best Results
Want to work like a seasoned mechanic? These insider tricks go beyond the basic steps and save you real headaches.
- Match the puller to the job. A gear puller works great for pulleys and gears, but internal bearings often need a slide-hammer or blind-hole puller. Using the right style prevents damage and wasted effort.
- Heat can free a stubborn bearing. For seriously seized parts, gently warm the surrounding hub with a heat gun. The metal expands slightly and loosens its grip, making the pull far easier. Keep heat away from seals and plastic.
- Protect the shaft threads. If the center screw presses on threaded shaft ends, thread a nut on first or use a soft cap. This keeps the threads from getting chewed up under pressure.
- Keep your jaws sharp and clean. Worn or greasy jaw tips slip off the bearing race easily. Wipe them down and inspect for rounding before each use.
- Support the assembly. When pulling a wheel bearing, brace the hub so it doesn’t twist as force builds. A steady setup gives you a straight, clean pull every time.
Frequently Asked Questions
What Is a Bearing Puller Tool Used For?
A bearing puller tool removes bearings from shafts, hubs, and housings without damaging the surrounding parts. It applies steady, even force through its jaws and center screw, which beats hammering or prying. Mechanics use it for wheel bearing replacements, gear removal, and press-fit components. Anyone doing regular repair work will find it saves both time and expensive parts.
Can I Use a Gear Puller Instead of a Bearing Puller?
In many cases, yes—a gear puller and a bearing puller share a similar design with jaws and a center screw. The main difference is jaw shape and reach, so check that the arms hook the bearing race securely. For deep or blind-hole bearings, though, you’ll need a specialized puller instead. When in doubt, match the tool to the exact bearing setup you’re facing.
How Do I Remove a Bearing That Won’t Budge?
Start by soaking the joint with penetrating oil and giving it ten minutes or more to work. If it’s still stuck, apply gentle heat to the hub with a heat gun to expand the metal slightly. Tap the puller body with a soft-face hammer while keeping tension on the screw. Patience beats brute force here—re-soaking and reheating almost always frees the bearing eventually.
Is It Safe to Reuse a Bearing After Pulling It?
Usually not, and here’s why. The pulling process puts stress on the bearing race and can create tiny dents in the rolling elements, even if you can’t see them. A damaged bearing often fails soon after reinstallation, which means redoing the whole job. Always fit a fresh bearing unless the manufacturer specifically says the part is reusable.
Why Does My Puller Keep Slipping Off the Bearing?
Slipping almost always comes down to jaw placement. Make sure each jaw hooks fully behind the bearing race and sits square, with equal grip on all sides. Worn or greasy jaw tips also lose their hold, so wipe them clean and check for rounding. If the bearing edge is too narrow, switch to a puller with thinner jaw tips designed for tight spots.
Conclusion
Pulling a stubborn bearing doesn’t have to end in stripped shafts or busted parts. Now that you know how to use a bearing puller tool, you can tackle wheel bearings, gears, and press-fit jobs with steady, controlled force. The real secret is patience—square jaw placement, penetrating oil, and slow, even pressure win every time.
If you haven’t picked one up yet, check out our recommended picks above to get the right size for your project. Ready for your next repair? Explore our other guides on automotive tools and DIY maintenance to keep your projects rolling smoothly.
