
You spot a cracked panel on the side of your house, and now the whole wall looks a little sad. Maybe water sneaked behind it, or maybe you just want to swap out a dented section. Either way, prying at vinyl siding with a flathead screwdriver only cracks more panels and scrapes your knuckles raw. That’s where a siding removal tool comes in and makes the job almost too easy.
In this guide, you’ll learn How to Use a Siding Removal Tool and what supplies to gather first. Then we’ll walk through each step to unlock and pull panels cleanly, without damaging the pieces around them. You’ll also pick up a few pro tips and answers to common questions. By the end, you’ll swap siding like you’ve done it a hundred times.
What Is a Siding Removal Tool?
A siding removal tool, often called a zip tool or siding unzip tool, is a small hand tool with a hooked, flat blade and a comfortable grip. It slides under the bottom lip of a vinyl siding panel and unhooks it from the panel below. Vinyl panels interlock along a hidden bottom edge, so you can’t just pull them off by hand. This little hook does the unlocking for you in seconds, keeping your panels crack-free.
What You’ll Need
Gather these before you climb the ladder. Most cost just a few dollars and save you a ton of hassle.
- A siding zip tool (the star of the show)
- A flat pry bar for lifting nails
- A cat’s paw or small nail puller
- A cordless drill or hammer for reinstalling
- Work gloves to protect your hands
- Safety glasses
- A sturdy ladder for higher panels
- Replacement panels or nails, if needed
- A pencil for marking panel positions
Step-by-Step Guide on How to Use a Siding Removal Tool
Take these steps one at a time. Rushing is the fastest way to crack a panel, so slow and steady wins here.
Step 1: Inspect the Wall and Plan Your Path
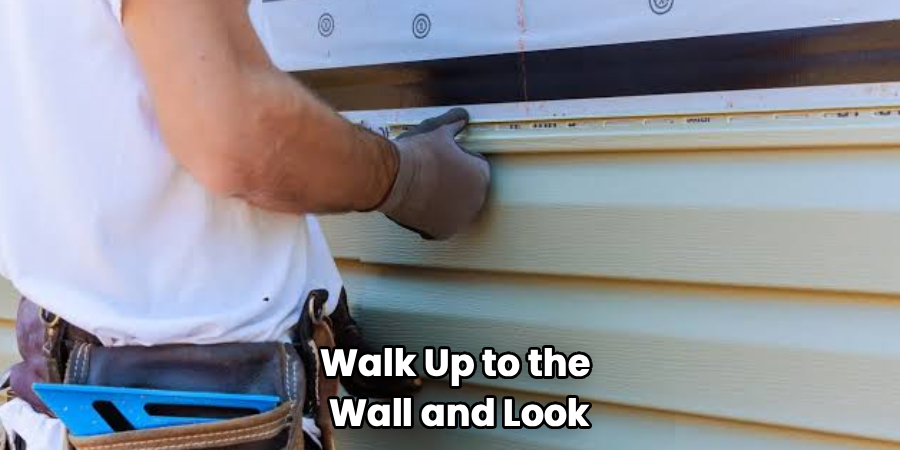
Walk up to the wall and look at how the panels overlap. Vinyl siding installs from the bottom up, with each row locking into the one below. Find the damaged panel and count the rows above it, since you may need to loosen a couple. Mark the panel you’re targeting with your pencil so you don’t lose track.
Snap a quick photo with your phone before you touch anything. That picture becomes your reference when it’s time to put everything back. A little planning now saves confusion later.
Step 2: Wait for the Right Weather
Vinyl gets brittle in the cold and floppy in extreme heat. Pick a mild, dry day somewhere around 50 to 70 degrees if you can. Cold panels snap easily when you flex them, and that turns a simple fix into a bigger repair. Warm panels bend and unhook far more smoothly.
Avoid working right after rain, since a wet ladder is a slip risk. Give the wall time to dry out. Comfortable weather protects both your panels and you.
Step 3: Hook the Bottom Edge of the Panel Above
Start with the panel directly above the one you want to remove. Slide the hooked end of your siding removal tool under its bottom lip. You’re feeling for the locking edge where it grabs the panel below. Once the hook catches that lip, you’re ready to unlock it.
Don’t force the tool in at a steep angle. Keep it flat against the wall so the hook slides in clean. A gentle, patient touch here prevents cracks along the edge.
Step 4: Slide and Unzip the Seam
With the hook set, pull the tool downward slightly and drag it sideways along the seam. You’ll feel and hear the panel unsnap as you go. Move in a smooth, steady motion from one end toward the other. This “unzipping” action is exactly why folks call it a zip tool.
Keep your free hand pressed lightly against the panel to guide it. If the seam resists, back up an inch and re-hook rather than yanking. Forcing it is the number one mistake that leads to broken panels.
Step 5: Lift and Expose the Nails
Once the seam is unzipped, gently lift the upper panel and fold it up out of the way. Now you can see the row of nails holding the damaged panel in place. Those nails sit in a slotted flange along the top edge. Take a peek to confirm they aren’t rusted or driven in too tight.
Slide a thin piece of scrap under the lifted panel to hold it up if you’re working solo. This frees both hands for the next step. Try not to crease the panel you’ve folded back.
Step 6: Pull the Nails on the Damaged Panel
Grab your flat pry bar or cat’s paw and slip it under each nail head. Work slowly and rock the bar to ease the nail out without tearing the flange. Place a thin shim behind the bar so you don’t dent the wall sheathing. Pull all the nails along that row until the panel floats free.
Save the nails if they’re in good shape. Yanking too hard can crack the nail slot, so let the tool do the work. Steady leverage beats brute force every time.
Step 7: Remove the Damaged Panel
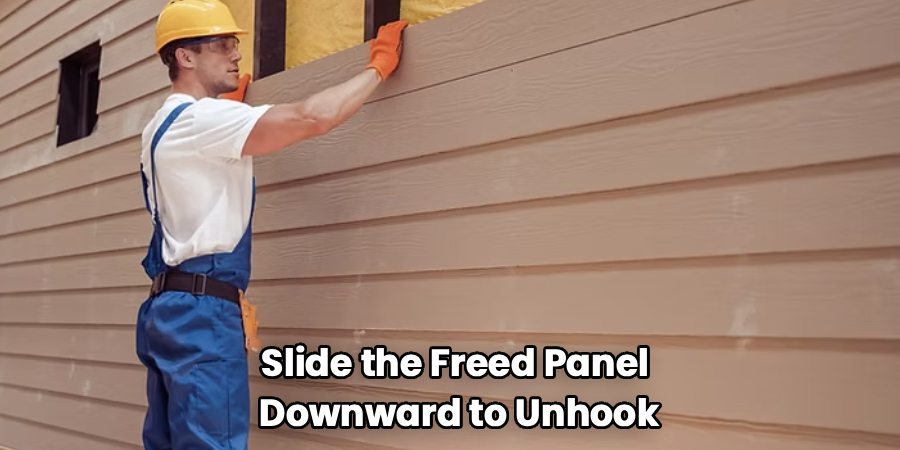
With the nails out, slide the freed panel downward to unhook it from the row beneath. It should release with a light tug. Set it aside carefully, especially if you plan to reuse it. Check the exposed wall for moisture, mold, or soft wood while you have the chance.
This is your golden moment to fix any hidden problems. Dry out damp spots and replace rotted sheathing before you close things up. A little inspection now prevents a big headache down the road.
Step 8: Install the New Panel and Re-Lock the Seam
Hook the bottom edge of your new panel into the row below and push up until it clicks. Nail it through the slots, leaving each nail about a sixteenth of an inch loose so the panel can expand. Then fold the upper panel back down over the new row. Run your siding removal tool along the seam again, pushing up this time to snap it locked.
Give the panel a gentle wiggle to confirm it’s seated. Don’t nail too tight, or the vinyl will buckle in the heat. Loose-but-secure is the sweet spot.
Tips for Best Results
These small tricks separate a clean job from a frustrating afternoon.
- Warm up stubborn panels. On a chilly day, aim a hair dryer at a stiff panel for a minute. The gentle heat makes vinyl flexible and far less likely to crack.
- Number your panels. If you’re removing several rows, mark each one with a pencil on the back. Reassembly becomes a simple paint-by-numbers job.
- Leave nails slightly loose. Vinyl expands and contracts with temperature. Snug-but-not-tight nails let the panel move so it won’t warp or pop off.
- Keep spare panels on hand. Buy an extra piece or two when you match a color. Vinyl shades fade over time, so future-you will thank present-you.
- Work from the top down. When removing a large section, always unhook the highest panel first and work your way down. It keeps everything organized and stable.
Frequently Asked Questions
Can I Remove Vinyl Siding Without a Zip Tool?
You can try, but it’s risky and rarely worth it. Without the hooked blade, you’ll likely crack panels while prying at the locked seams. A dedicated siding removal tool costs only a few dollars and saves you from buying replacement panels. For clean, damage-free results, it’s the right tool for the job.
How Do I Reattach the Siding After Removing It?
Reattaching is basically the removal steps in reverse. Hook the new panel into the row below, nail it loosely through the slots, then fold the upper panel down. Slide your zip tool along the seam and push up to snap it locked. Give the panel a light tug to confirm it clicked into place.
Is It Safe to Remove Siding in Cold Weather?
Cold weather makes vinyl brittle, so it’s best to wait for a milder day. Panels can snap when you flex or unhook them below about 50 degrees. If you must work in the cold, warm each panel gently with a hair dryer first. Take it slow, since chilly vinyl has far less give.
What If the Panel Cracks While I’m Removing It?
Don’t panic, since a cracked panel is easy to swap out. Simply finish removing it and slide a matching replacement into place. This is exactly why keeping a couple of spare panels around pays off. Match the color and size, and no one will ever spot the fix.
How High Up Can I Safely Work?
Stick to whatever height you can reach comfortably from a stable ladder. For upper stories or anything past your ladder’s safe range, call in a pro. Falls cause serious injuries, and no siding repair is worth that risk. Always have someone spot your ladder when you’re off the ground.
Do I Need to Replace the Nails Too?
If the old nails are straight and rust-free, you can reuse them. Bent or corroded nails should go straight in the trash. Roofing nails with wide heads work best because they hold the flange securely. Just remember to leave them slightly loose so the vinyl can expand.
Conclusion
Swapping out a damaged panel really comes down to unlocking that hidden seam, pulling a few nails, and snapping everything back into place. With a siding removal tool in hand, you’ll unzip and re-lock panels without cracking the pieces around them. Take your time, pick a mild day, and keep those nails just loose enough.
If you haven’t grabbed a zip tool yet, check out our recommended picks above and choose one that feels comfortable in your grip. Ready for your next home project? Browse our other DIY exterior guides and keep those skills growing.
