
Your face feels puffy every morning, your jaw looks tense, and your favorite serum seems to sit on top of your skin instead of sinking in. A facial roller can help with all three. This little handheld tool has become a staple in many people’s routines, and for good reason. It cools the skin, eases tension, and helps move fluid that builds up overnight.
In this guide, you’ll learn exactly how to use a facial roller, which direction to go, and how to fit it into your day. We’ll cover what you need, walk through each step, and answer the questions people ask most. By the end, you’ll glide through a calming face massage like it’s second nature.
What You’ll Need
Set these items out before you begin so your session stays smooth and relaxing. You probably own most of them already.
- Your facial roller (jade, rose quartz, or metal all work)
- A gentle cleanser
- Your favorite serum or facial oil
- A clean towel
- A moisturizer to finish
- A small bowl of ice water or access to a fridge (optional, for extra cooling)
- A mirror with good lighting
Step-by-Step Guide on How to Use a Facial Roller
Step 1: Cleanse Your Skin First
Always start with a clean face so you’re not rolling dirt and oil deeper into your pores. Wash with a gentle cleanser and pat your skin dry with a soft towel. This gives you a fresh base and lets the tool glide without dragging. Rolling over makeup or leftover grime can clog pores and irritate the skin. Take an extra thirty seconds here, and your whole routine works better.
Step 2: Chill the Roller for Extra De-Puffing
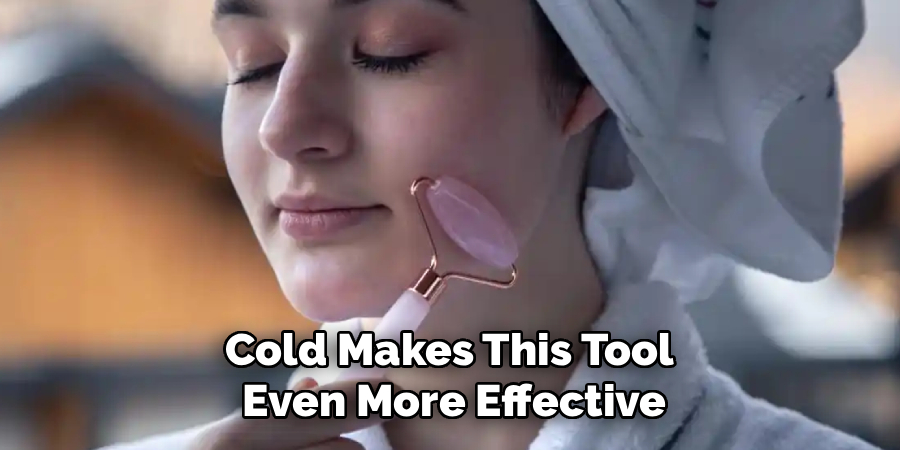
Cold makes this tool even more effective, especially in the morning. Pop it in the fridge overnight, or rest it in a bowl of ice water for a few minutes before you start. The cool stone tightens the skin and calms redness on contact. It also feels wonderful against tired, puffy eyes. Stone rollers like jade or rose quartz hold the chill longer than metal, so plan around whichever one you own.
Step 3: Apply Your Serum or Oil
Never roll on dry skin, since friction can pull and stress the surface. Smooth a few drops of serum or facial oil across your face and neck first. This gives the roller a slick surface to travel over and helps your product absorb more deeply. The gentle pressure pushes those nutrients right where you want them. Skip heavy creams for now, though, because they can get gummy under the roller.
Step 4: Start at Your Neck
Work from the bottom up to encourage healthy lymphatic drainage. Begin at the base of your neck and roll upward toward your jaw in slow, steady strokes. This clears the path so fluid from your face has somewhere to drain. Do each side three to five times before moving higher. Many people rush straight to the cheeks, but starting at the neck sets everything up for better results.
Step 5: Roll Along Your Jaw and Cheeks
Now move to the lower half of your face with the larger end of the tool. Place the roller at the center of your chin and glide outward toward your ear. Repeat this across your jawline and cheeks, always moving from the middle of your face toward the edges. This outward motion helps reduce puffiness and gives your face a subtle contour. Keep the pressure light and let the roller do the work.
Step 6: Treat the Delicate Eye Area
Switch to the smaller roller head for the thin skin around your eyes. Start at the inner corner and roll gently outward toward your temple. Use the lightest touch here, since this skin bruises and creases easily. The cool stone shrinks morning puffiness and softens the look of tired eyes. A few passes are plenty, so resist the urge to press hard or overdo it.
Step 7: Finish With the Forehead
Move up to your forehead to release any tension you carry there. Roll from your brows upward toward your hairline in smooth, vertical strokes. Then work horizontally from the center out to each temple. This eases the tightness that builds during long hours at a screen. Cover the whole forehead evenly, and enjoy how relaxed the muscles feel afterward.
Step 8: Repeat and Adjust as Needed
Give each area a few gentle passes, but listen to how your skin responds. If one spot feels especially puffy or tense, spend a little extra time there. The whole session should take about five to ten minutes, so there’s no need to hurry. Keep every stroke moving away from the center of your face and upward along the neck. Consistency matters far more than force, so stay light and steady.
Step 9: Seal and Clean Up
Lock in all that good work with a layer of moisturizer once you finish rolling. This traps the serum you pressed in and keeps your skin hydrated. Then clean the tool with a soft cloth and a little mild soap, and dry it fully before storing. A quick wipe after each use stops bacteria from building up on the surface. Store it somewhere clean, or tuck it back in the fridge for tomorrow.
Tips for Best Results
These small habits turn a decent session into a genuinely effective one.
- Roll in the morning for puffiness. Fluid pools while you sleep, so a cool morning session tackles a swollen face fast. It’s the quickest way to look more awake before your day starts.
- Always move outward and upward. Every stroke should push toward your hairline and ears. This direction supports lymphatic drainage and prevents you from tugging skin the wrong way.
- Keep the pressure gentle. More force does not mean more benefit. Light, consistent strokes protect the delicate skin and still deliver a relaxing face massage.
- Pair it with gua sha for tension. On days when your jaw feels tight, follow your roller with a gua sha stone. The flat edge digs into knots the roller can’t reach.
- Stay consistent. A few minutes most days beats one long session a week. Regular use is where you’ll notice smoother, calmer skin over time.
Frequently Asked Questions
What Does a Facial Roller Actually Do?
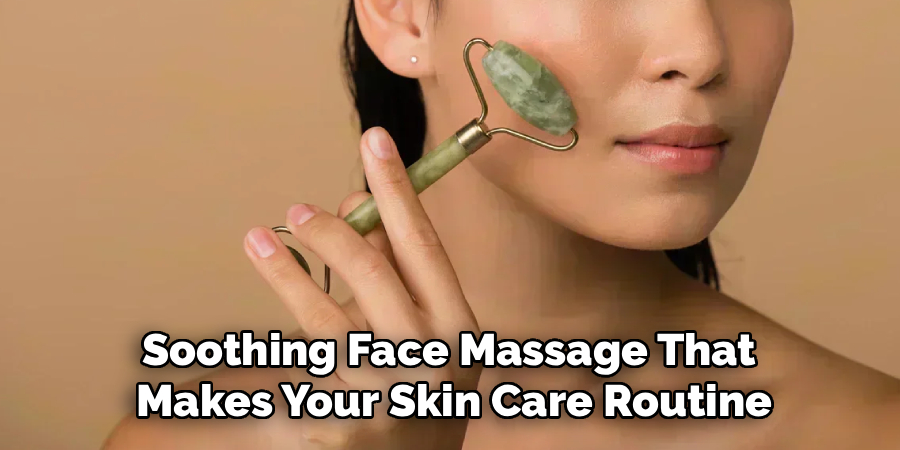
It cools and de-puffs your skin while helping your products absorb better. The gentle rolling encourages lymphatic drainage, which moves excess fluid away from your face and reduces morning puffiness. It also relaxes tense muscles in your jaw and forehead. Think of it as a quick, soothing face massage that makes your skin care routine feel more like a treat.
How Often Should I Use It?
You can safely use one every day if you’d like. Many people roll each morning to reduce puffiness and again at night to unwind. If your skin is sensitive or reactive, start with a few times a week and see how it feels. Listen to your skin, and adjust the frequency until you find your sweet spot.
Jade Roller or Rose Quartz — Does It Matter?
Both work beautifully, so the choice mostly comes down to preference. A jade roller stays cool and has long been a favorite for de-puffing. Rose quartz holds a chill a touch longer and feels smooth against the skin. The material matters less than your technique, so pick whichever one you enjoy using most.
Can I Use It Without Serum or Oil?
You really shouldn’t roll on completely dry skin. Without a slip layer, the tool drags and tugs, which can stress your skin and cause irritation. A few drops of serum or facial oil create a smooth surface and let the roller glide easily. This also pushes those nutrients deeper for better absorption.
Is It Safe for Acne-Prone Skin?
Yes, but stay gentle and keep the tool spotless. Always clean it after each use so you’re not spreading bacteria across your face. Avoid rolling directly over active, inflamed breakouts, since pressure can worsen them. Stick to clear areas, and clean the surface thoroughly to keep your skin calm and happy.
How Long Before I See Results?
The de-puffing effect shows up right away, especially with a chilled tool. You’ll notice a fresher, more awake face within minutes of your first session. The deeper benefits, like reduced tension and smoother-looking skin, build gradually with regular use. Give it a few weeks of consistency, and the difference becomes hard to miss.
Conclusion
Great skin often comes down to small, steady habits: cleanse first, add a little serum, and always roll outward and upward. Once the routine clicks, a facial roller turns a puffy, tense morning into a few calming minutes you’ll look forward to.
Trust the process, and each session feels more natural. If you haven’t picked one up yet, check out our recommended picks above. Want to level up your glow? Explore our other skin care and beauty guides on the site, and happy rolling.
