
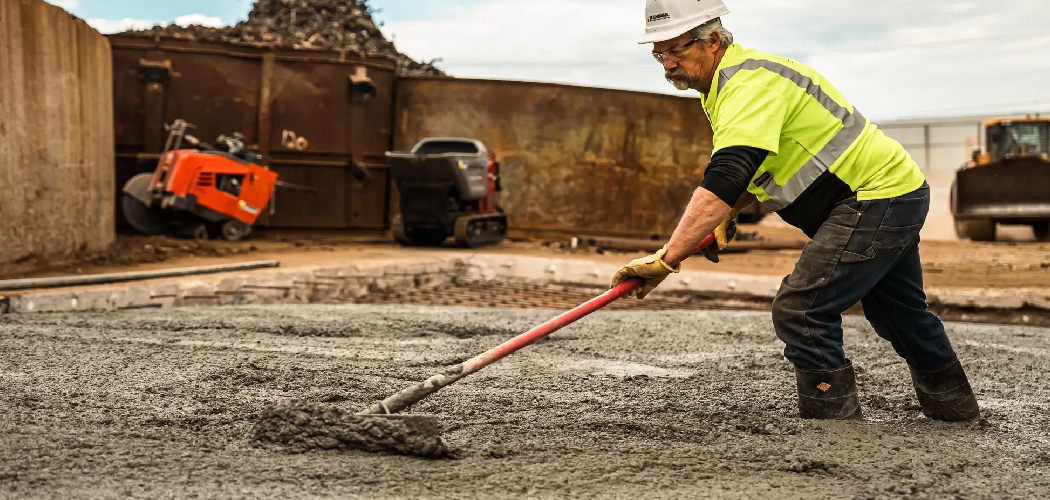
You just finished pouring a fresh batch of concrete, and the job looks great. But now there’s a drum coated in gray sludge, and you’re tempted to deal with it tomorrow. Don’t. Knowing how to clean concrete mixer drums right after use is the single best habit you can build. Wet concrete rinses out in minutes, while dried cement turns into a rock-hard mess that ruins your machine.
In this guide, you’ll learn exactly how to clean a concrete mixer, scrub, and protect your mixer so it runs smoothly for years. We’ll cover the gear you need, a clear step-by-step routine, and pro tips for tackling stubborn buildup. By the end, cleanup will feel like the easiest part of any project.
What You’ll Need
Round up your supplies before the concrete has a chance to set. Speed matters here, so keep everything within reach.
- A garden hose with decent water pressure
- A few shovels of coarse gravel (for a gravel flush)
- A stiff brush or wire brush for scrubbing
- A plastic or wooden scraper for loosening residue
- A bucket for water and rinsing
- Rubber gloves and safety glasses (protective gear)
- A dust mask for handling dry buildup
- A sponge or rag for wiping down surfaces
- Diluted vinegar or a commercial chemical cleaner (for descaling)
- Old towels or cloths for drying
- A wheelbarrow to catch the dirty rinse water
Keep a spare stiff brush around, since bristles wear down fast against dried cement. A little prep saves you a lot of scrubbing later.
Step-by-Step Guide on How to Clean a Concrete Mixer
The trick to easy cleanup is doing it while everything is still wet. Follow these steps in order, and you’ll keep your mixer drum spotless without breaking a sweat. Learning how to clean concrete mixer machines properly comes down to timing, a good gravel flush, and a bit of elbow grease when needed.
Step 1: Empty the Drum Completely
Start by tipping out every last bit of concrete while the drum is still turning. Let it flow into your wheelbarrow so nothing pools at the bottom. Leftover concrete hardens fast, and even a small amount left behind can throw off your next batch. Keep the drum rotation going until the last of the mix slides out.
Give the drum a few extra spins upside down to shake loose any clumps. Don’t reach inside while it’s moving, and never scoop material out by hand. A fully emptied drum is your best starting point for a quick, clean job.
Step 2: Do a Gravel Flush
This is the pro move that saves you serious scrubbing. Toss a few shovels of coarse gravel into the drum along with a good splash of water. Let the machine run for two to three minutes so the gravel tumbles and scours the walls. The stones knock off wet concrete and drum residue that would otherwise cling and dry.
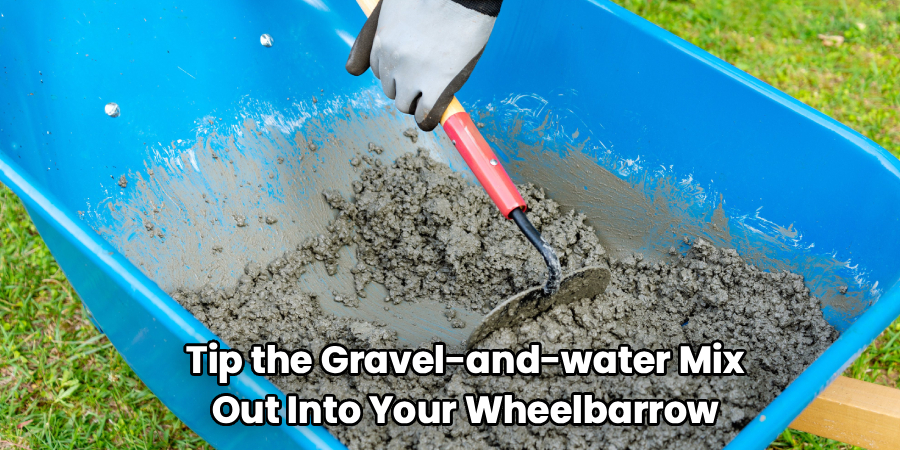
Tip the gravel-and-water mix out into your wheelbarrow when it looks murky. You can reuse clean gravel for future flushes if you rinse it first. This simple trick handles most of the cleaning before you ever pick up a brush.
Step 3: Rinse the Drum Thoroughly
Grab your hose and blast the inside of the mixer drum with water. Aim for the walls, the fins, and any corners where slurry likes to hide. Keep the drum turning slowly so the water reaches every surface as it rotates. A strong rinse washes away loosened grit and the last of the gray film.
Direct the dirty water into your wheelbarrow rather than onto the ground, since cement slurry can stain and damage surfaces. Repeat the rinse until the water runs clear. Clean walls now mean less descaling work down the road.
Step 4: Scrub Away Stubborn Residue
Some spots won’t budge with water alone. Dip your stiff brush and get to work on any patches of clinging concrete, especially around the drum’s fins and rim. Use firm, circular strokes to lift the residue without gouging the metal. For tougher bits, a plastic or wooden scraper helps loosen them first.
Don’t force a metal tool hard against the drum, since deep scratches invite rust and fresh buildup. Work section by section so you don’t miss anything. A few minutes of scrubbing keeps small deposits from becoming permanent.
Step 5: Tackle Dried Cement With a Descaler
If you skipped a cleanup or two, you’ll likely find hardened patches. This is where a chemical cleaner or a diluted vinegar solution earns its keep. Apply your descaling product to the dried cement, then let it sit for the time listed on the label. The acid softens the buildup so you can scrub it off with less effort.

Always wear your gloves and safety glasses during this step, since these cleaners are harsh on skin and eyes. Rinse the drum well afterward to remove any leftover chemicals. Regular maintenance means you’ll rarely need this heavy-duty step.
Step 6: Clean the Exterior and Chute
The outside of your mixer deserves attention too. Wipe down the frame, the pour chute, and the controls with a damp sponge or rag. Splatters harden just like the material inside the drum, so catch them while they’re fresh. Pay special attention to the chute, where slurry loves to collect.
Check around the motor housing or engine, but keep water away from electrical parts. For an electric mixer, unplug it first and never spray the cord or switch directly. A tidy exterior makes the whole machine safer and easier to use next time.
Step 7: Inspect Moving Parts
With everything clean, take a moment to look over the working bits. Check the drum’s mounting, the gears, and the tilt mechanism for trapped grit or debris. Concrete dust wedged into moving parts causes wear and strains the motor over time. Wipe or brush away anything you find.
Give the drum a manual spin to feel for any grinding or resistance. If something sounds off, note it for a closer look before your next job. This quick inspection is a core part of good mixer maintenance.
Step 8: Dry and Store Properly
Once the drum runs clear and the outside is clean, dry off the machine with old towels. Leaving standing water invites rust, especially on bare metal surfaces. Tip the drum downward so any last drops drain out completely. Let it air-dry for a bit before you cover or store it.
Keep your mixer somewhere dry and sheltered, away from rain and damp ground. Coil the cord neatly on an electric model, or check fuel on a petrol one. A well-dried, well-stored machine greets you ready to work every single time.
Tips for Best Results
Want cleanup that takes minutes instead of hours? These insider habits make all the difference.
- Clean immediately, every time. Wet concrete rinses out easily, but even an hour’s delay lets it start setting. Make the gravel flush your final task before you walk away from any pour.
- Never let the drum sit loaded overnight. Dried cement bonds to the metal and can permanently reduce your drum’s capacity. If you must pause mid-job, keep the drum turning and add a little water.
- Use gravel, not just water. A dry-ish gravel flush scours far better than water alone, especially in the corners and along the fins. It’s the closest thing to a self-cleaning cycle your mixer has.
- Keep vinegar on hand for light descaling. A diluted vinegar rinse dissolves thin lime scale and cement film without harsh chemicals. It’s cheap, gentle on the metal, and safer to handle than industrial cleaners.
- Protect the paint and metal. Avoid aggressive metal scrapers that gouge the surface. A scratched drum collects buildup faster and rusts sooner, so treat the finish with care.
Frequently Asked Questions
How Do I Remove Dried Concrete From My Mixer Drum?
Start by chipping away large chunks with a plastic scraper, then apply a descaling product or diluted vinegar to soften what’s left. Let it soak for the recommended time, then scrub with a stiff brush and rinse thoroughly. For very stubborn buildup, you may need to repeat the process a couple of times. Always wear protective gear, since both dried cement dust and chemical cleaners can irritate your skin and eyes.
Can I Use Vinegar to Clean a Cement Mixer?
Yes, vinegar works well for light cleaning and descaling. Its mild acidity dissolves thin layers of cement film and lime scale without the harshness of industrial products. Apply it to the affected spots, let it sit for a few minutes, then scrub and rinse the drum clean. For thick, hardened deposits, though, you’ll likely need a stronger commercial chemical cleaner.
How Often Should I Clean My Concrete Mixer?
Clean it after every single use, without exception. Wet concrete washes out in minutes, while any residue left behind hardens into a stubborn crust. A quick gravel flush and rinse at the end of each job keeps buildup from ever forming. Beyond that, do a deeper maintenance check for scale and worn parts every few months if you use the mixer often.
Is It Safe to Clean a Concrete Mixer While It’s Running?
You can safely run the drum during a gravel flush, since the tumbling stones do the scouring for you. However, never reach inside a spinning drum or scrub near moving parts while the motor is on. For scrubbing and inspecting, always switch off and unplug an electric mixer first. Keeping your hands clear of the drum rotation is the golden rule of safe cleanup.
What Happens if I Don’t Clean My Mixer Properly?
Neglected concrete hardens inside the drum, shrinking its capacity and adding dead weight. Over time, buildup throws off your mix consistency and strains the motor. Trapped grit in the moving parts causes premature wear and costly repairs. In short, skipping cleanup shortens your machine’s life and makes every future batch harder to get right.
Can I Pour the Dirty Rinse Water Down the Drain?
No, cement slurry should never go down a drain or storm sewer. It settles, hardens, and can clog your pipes solid. Instead, collect the rinse water in a wheelbarrow or bucket and let the solids settle out. Once the water clears, you can decant it responsibly and dispose of the hardened sediment with your regular waste.
Conclusion
Cleaning up doesn’t have to be a chore you dread. Once you know how to clean concrete mixer drums the right way, the whole routine takes just a few minutes. Remember the golden rule: do it while everything’s still wet, lean on a gravel flush, and dry the machine before storage. That habit alone will keep your mixer running strong for years.
If you’re still shopping for the right machine, check out our recommended picks above. Now go tackle that cleanup with confidence, and explore our other tool guides when you’re ready for your next project.
