
That sinking feeling when you spot a flat tire in a parking lot? We’ve all been there. Or maybe you’ve got an oil change on the weekend to-do list and need to get underneath the car safely. Either way, a floor jack is the tool that gets your vehicle off the ground so you can actually do the work. It’s simple to use once you know the ropes, but the details matter a lot here.
In this guide, you’ll learn how to use a floor jack, find the right lifting points, and raise your vehicle safely. We’ll walk through each step, share tips the pros rely on, and answer the questions people ask most. By the end, you’ll handle under-car jobs with real confidence.
What You’ll Need
Gather these items before you start so you’re not scrambling mid-job. Most of them are cheap and worth every penny for the safety they add.
- A hydraulic jack rated for your vehicle’s weight
- A pair of jack stands (never skip these)
- Wheel chocks or a couple of sturdy wood blocks
- Work gloves
- Your vehicle owner’s manual
- A flat, solid surface like a concrete garage floor
- A flashlight for spotting jack points
- A creeper or old blanket if you’ll slide underneath
Step-by-Step Guide on How to Use a Floor Jack
Step 1: Park on a Flat, Solid Surface
Where you lift matters more than almost anything else. Choose level, hard ground like a concrete driveway or garage floor. Soft dirt, gravel, or hot asphalt can let the jack sink or shift under load. A tilted surface invites the car to roll or slide off the saddle pad. Take a moment to check the ground before you commit, because this one choice sets the tone for the whole job.

Step 2: Engage the Parking Brake
Once you’re parked, pull that parking brake firmly. If you drive a manual, leave it in first gear or reverse to lock things down further. For an automatic, shift into Park before anything else. This keeps the vehicle from creeping while you work underneath it. Skipping this step is one of the most common mistakes people make, and it’s an easy one to avoid. Give the car a gentle rock to confirm it’s holding still.
Step 3: Place Wheel Chocks
Chocks stop the tires that stay on the ground from rolling. Set them snugly against the wheel opposite the corner you plan to lift. So if you’re raising the front left, chock the rear right tire on both sides. This creates a physical block that backs up your parking brake. Never rely on the brake alone, since brakes can slip under pressure. Wood blocks work in a pinch, but proper rubber chocks grip far better.
Step 4: Locate the Correct Lifting Points
Your vehicle has specific spots built to bear its weight. Check the owner’s manual to find these reinforced lifting points, usually marked near each wheel. Most cars use a pinch weld along the frame rail behind the front wheels and ahead of the rear ones. Lifting anywhere else can dent the floor pan, crack plastic, or bend the exhaust. Run your hand along the frame and feel for that solid, thickened seam. When in doubt, the manual always wins.
Step 5: Position the Jack Under the Vehicle
Roll the car jack into place so the saddle pad sits directly under the lifting point. Take your time lining it up, because a crooked start leads to slipping later. The saddle should meet the pinch weld square and centered, not off to one side. A rubber pad or slotted adapter protects the weld and grips better. Double-check that nothing else, like a brake line or cover, sits in the way. Good positioning here saves you real headaches.
Step 6: Lift the Vehicle Slowly
Close the release valve, then pump the handle in smooth, steady strokes. Watch the saddle as it makes contact and starts to raise the car. Go slow and keep an eye on that lifting point to be sure it stays put. Raise the vehicle just high enough to fit your jack stands and get your work done. Rushing the pump or lifting too high makes the whole setup less stable. If anything shifts or creaks oddly, lower it and reposition.
Step 7: Place Jack Stands Under the Frame
This is the step that keeps you safe, so never skip it. Slide a jack stand under a solid frame point near the raised corner. Adjust the stand to the right height and lock its pin firmly in place. Then lower the vehicle slowly onto the stands until they carry the full weight. A hydraulic seal can fail without warning, and stands are your backup. Treat them as non-negotiable every single time you go under a car.
Step 8: Perform Your Task
Now you can get to work, whether that’s swapping a tire, changing oil, or inspecting brakes. Keep your tools within easy reach so you’re not wriggling around under load. Before you slide underneath, give the car one more firm shake to test its footing. Stay aware of how the vehicle feels the whole time you’re down there. If something shifts, get out first and reset your setup. A steady, calm pace beats rushing every time.
Step 9: Lower the Vehicle Safely
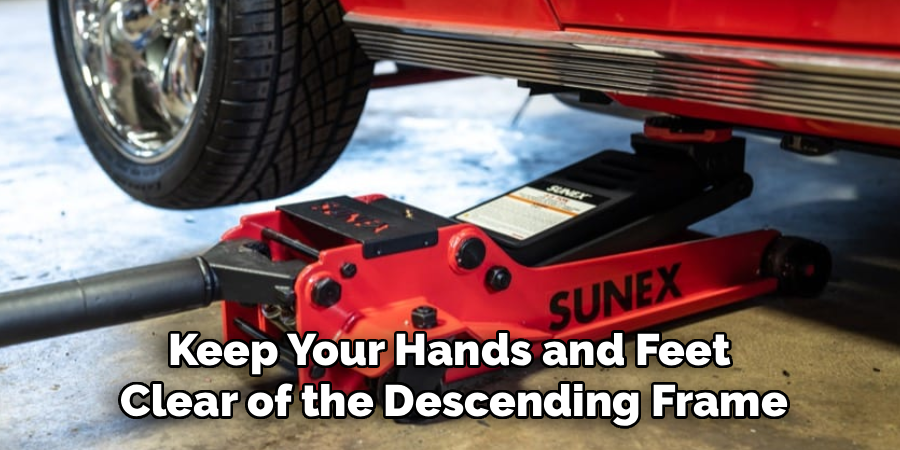
When the job’s done, raise the car slightly off the stands first. Remove the jack stands one at a time, then turn the release valve very slowly. Let the vehicle settle down in a controlled, gentle motion rather than a sudden drop. Opening the valve too fast can slam the car down and damage parts. Keep your hands and feet clear of the descending frame. Once all four wheels touch, you’re back on solid ground.
Step 10: Clean and Store Your Equipment
Wipe down the tool and check for any oil leaks around the seals. A leaking hydraulic jack is a warning sign you shouldn’t ignore. Store the jack and stands somewhere dry so rust doesn’t set in. Fold the chocks and coil any adapters together so nothing goes missing. A quick cleanup now means your gear is ready and reliable next time. Well-kept equipment lasts for years and works when you need it.
Tips for Best Results
These small habits separate a smooth job from a frustrating one.
- Match the rating to your vehicle. Always confirm the weight capacity before lifting. A tool rated below your car’s weight is dangerous, so check both numbers and leave yourself margin.
- Use a wooden buffer on the saddle. A hockey puck or block of wood between the saddle pad and pinch weld spreads the load. This protects the weld from bending or crushing.
- Lift one corner at a time. Trying to raise two corners at once puts uneven stress on the frame. Work methodically around the vehicle instead.
- Warm up a cold jack. In chilly weather, pump the handle a few times with the valve open first. This circulates the fluid and helps the vehicle lift smoothly.
- Inspect seals every few months. Even lightly used equipment can develop slow leaks. A quick check keeps small problems from becoming failures under load.
Frequently Asked Questions
What Weight Capacity Do I Need?
Pick a tool that can handle at least three-quarters of your vehicle’s total weight, since you only lift one corner at a time. Check your car’s gross weight in the manual or on the door jamb sticker. It’s smart to buy extra capacity for a safety cushion rather than cutting it close. When in doubt, size up rather than down.
Do I Really Need Jack Stands?
Yes, absolutely, every single time you go underneath a vehicle. A hydraulic seal can fail suddenly, and the tool alone will not hold your car up reliably. Jack stands act as a mechanical backup that won’t leak or drop. Think of them as the difference between a controlled lift and a serious accident waiting to happen.
Can I Use It on Asphalt or Gravel?
Concrete is by far the safest surface for lifting a vehicle. Asphalt can soften in hot weather and let the wheels or stands sink under the load. Gravel and dirt shift too easily and offer no stable base at all. If concrete isn’t an option, lay a thick steel or plywood plate under the setup to spread the weight.
Is It Safe to Lift More Than One Corner at Once?
It’s best to raise just one corner at a time for stability. Lifting multiple corners together strains the frame unevenly and makes the car far more likely to tip. If a job needs the whole vehicle raised, use four stands and lift each corner in careful sequence. Always support every raised corner before moving to the next.
How High Should I Lift the Vehicle?
Only lift as high as the job actually requires. Raising the car higher than needed makes the setup less stable and increases the risk of a slip. Enough clearance to slide underneath comfortably and position your stands is usually plenty. Lower is safer, so resist the urge to crank it up more than you must.
What If the Vehicle Feels Wobbly?
Stop right away and lower it back to the ground if anything feels loose or unsteady. A wobble usually means the saddle isn’t centered on the lifting point or the ground is uneven. Reposition everything from scratch rather than trying to correct it under load. Trusting that gut feeling is one of the smartest safety habits you can build.
Conclusion
Lifting a car isn’t complicated once you respect the basics. Park on solid ground, chock your wheels, find the right lifting points, and always back up your floor jack with sturdy jack stands. That last part is the golden rule, so never skip it.
With a little practice, this whole routine becomes second nature. If you haven’t picked up the right gear yet, check out our recommended products above. Want to keep building your skills? Explore our other tool guides on the site, and happy wrenching.
