

That back corner of your yard has become a jungle. Waist-high weeds, thick brush, and stubborn saplings laugh at your regular trimmer. A brushcutter is the tool that finally puts you back in charge. Built tougher than a string trimmer, it slices through dense growth, woody stems, and overgrown grass with ease.
In this guide, I’ll walk you through everything you need to tackle that overgrown patch safely and effectively. You’ll learn how to use a brushcutter, start the machine, hold it correctly, and cut with control. We’ll also cover blade choices, expert tips, and answers to common questions. By the end, you’ll feel confident firing it up and reclaiming your outdoor space. Let’s turn that wild mess into a clean, tidy lawn.

What You’ll Need
Before you start, gather your gear. A little prep keeps you safe and saves you trips back to the shed.
- A brushcutter with the right blade or trimmer head for your job
- Fuel or a charged battery, depending on your model
- Safety glasses or a face shield
- Ear protection (earmuffs or plugs)
- Sturdy gloves with a solid grip
- Long pants and steel-toe boots
- The support harness that came with your machine
- A blade wrench for swapping cutting heads
- A rag and gloves for handling fuel
- Sturdy work gloves for clearing debris afterward
Keep everything within reach before you begin. Trust me, you don’t want to hunt for ear protection with a running engine at your feet.
Step-by-Step Guide on How to Use a Brushcutter
Ready to clear that overgrowth? Follow these steps in order and take your time. Rushing leads to mistakes, and this tool demands respect.
Step 1: Gear Up for Safety
Never skip your protective equipment, no matter how quick the job seems. Slip on your safety glasses, ear protection, and gloves first. Spinning blades can fling rocks, sticks, and debris at surprising speeds. Long pants and sturdy boots protect your legs and feet from flying material. A face shield adds extra protection when you tackle thick brush or woody stems. Dressing right takes two minutes and prevents injuries that can sideline you for weeks.
Step 2: Inspect Your Machine
Give your tool a once-over before you fire it up. Check that the blade or trimmer head sits tight and shows no cracks or chips. Look over the shaft, handles, and guard for loose bolts or damage. Make sure the safety guard sits firmly in place, since it deflects debris away from you. For gas models, check the fuel level and look for leaks around the tank. Catching a problem now beats dealing with a breakdown mid-cut.

Step 3: Choose the Right Cutting Head
Matching the head to the job makes all the difference. A nylon line head handles tall grass and light weeds with ease. For thicker brush and stubborn stems, switch to a metal blade with several teeth. Small saplings and woody growth call for a heavy-duty circular saw blade. Use your blade wrench to swap heads, and always confirm the blade spins freely afterward. The wrong head slows you down and strains the engine, so pick wisely.
Step 4: Set Up Your Harness
The support harness carries the weight so your arms don’t have to. Slip it over your shoulders and clip the machine to the attachment point. Adjust the straps until the tool hangs comfortably at hip height. A well-fitted harness keeps the blade parallel to the ground and reduces fatigue. This balance lets you work longer without wearing out your back and shoulders. Take a moment to fine-tune the fit before you start the engine.
Step 5: Start the Engine
Starting depends on whether you own a gas or battery model. For gas units, set the choke, prime the bulb a few times, then pull the starter cord firmly. Once it sputters to life, ease the choke off and let it warm up for a minute. Battery-powered machines simply need the safety switch engaged and the trigger pressed. Always start the tool on flat ground with the blade clear of obstacles. Keep a firm grip so it doesn’t jump when the engine catches.
Step 6: Grip and Position Correctly
Hold both handles firmly with a relaxed but steady grip. Keep the machine in front of you at a comfortable working height. Stand with your feet shoulder-width apart for solid balance and control. Let the harness support the weight while you guide the direction. Keep the blade low and close to the ground for clean, even cutting. A stable stance gives you the power to steer through tough patches without losing control.
Step 7: Cut with a Sweeping Motion
Swing the head from right to left in a smooth, controlled arc. This sweep uses the blade’s natural cutting direction for the cleanest results. Work in small sections rather than swinging wildly across the whole area. Move slowly and let the blade do the work instead of forcing it through growth. Cutting right to left also sends debris away from your feet. For thick brush, make several light passes rather than one deep, aggressive cut.
Step 8: Watch for Hazards
Keep your eyes on the ground ahead as you work. Hidden rocks, wire, fence posts, and buried roots can damage the blade or cause dangerous kickback. Clear obvious debris before you start, and slow down near unfamiliar terrain. Keep bystanders and pets at least 50 feet away, since flying objects travel far. If the blade catches on something solid, release the trigger right away. Staying alert protects both you and your machine from nasty surprises.
Step 9: Take Breaks and Refuel Safely
This work is more tiring than it looks, so pace yourself. Stop the engine and rest every 20 to 30 minutes to stay sharp. Tired hands lose grip strength and make costly mistakes. When refueling a gas model, shut off the engine and let it cool first. Wipe up any spills and move away from the fill spot before restarting. A quick water break keeps you focused and your cuts precise.
Step 10: Shut Down and Clean Up
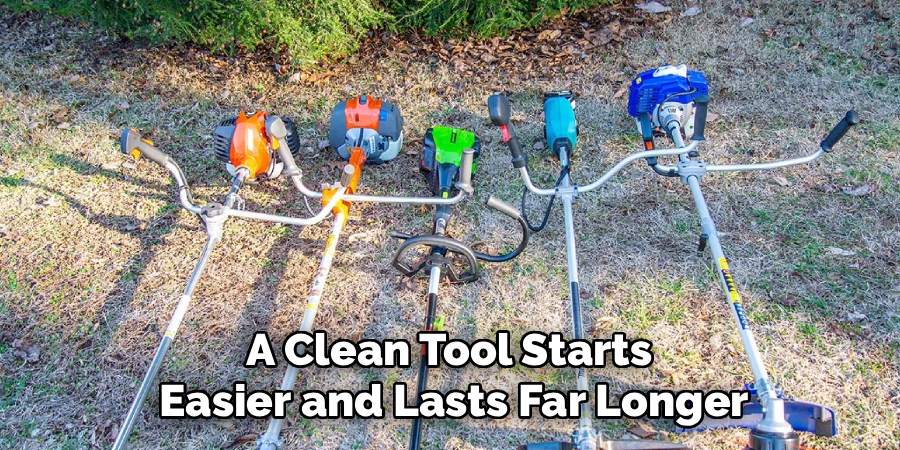
When you finish, release the trigger and let the blade stop fully before setting the tool down. Turn off the engine or disengage the battery switch completely. Clear grass and sap buildup from the blade and guard with a stiff brush. Check the cutting head for dull edges or damage so it’s ready next time. Store the machine in a dry spot, away from kids and pets. A clean tool starts easier and lasts far longer.
Tips for Best Results
Want to work like a pro? These insider tips go beyond the basic steps and save you real frustration.
- Cut in the morning when growth is dry. Wet grass clumps up, clogs the head, and dulls your blade faster. Dry conditions give you cleaner cuts and less mess to clear afterward.
- Keep your blade sharp. A dull blade tears through growth instead of slicing it, straining the engine and leaving ragged edges. Sharpen or replace blades regularly for smooth, efficient cutting.
- Match your throttle to the task. Run at full throttle for thick brush and ease off for light grass. This saves fuel, reduces noise, and extends the life of your machine.
- Work in overlapping rows. Just like mowing, slight overlaps catch stray stalks and give you an even, finished look. This method beats random swinging every time.
- Let the tip do the cutting. The outer edge of the blade moves fastest and cuts most efficiently. Feeding growth into the tip beats jamming the whole blade into a thick patch.
FAQ Section
What Is a Brushcutter Used For?
It’s a heavy-duty tool built for clearing dense vegetation that a regular trimmer can’t handle. You can slice through tall grass, thick weeds, woody brush, and even small saplings. Landscapers and homeowners rely on it to tame overgrown areas and maintain large properties. Think of it as the muscle you call in when your string trimmer gives up.
Is It Safe to Use a Brushcutter Alone?
Yes, working solo is fine as long as you follow safety practices. Always wear your protective gear, keep bystanders far away, and stay alert to hidden hazards. Tell someone nearby that you’re working, especially on remote or hilly land. Take regular breaks so fatigue never leads to a careless slip.
Can I Cut Small Trees With One?
You can tackle small saplings and thin woody stems with the right blade. A metal saw-tooth blade handles stems up to about an inch or two thick. For anything larger, reach for a proper pruning saw or chainsaw instead. Forcing the tool through oversized trunks strains the engine and risks dangerous kickback.
How Do I Avoid Blade Kickback?
Kickback happens when the blade hits something solid it can’t cut. Keep your grip firm and both hands on the handles at all times. Avoid cutting with the upper right portion of the blade, where kickback is strongest. Cut with the recommended section and slow down near rocks, posts, and thick trunks.
What’s the Difference Between a Trimmer and This Tool?
A string trimmer uses nylon line to cut soft grass and light weeds. This machine runs a sturdier shaft and accepts metal blades for tougher jobs. That extra power lets it slice through brush, saplings, and dense growth with ease. If your trimmer struggles, this is the upgrade you need.
How Often Should I Replace the Blade?
It depends on how often you use it and what you cut. Inspect the blade before each session for dull edges, cracks, or bent teeth. Sharpen metal blades when they start tearing rather than slicing cleanly. Replace any blade that shows cracks or serious damage right away for safe cutting.
Conclusion
Clearing that overgrown corner no longer has to feel impossible. With the right gear, a solid stance, and a smooth sweeping motion, you’ll handle even the thickest brush with confidence. Just remember to gear up, inspect your machine, and take breaks to stay sharp. These simple habits keep you safe and your cuts clean.
If you haven’t added a reliable model to your shed yet, check out our picks in the recommended products section above. Ready to keep sharpening your skills? Browse our other DIY guides for more hands-on tips and project walkthroughs.
