
You’ve spent hours gluing up a beautiful tabletop, only to run your hand across it and feel bumps, ridges, and uneven spots everywhere. Hand sanding takes forever, and a random orbital sander just can’t level a big surface evenly. That’s exactly where learning how to use a drum sander changes everything. This powerful tool flattens wide boards, smooths glue-ups, and brings your projects to a professional finish in a fraction of the time.
In this guide, you’ll learnHow to Use a Drum Sander, the gear you need before you start, and a clear step-by-step process for getting flat, flawless results. We’ll also cover insider tips and answer the questions most beginners have. By the end, you’ll feel confident feeding wood through with clean, even passes every single time.
What Is a Drum Sander?
A drum sander is a stationary woodworking machine that uses a spinning, cylindrical abrasive drum wrapped in grit sandpaper to smooth and flatten wood. As you feed a board across the flat bed, a conveyance belt pulls it under the rotating drum for an even sanding pass. Unlike a planer, which shaves off shavings with blades, this tool gently removes thin layers for a smooth wood surface. It’s especially handy for wide panels, thin stock, and delicate glue-ups that a planer might tear apart.
What You’ll Need
Before you fire anything up, gather your supplies. Having everything ready keeps the job smooth and safe.
- A drum sander (open-drum sander or closed-frame model)
- Rolls of grit sandpaper in a few grades (start around 80, work up to 180 or 220)
- The wood or panel you plan to sand
- A push block or feed board for smaller pieces
- Safety glasses to protect your eyes from dust
- A dust mask or respirator for fine particles
- Hearing protection since these machines run loud
- A shop vacuum or dust collector to keep the air clear
- A tape measure or calipers to check thickness
- A soft brush or rubber cleaning stick to clear the abrasive drum
A dust collector isn’t optional here. These machines produce a huge amount of fine dust, and clean airflow keeps your sandpaper working longer.
Step-by-Step Guide on How to Use a Drum Sander
Step 1: Set Up in a Well-Ventilated Space
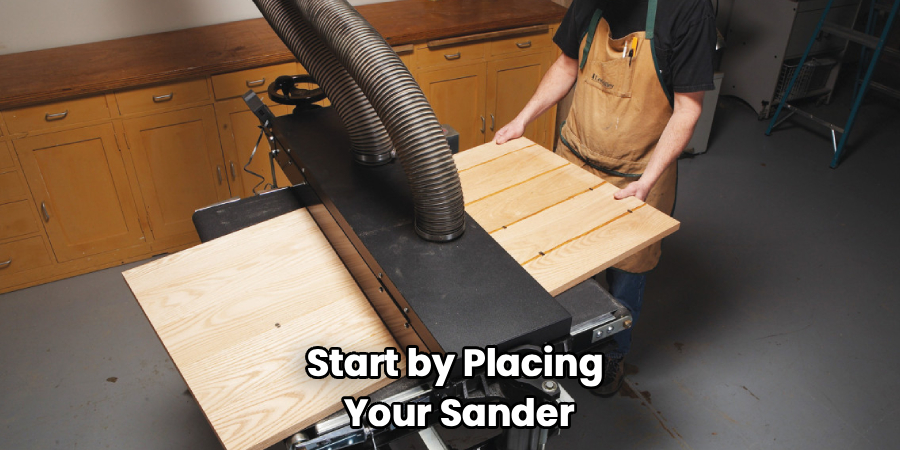
Start by placing your sander on a stable, level surface with plenty of room on both sides. You need clear space at the infeed and outfeed ends so long boards can pass through without hitting a wall. Connect your dust collector or shop vac to the port before doing anything else. Good ventilation matters because fine wood dust builds up fast and can be a health and fire hazard.
Give yourself elbow room to move comfortably. A cramped setup leads to awkward feeding and uneven results. Take a minute here — it pays off later.
Step 2: Choose and Install the Right Grit Sandpaper
Pick your starting grit based on how rough your wood is. For leveling glue-ups or removing mill marks, an 80-grit is a solid choice. Wrap the abrasive strip around the drum, following your machine’s spiral pattern, and lock both ends into the clips or slots. Make sure it sits tight with no gaps or overlaps.
Loose sandpaper is the number one rookie mistake. It can tear, bunch up, or fly off mid-pass. Double-check that every wrap lies flat and snug before you power on.
Step 3: Set Your Starting Depth
Turn off the machine and lower the drum until it just kisses the surface of your board. On a drum sander, you only remove a tiny bit of material per pass, so resist the urge to crank it down. A good rule is to lower by no more than a quarter turn of the height adjustment at a time. Too aggressive a cut bogs down the motor and burns the wood.
Think shallow and patient. Light passes give you a smoother wood surface and protect both your sandpaper and your motor. You can always take another pass.
Step 4: Set the Feed Rate
Many models let you adjust how fast the conveyance belt moves. Start with a slower feed rate for your first pass, especially with coarse grit or hard wood. A slower speed gives the abrasive drum more time to work, reducing lines and swirl marks. Faster feed rates work fine later for lighter finishing passes.
If you hear the motor straining, slow down or raise the drum slightly. Matching your feed rate to the wood keeps everything running cool and clean. Listen to your machine — it tells you a lot.
Step 5: Feed the Wood With the Grain
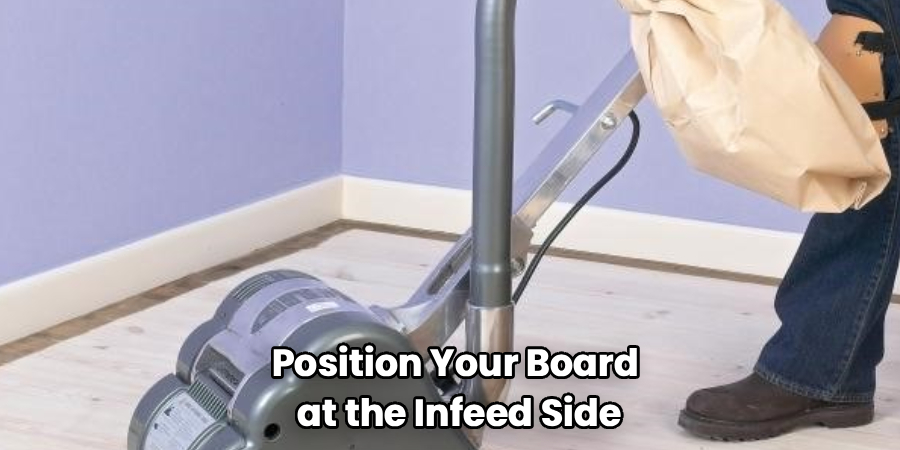
Position your board at the infeed side and align it with the grain direction running through the machine. Gently push it forward until the conveyance belt grabs it and pulls it under the drum. Always sand with the grain, never across it, to avoid ugly scratches that are tough to remove. Keep your hands well away from the drum area as the board feeds through.
Walk around to the outfeed side to support long boards as they exit. Let the machine do the pulling — don’t force it. Steady and smooth wins here.
Step 6: Make Multiple Light Passes
After the first pass, check the surface and feel for smoothness. Lower the drum a hair and run the board through again. Repeat this several times, taking off just a little each pass, until the surface is flat and even. Rushing with deep cuts causes burning, snipe, and motor overload.
For wide panels, rotate the board end-for-end between passes to even out any slight taper. Patience is your best friend with this tool. Thin, repeated passes beat one heavy cut every time.
Step 7: Step Up Through Finer Grits
Once your surface is flat with coarse grit, swap in a finer sandpaper. Move up gradually — from 80 to 120, then 150, then 180 or higher. Skipping grits leaves scratches that the next grit can’t fully erase. Each finer pass refines the wood surface and gets you closer to that glassy, finish-ready feel.
Vacuum or brush the board between grit changes. Leftover grit from a coarse pass can scratch your work during the finer stage. A quick cleanup keeps every pass clean.
Step 8: Inspect, Clean, and Power Down
When you’re happy with the finish, run your hand over the whole surface and check under good light for missed spots. Measure the thickness in a few places to confirm it’s even. Once done, power off the machine and let the drum stop fully before cleaning. Use a rubber cleaning stick to clear built-up pitch and dust from the sandpaper.
Empty your dust collector regularly to keep suction strong. Clean sandpaper cuts better and lasts far longer. A little maintenance now saves money on abrasives down the road.
Tips for Best Results
- Clean your sandpaper often with a rubber stick. Loaded, gunked-up abrasive burns wood and works poorly. A quick swipe restores its bite and stretches your sandpaper budget significantly.
- Watch for snipe at the ends. Support long boards on both sides so they enter and exit level. This prevents that annoying dip the drum can leave at the beginning and end of a pass.
- Let the machine cool on big jobs. Long sanding sessions heat up both motor and drum. Short breaks prevent overheating and reduce the risk of scorching your wood surface.
- Never sand pieces shorter than the drum allows. Small offcuts can jam or kick back. Check your manual for the minimum length, and use a carrier board for tiny pieces.
- Keep a sanding log for repeat projects. Jot down the grit sequence and feed rate that worked. Next time you’ll dial in perfect results without the guesswork.
Frequently Asked Questions
What Is the Difference Between a Drum Sander and a Thickness Planer?
A thickness planer uses sharp blades to shave off thicker layers of wood quickly, while a drum sander uses grit sandpaper to remove very thin amounts for a smoother finish. Planers are faster for heavy stock removal, but they can tear out figured or delicate grain. A drum sander, sometimes called a thickness sander, gives you a cleaner, finish-ready surface. Many woodworkers use both — the planer first, then the sander for refinement.
Can I Use a Drum Sander to Flatten a Glued-Up Panel?
Yes, and it’s one of the best tools for the job. Feed the panel through with light passes, sanding with the grain direction to level uneven joints and remove glue squeeze-out. Just make sure any dried glue is scraped off first, since hardened glue can gum up your sandpaper. Take your time with shallow passes for a perfectly flat result.
How Do I Prevent Burn Marks on My Wood?
Burn marks usually come from taking too deep a cut, feeding too slowly, or using clogged sandpaper. Lower the drum only a little between passes and keep your feed rate steady. Clean your abrasive drum often with a rubber stick to keep it cutting cool. If you spot scorching, raise the drum slightly and increase the feed speed.
What Grit Sandpaper Should I Start With?
It depends on how rough your wood is. For leveling glue-ups or removing mill marks, start around 80 grit, then step up through 120, 150, and 180. If your surface is already fairly smooth, you can begin at 120. Always move up gradually and avoid skipping grades, or you’ll leave behind scratches.
Is It Safe to Sand Thin Pieces of Wood?
You can, but check your machine’s minimum thickness and length first. Very thin or short pieces can catch, jam, or kick back through an open-drum sander. For small stock, place it on a carrier board so the conveyance belt has something solid to grip. Always keep your hands clear of the drum and wear your safety gear.
Conclusion
Getting a flat, silky-smooth surface really comes down to light passes, the right grit progression, and a little patience. Once you understand how to use a drum sander properly, your glue-ups, panels, and projects will reach a finish you’ll be proud to show off. It’s a skill that transforms rough lumber into furniture-grade wood.
If you haven’t added one to your shop yet, check out our recommended picks above. Ready to keep building your skills? Explore our other guides on thickness planers, dust collection setups, and beginner woodworking projects.
