
You’ve got a bundle of gorgeous blooms, a beautiful container, and a big event on the horizon. But the moment you tuck those stems in, they flop over, slide around, and refuse to stay put. Sound familiar? This is exactly where flower foam becomes your best friend.
This spongy green block holds your stems right where you want them, keeps fresh flowers hydrated, and makes even a first attempt look professional. In this guide, you’ll learn what floral foam is, what supplies you’ll need, and how to use flower foam step by step. You’ll also pick up expert tips and answers to the questions beginners ask most. By the end, you’ll be arranging flowers with real confidence.
What Is Flower Foam?
Floral foam is a lightweight, spongy material that anchors flower stems in place while feeding them water. Florists rely on it to build everything from wedding centerpieces to sympathy arrangements. It comes in two main types: wet foam, which soaks up water to keep fresh flowers alive, and dry foam, which holds silk or dried flowers without moisture. Sometimes called oasis foam after a popular brand, it’s the secret behind arrangements that look full, balanced, and steady.
What You’ll Need
Before you begin, gather your supplies. Having everything within reach makes the whole process smoother and far less stressful.
- A block or brick of floral foam (wet foam for fresh flowers, dry foam for artificial)
- A container, vase, or design dish
- A sharp knife or serrated blade for cutting the foam
- A large bowl, sink, or bucket for soaking foam
- Sharp floral snips or scissors
- Your chosen fresh flowers and greenery
- Floral tape or waterproof tape (optional, for securing the foam)
- A pitcher of clean water
- Paper towels or a cloth for cleanup
Step-by-Step Guide on How to Use Flower Foam
Work through these steps in order. Don’t rush the soaking stage—it’s the part beginners get wrong most often, and it makes all the difference.
Step 1: Choose the Right Foam for Your Project
Start by matching the foam to your flowers. Wet foam is designed for fresh flowers because it drinks up water and keeps stems hydrated for days. Dry foam is denser and meant for silk or dried arrangements, so never soak it. Grabbing the wrong type is a classic first-timer mistake that wastes both time and blooms. Check the packaging if you’re unsure, since the two look similar but behave very differently. Once you’ve got the right block, you’re ready to size it up.
Step 2: Measure and Cut the Foam to Fit
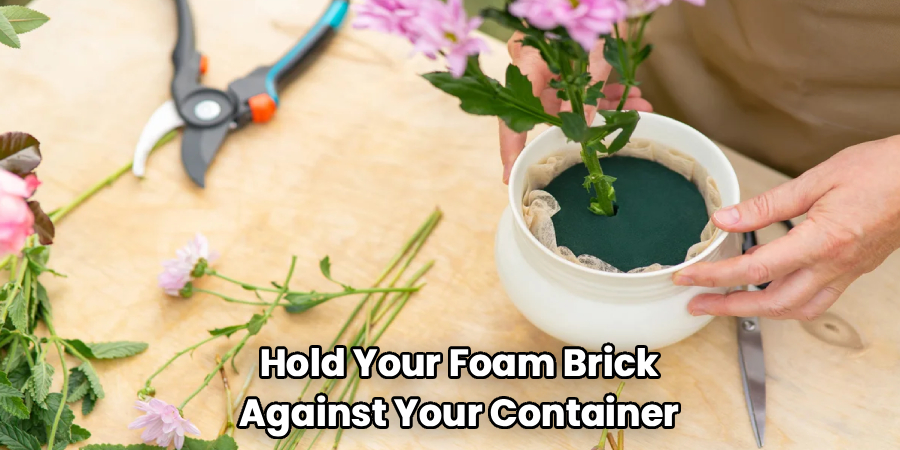
Hold your foam brick against your container to gauge the size. Using a sharp knife, cut it so it sits snugly inside with a little rising above the rim. That extra height lets you angle stems outward for a fuller floral arrangement. Trim the corners if your vase is round, so the foam nestles in without gaps. Cut a bit large rather than too small—you can always shave more off. A loose, wobbly block will let your flower stems shift, so aim for a firm fit.
Step 3: Soak the Foam the Right Way
This step is where the magic happens, so slow down. Fill a bowl or sink deeper than your foam block, then set the foam gently on top of the water. Let it sink on its own—do not push it down. Forcing it under traps dry pockets inside that leave stems thirsty. Depending on the size, soaking foam usually takes 30 seconds to a couple of minutes. When the block darkens and sits level with the surface, it’s fully saturated and ready to use.
Step 4: Secure the Foam in Your Container
Lift the soaked foam out carefully and place it into your vase or dish. It should fit tightly enough to stay put on its own. For taller or top-heavy designs, run waterproof floral tape across the top and down the sides to lock it in place. This keeps everything steady when you’re transporting a centerpiece to an event. Wipe up any water that spills over the edges. A stable base now prevents a toppled arrangement later.
Step 5: Plan Your Shape Before Inserting Stems
Take a moment to picture the final look before you start poking stems in. Decide whether you want a low, spreading centerpiece or a tall, dramatic display. Place your greenery first to build the outline and hide the foam. This framework guides where your flowers go and keeps the design balanced. Beginners often dive straight into flowers and end up with a lopsided result. A few seconds of planning saves you from re-doing the whole thing.
Step 6: Cut and Insert Your Flower Stems
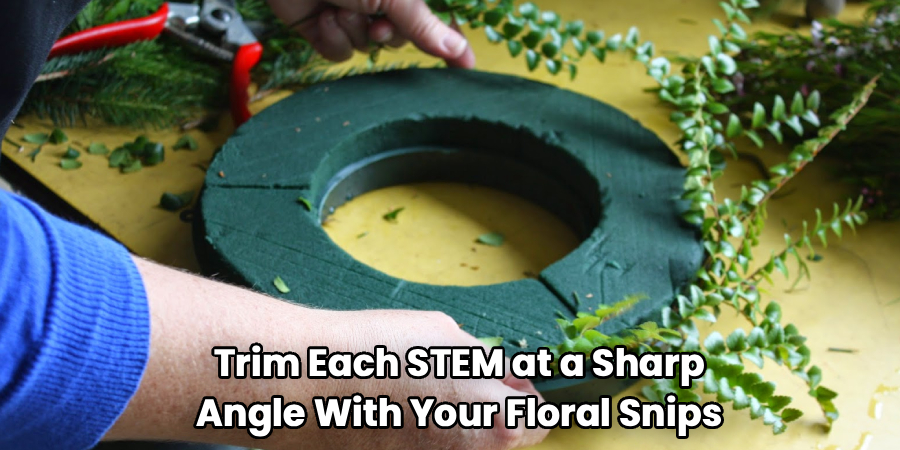
Trim each stem at a sharp angle with your floral snips, cutting off about an inch. The angled cut helps the stem pierce the foam and draw up water. Insert stems firmly, pushing them at least an inch or two deep so they hold. Work from the center outward, filling gaps as you go. Avoid pulling a stem back out and reinserting it in the same hole—the enlarged hole won’t grip, and the stem will droop. Fresh cuts and steady placement keep every bloom secure.
Step 7: Fill Gaps and Build Fullness
Once your main flowers are in, step back and look for empty spots. Tuck in smaller blooms, filler flowers, and extra greenery to create a lush, finished look. Turn the arrangement as you work so it looks balanced from every angle. Vary the heights slightly for a natural, garden-picked feel rather than a stiff, flat one. This is the fun part where your creation really comes alive. Keep filling until no foam peeks through the flowers.
Step 8: Water and Maintain Your Arrangement
Even soaked foam dries out, so keep it hydrated. Gently pour clean water over the top every day or two until it can’t absorb any more. This simple habit extends the life of your fresh flowers dramatically. Keep the finished piece away from direct sun and heat, which speed up wilting. Remove any spent blooms as they fade so they don’t drag down the rest. A little daily care keeps your arrangement looking fresh far longer.
Step 9: Clean Up and Store Leftovers
When you’re done, wipe down your workspace and dispose of scraps properly. If you have leftover dry foam, store it in a sealed bag so it stays clean and ready. Used wet foam can’t be effectively re-soaked once it dries, so plan to toss it after the arrangement is finished. Rinse your tools and dry them to prevent rust on your snips. A tidy finish means you’re set up and ready for your next project.
Tips for Best Results
These insider tricks go beyond the basics and will help your arrangements look polished every single time.
- Let the foam soak itself—never rush it. Pushing the block underwater is the number one mistake beginners make. Patience during soaking foam gives you even hydration and healthier, longer-lasting stems.
- Keep a spray bottle handy. Misting delicate petals and greenery between waterings helps fragile fresh flowers hold their shape, especially in warm rooms or during long events.
- Cut stems underwater when you can. Trimming flower stems while they’re submerged prevents air bubbles from blocking water uptake, so your blooms drink freely once placed in the foam.
- Don’t overcrowd one spot. Inserting too many stems into the same section crumbles the foam and weakens its grip. Spread your placements out to keep the block firm and supportive.
- Choose quality foam over bargain blocks. Cheap foam crumbles easily and holds less water. A reliable brick makes your whole floral arrangement steadier and easier to build.
Frequently Asked Questions
What’s the Difference Between Wet Foam and Dry Foam?
Wet foam is made to absorb and hold water, so it’s perfect for fresh flowers that need hydration. Dry foam is firmer and designed for silk or dried stems, and it should never be soaked. Using the wrong one can ruin your blooms or crumble your design. When in doubt, check the label, since the two look nearly identical on the shelf.
How Long Does It Take to Soak Floral Foam?
Most blocks soak fully in 30 seconds to about two minutes, depending on their size and density. Set the foam on top of the water and let it sink naturally rather than forcing it under. It’s ready when the whole block darkens and sits level with the water surface. Rushing this step leaves dry pockets that leave some stems without water.
Can I Reuse Floral Foam After It Dries Out?
Once wet foam has been used and dries, it won’t re-absorb water the same way, so reusing it for fresh flowers isn’t reliable. The old stem holes also weaken its grip on new stems. For fresh arrangements, always start with a new block. Dry foam for silk flowers, however, can be reused several times if it stays intact.
Is Flower Foam Safe to Handle Without Gloves?
Handling floral foam occasionally is generally fine, but it’s smart to avoid breathing in the dust from cutting dry blocks. Wear gloves if you have sensitive skin or you’re working with it often. Wash your hands after use, and keep the foam away from children and pets. Good ventilation while cutting keeps things comfortable and safe.
How Do I Keep My Arrangement Looking Fresh Longer?
Water the foam every day or two so it never fully dries out. Keep your centerpiece out of direct sunlight and away from heat vents, which cause faster wilting. Trim and remove any fading blooms so they don’t affect the healthy ones. A quick daily misting also helps delicate petals stay perky in a warm room.
Do I Need Foam, or Can I Just Use a Vase With Water?
A simple vase works well for loose, casual bouquets where stems can lean naturally. Foam becomes essential when you want stems locked at specific angles, like in a low centerpiece or a shaped design. It gives you control that water alone can’t match. For structured arrangements that need to travel or hold a form, foam is the way to go.
Conclusion
Building a beautiful arrangement isn’t nearly as tricky as it looks once you understand the basics. Remember the essentials: pick the right foam, let it soak on its own, cut stems at an angle, and water daily to keep your blooms fresh. With a little practice, using flower foam will feel second nature, and your arrangements will look like they came from a professional florist. If you haven’t stocked up yet, check out our recommended picks above to find the right supplies. Ready for your next creative project? Explore our other guides for more tips to grow your skills.
