
You’ve got a length of steel cable, a fitting, and a project that needs a rock-solid connection. Maybe it’s a deck railing, a wire rope for the garden, or a repair on a piece of equipment. You twist and knot and hope it holds, but deep down you know a knot won’t cut it. That’s where a swaging tool comes in. This handy device crimps a metal sleeve onto cable so tightly that the joint becomes nearly as strong as the cable itself.
In this guide, you’ll learn exactly what this tool does, what supplies to gather, and How to Use a Swaging Tool , secure crimps every time. We’ll walk through the process step by step, share a few insider tips, and answer the questions people ask most. By the end, you’ll feel confident tackling your next cable project.
What Is a Swaging Tool?
A swaging tool is a hand-operated or hydraulic device that compresses a metal sleeve—often called a ferrule or stop sleeve—onto wire rope or cable. When you squeeze the handles, the tool deforms the sleeve so it grips the cable permanently, forming a loop or a fixed end. People use these tools for railings, rigging, fencing, trailer safety cables, and even jewelry. Think of it as a super-strong crimper built for metal-on-metal connections.
What You’ll Need
Grab these items before you start. Having everything within reach keeps the job smooth and safe.
- A swaging tool sized for your cable diameter
- Wire rope or cable (galvanized or stainless steel)
- Aluminum or copper sleeves (ferrules) that match your cable size
- A cable cutter or heavy-duty snips
- A tape measure or ruler
- A permanent marker for marking cuts
- Safety glasses and work gloves
- A vise or clamp to hold your work steady (optional but helpful)
- A go/no-go gauge to check your finished crimp
Step-by-Step Guide on How to Use a Swaging Tool
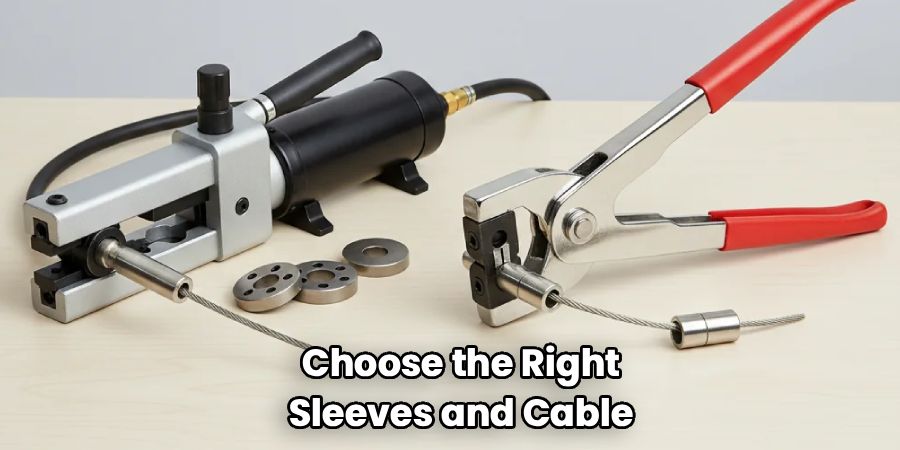
Step 1: Choose the Right Sleeves and Cable
Start by matching your sleeves to your cable diameter. This step matters more than any other, because a mismatched sleeve won’t grip properly and could fail under load. Check the packaging or the tool’s chart to confirm the sizes line up.
If you’re using stainless steel cable, pair it with copper or stainless sleeves rather than aluminum, since mixing certain metals invites corrosion. When in doubt, size up your reference materials and double-check. A few seconds of matching now saves you from a weak joint later.
Step 2: Measure and Mark Your Cable
Decide how long your finished piece needs to be, then add extra length for the loop and the tail. Use your tape measure and mark the cut point clearly with a permanent marker. Remember to account for the sleeve and any thimble you plan to use.
It’s smart to measure twice, because you can always trim excess but you can’t add cable back. Marking your loop size ahead of time keeps every connection consistent. Precise measurements are the backbone of a clean job.
Step 3: Cut the Cable Cleanly
Use a proper cable cutter for a clean, square cut. Avoid using regular pliers or dull snips, since they crush and fray the strands, making them hard to feed through the sleeve. If the cable does fray, a quick wrap of tape near the cut helps hold the strands together.
Position the cutter right on your mark and squeeze firmly in one motion. A tidy end slides through the ferrule with far less fuss. Clean cuts also produce stronger, better-looking finished loops.
Step 4: Thread the Cable Through the Sleeve
Slide the sleeve onto the cable first, then loop the cable back and pass the tail through the sleeve a second time. If you’re using a thimble to protect the loop, seat it inside the loop before you tighten everything up.
Adjust the loop until it’s the exact size you marked earlier. Keep the tail sticking out slightly past the sleeve so the crimp has full contact. Take your time here, because a well-formed loop makes the crimping step easy. A little patience now pays off with a professional result.
Step 5: Position the Sleeve in the Swaging Tool
Open the jaws of your swaging tool and fit the sleeve into the correctly sized cavity. Most tools have several slots for different sleeve sizes, so pick the one that matches. Center the sleeve so the jaws press evenly across its body.
Hold the cable steady so the loop and thimble stay in place while you work. If your tool feels wobbly, clamp it in a vise for better control. Proper positioning ensures the pressure lands exactly where you need it.
Step 6: Squeeze and Crimp the Sleeve
Now for the satisfying part. Grip the handles firmly and squeeze with steady, even pressure until the jaws bottom out completely. You’ll feel the sleeve deform and lock onto the cable. Don’t stop halfway, because a partial crimp leaves a weak connection that can slip. For longer sleeves, you may need two or three crimps side by side to cover the full length. Work from one end to the other for even coverage. A full, firm crimp is what gives your joint its strength.
Step 7: Inspect and Test Your Crimp
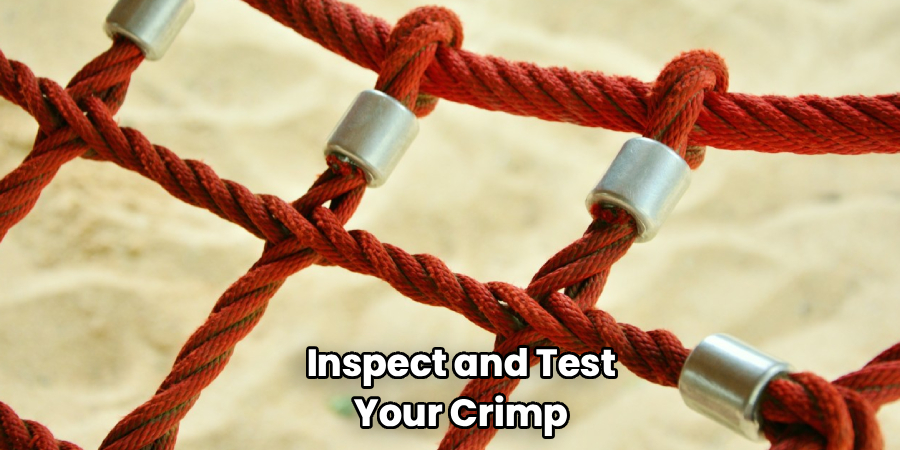
Once you release the handles, take a close look at your work. The sleeve should be uniformly compressed with no gaps or uneven spots. Use a go/no-go gauge to confirm the crimp meets the right dimensions.
Give the loop a firm tug to test the hold, and check that the cable doesn’t slide within the sleeve. If anything looks off, cut it away and redo it rather than risk a failure. Testing every connection builds confidence in your finished project.
Step 8: Trim and Finish the Ends
Trim any excess tail sticking out past the sleeve, leaving just a small stub for safety. Smooth sharp edges with a file so no one gets scratched by stray wire strands. If you’re working outdoors, a dab of clear sealant over exposed ends helps fight rust.
Coil and store any leftover cable neatly for your next project. A clean finish makes your work look polished and professional. Small details like these separate a rushed job from a quality one.
Step 9: Clean and Store Your Swaging Tool
Wipe down the jaws to remove metal shavings and grime after each session. A light coat of oil on the moving parts keeps everything working smoothly and prevents rust.
Check the pivot points and handles for wear, and tighten any loose bolts. Store the tool in a dry spot, ideally in its case or a toolbox. Well-kept gear lasts for years and performs reliably every time. Treat your equipment right and it’ll return the favor.
Tips for Best Results
Ready to level up your crimping game? These habits go beyond the basics and help you produce stronger, cleaner connections.
- Do a practice crimp first. Before you commit to your final piece, sacrifice a short scrap of cable and a spare sleeve. This lets you confirm your tool settings and get a feel for the pressure needed.
- Match your metals. Pairing stainless cable with stainless or copper sleeves prevents galvanic corrosion. Mixing incompatible metals leads to premature failure, especially in wet or outdoor settings.
- Use a thimble for load-bearing loops. A thimble protects the inside of your loop from wear and keeps the cable from kinking under tension. It’s a small part that dramatically extends the life of your connection.
- Don’t over-space your crimps. On long sleeves, overlap your crimps slightly rather than leaving gaps. Consistent, overlapping compression spreads the load evenly and boosts holding strength.
- Check the rated capacity. Always confirm your cable, sleeve, and connection can handle the load you’re planning. Overloading a joint is the fastest way to a dangerous failure.
Frequently Asked Questions
What Is a Swaging Tool Used For?
This tool crimps metal sleeves onto wire rope to create permanent loops or fixed ends. People rely on it for deck railings, fencing, rigging, trailer safety cables, and even hobby projects like jewelry. It creates a joint that’s often as strong as the cable itself. Anywhere you need a secure, load-bearing connection, this tool gets the job done.
How Strong Is a Swaged Connection?
A properly made swaged connection can hold nearly the full breaking strength of the cable. That’s far stronger than any knot or twist you could tie by hand. The key is using the right sleeve size, crimping fully, and inspecting your work. When done correctly, these joints are trusted in demanding applications like construction and marine rigging.
Can I Use Pliers Instead of a Proper Crimping Tool?
You really shouldn’t, especially for anything load-bearing. Pliers can’t apply the even, controlled pressure needed to deform a sleeve correctly. The result is a weak, unreliable joint that may slip or fail under tension. For a safe connection, invest in the correct tool designed for the job.
What Size Sleeve Do I Need?
Your sleeve size must match your cable diameter exactly. Most sleeves and tools list compatible sizes right on the packaging or the tool itself. Using a sleeve that’s too big won’t grip, while one that’s too small won’t fit. When you’re unsure, check the manufacturer’s chart before you buy.
Is It Safe to Swage Stainless Steel Cable?
Yes, as long as you use compatible sleeves and the right tool for the material. Stainless cable pairs best with copper or stainless sleeves to avoid corrosion over time. Make sure your tool is rated for the cable’s diameter and hardness. With the correct setup, stainless connections are extremely durable and long-lasting.
Conclusion
Making strong cable connections doesn’t require years of experience—just the right approach and a bit of practice. Once you understand how to measure, cut, and crimp properly, you’ll trust every joint you create.
Remember to match your sleeves, crimp fully, and always inspect your work before putting it under load. If you haven’t picked one up yet, check out our recommended picks above to find the right fit for your projects. Want to keep building your skills? Browse our related guides and tackle your next DIY project with confidence.
